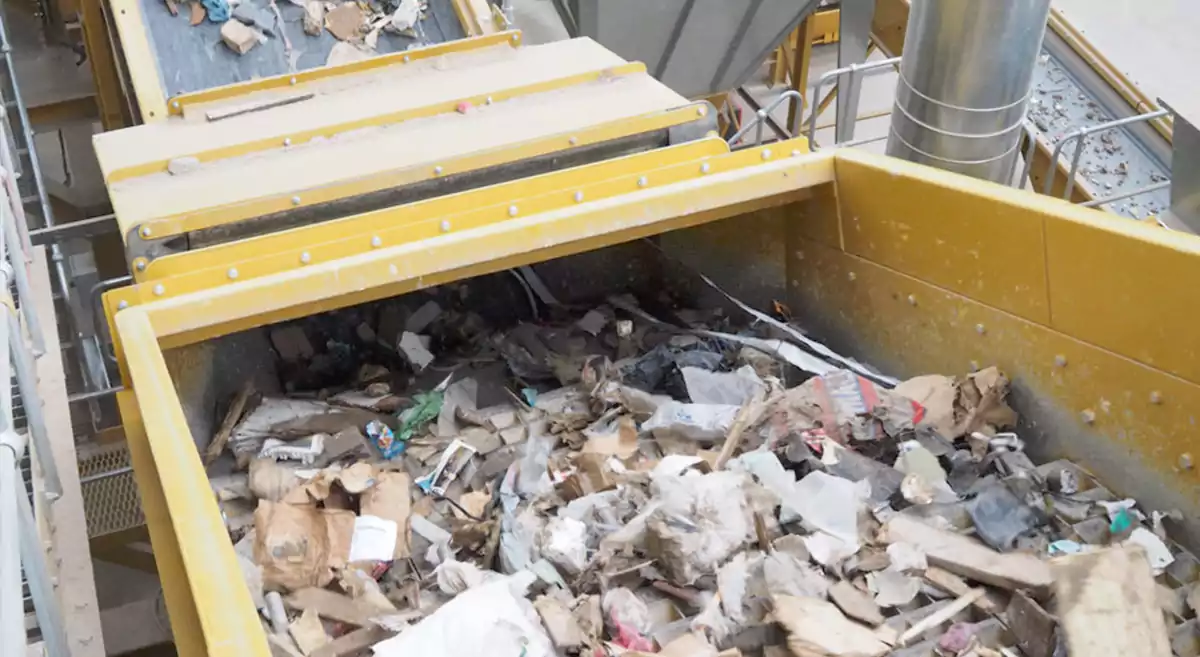
To perform a perforated plate screen installation, you begin by measuring your deck accurately. After that, you select the appropriate plate for your specific job. Once you have your plate, you secure it in place using bolts or clamps. A perforated plate screen is essentially a metal sheet with holes designed to assist in separating materials on vibrating screens or scalping decks. These screens are utilized across various industries, including mining, cement, and recycling:
| Industry | Application |
|---|---|
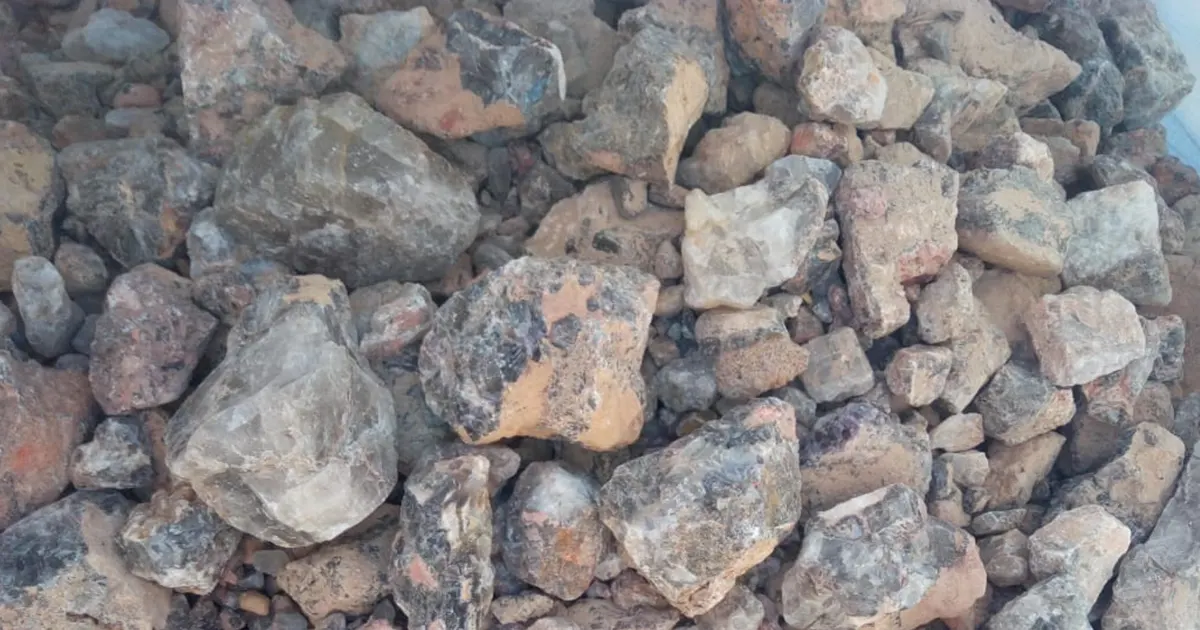
| Mining | Material separation and processing |
| Aggregates | Efficient material handling |
| Industrial Minerals | Scalping decks for pre-screening |
| Cement | Material processing |
| Building Products | Efficient separation |
| Fertilizer | Scalping for material efficiency |
| Salt | Material processing |
| Recycling | Efficient material separation |
Always ensure you measure carefully before starting your perforated plate screen installation. Choose the pattern and material that best suit your job requirements. If you’ve never installed one before, don’t worry; this process is easier than you might think!
Key Takeaways
- Measure your deck carefully before you start. This makes sure the screen fits well. It also stops problems later.
- Get all tools and materials ready first. This helps you work faster. It keeps your area neat and tidy.
- Always wear PPE when you install. Safety glasses, gloves, and hard hats keep you safe. They protect you from harm.
- Check the deck and supports for damage before you begin. A strong base is very important. It helps your screen last longer.
- Pick the right perforated plate material and pattern for your job. This changes how well it works. It also makes it last longer.
- Use a step-by-step guide to install. This helps you avoid mistakes. Good alignment and fastening are very important.
- Check and tighten fasteners often after you finish. This stops them from getting loose. It keeps everything safe.
- Think about customizing your perforated plate screen for your needs. Custom choices can make it work better. They help it be more efficient.
Tools, Materials & Safety
Getting ready for a perforated plate screen installation means you need the right tools and materials. Make sure you have everything before you start. This helps you work faster and keeps your space neat.
Tools Checklist
You need good tools for this job. Here is a list to help you:
- Socket wrench set
- Flathead and Phillips screwdrivers
- Pry bar
- Hammer
- Measuring tape
- Level
- Drill with bits
- Clamps
- Torque wrench
A wire brush can help clean old bolts or supports. If you have someone helping, ask them to check your tools. It is easy to forget something, but every tool is important.
Materials Needed
You need the right materials to install a perforated plate screen. Gather these items:
| Materials | Purpose |
|---|---|
| Perforated plate screen | Main screening surface |
| Fasteners (bolts, nuts) | Securing the plate |
| Clamps | Holding the plate in position |
| Replacement rails | Supporting the plate |
| Wear liners | Protecting deck and supports |
| Sealing strips | Preventing edge gaps |
Look at your materials before you begin. Make sure your fasteners fit the holes in your plate. Test your clamps to see if they grip well. You want everything to fit so your job goes well.
PPE & Lockout/Tagout
Safety is very important. You need personal protective equipment (PPE) when using heavy tools and materials. Wear these items:
- Safety glasses
- Gloves
- Steel-toe boots
- Hearing protection
- Hard hat
Before you use any tools, follow lockout/tagout steps. OSHA says you should do these things for screen installation:
- Write down your lockout/tagout plan. This plan tells how you control and block energy sources.
- Find and label all energy sources. Use clear tags so everyone knows what is locked out.
- Teach all workers about the lockout/tagout steps. Make sure everyone knows what to do.
- Check your steps often. Look at your plan regularly to keep everyone safe.
Tip: Always check that the machine is off before you start. You do not want any accidents when you use tools or materials.
If you follow these safety rules, you will keep yourself and your team safe. Your installation will also go better.
Pre-Installation Checks
Before you start installing your new perforated plate screen, you need to make sure everything fits and works as it should. These checks help you avoid problems later. Let’s walk through each step together.
Measuring for Fit
Grab your measuring tape and double-check the size of your replacement screen and the machine box. You want the plate to fit snugly, not too tight or too loose. If you skip this step, you might end up with a screen that rattles or doesn’t work right.
Here’s what you should look for when measuring:
- Measure the length and width of the deck opening.
- Check the thickness of the old plate and match it with the new one.
- Make sure the hole pattern lines up with your machine’s requirements.
- Confirm that the bolt holes on the plate match the holes on your deck.
Tip: Always check the tolerances for the holes in your perforated plate. If any hole is too big or too small, the plate might not work. Most technical documents say that if a hole size goes outside the allowed tolerance, you should not use that plate.
Taking your time with measurements saves you from headaches later. If you’re unsure, measure twice. It’s better to be safe than sorry!
Inspecting Deck & Supports
Now, look at the deck and all the parts that hold your screen in place. You want everything strong and ready for the new plate. Weak supports or worn rails can cause your screen to fail early.
Here’s a quick table to help you remember when to inspect these parts:
| Inspection Requirement | Frequency |
|---|---|
| Initial inspection by a qualified person | Before the system is relied upon for fall protection |
| Inspection by a qualified person | At the start of each work shift |
Check the support bars for cracks or bends. Look at the tension rails and wear liners. If you see damage, fix it before you install the new screen. Tighten any loose bolts or replace missing ones. A solid foundation means your screen will last longer and work better.
Cleaning Work Area
A clean work area helps you stay safe and makes the job easier. Sweep away dust, dirt, and old material from the deck. Remove any leftover fasteners or broken pieces. If you see oil or grease, wipe it up so you don’t slip.
Note: A tidy workspace also helps you find your tools and parts faster. You’ll spend less time searching and more time installing.
Set out your tools and materials where you can reach them. Good organization keeps your project moving smoothly. When your area is clean, you can focus on getting the installation right.
Selecting Plate & Patterns
Choosing the right plate and patterns for your screen makes a big difference in how your equipment works. You want your screen to last, look good, and handle the job you need it to do. Let’s break down what you should look for.
Choosing Plate Material
You have a few options when picking the material for your perforated plate screen. Each one has its own strengths. If you work in a high-wear environment, you need something tough. Here are some materials you might use:
- Stainless steel stands out for its durability. It resists corrosion and handles tough jobs without wearing out fast.
- Solid steel plates give you a strong base. They last a long time and can take heavy loads.
- Some metals work better for primary screening and scalping. They handle big pieces and lots of weight.
If you want something that looks good and lasts, aluminium perforated panel is a smart choice. It stays strong for over 25 years and keeps its shape and color. You can trust it for industrial screening and it won’t let you down.
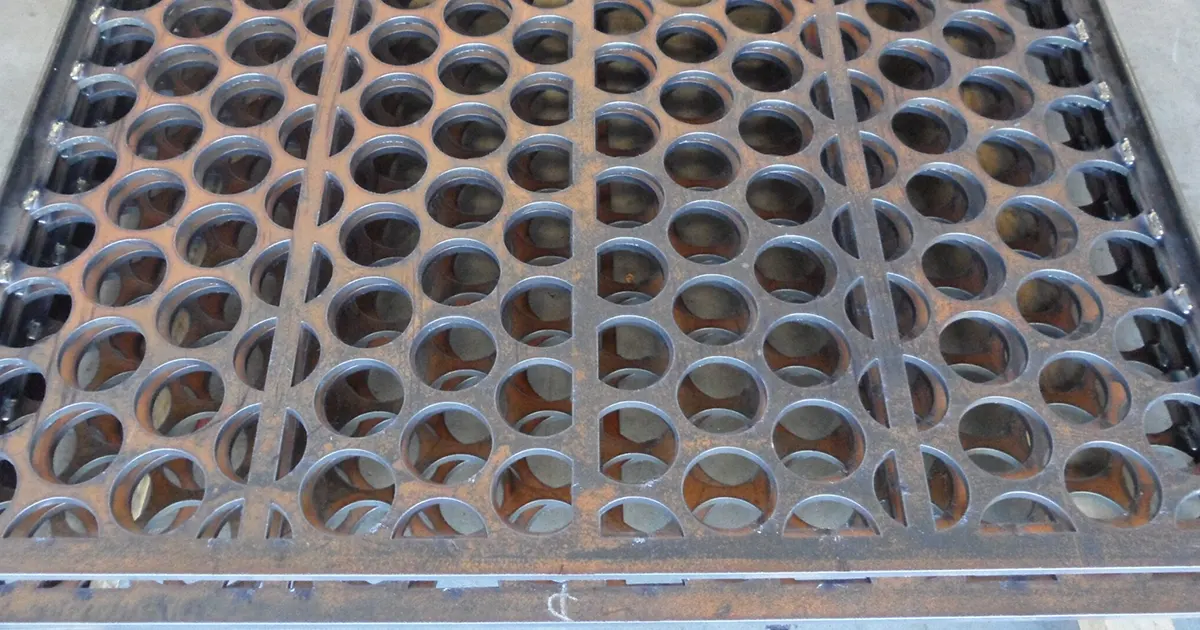
Understanding Patterns
Patterns are the way holes are arranged in your plate. The right patterns help your screen work better. You need to think about what you want your screen to do. Do you want more airflow? Do you need to keep out debris? Patterns change how your screen performs.
Here’s a table to help you see how different patterns affect your screen:
| Performance Factor | Description |
|---|---|
| Airflow and Cooling | Higher open-area percentages in patterns boost air movement and cooling. |
| Noise and Vibration Control | Well-designed patterns lower turbulence and noise. |
| Filtration and Protection | Smaller holes and tight patterns block debris but let air through. |
You should match your patterns to your job. If you need cooling, pick patterns with lots of open space. If you want to keep things quiet, look for patterns that control vibration. For protection, use patterns with small holes.
Patterns also change how your screen looks. Some patterns give a modern style, while others look more classic. You can pick patterns that fit your taste and your needs.
Aluminium Perforated Panel Options
Aluminium perforated panel is popular for many reasons. It’s light, strong, and easy to work with. You can find it in lots of patterns, so you get the look and performance you want. If you need a screen that lasts, aluminium perforated panel is a great pick. It keeps its shape and color for decades.
You can choose from round, square, or custom patterns. Some patterns let more air through, while others block more debris. Aluminium perforated panel works well in places where you want both style and strength. You can use it for screening, decoration, or even noise control.
Tip: Always check the patterns before you buy. Make sure the patterns match your machine and your job. If you’re not sure, ask your supplier for advice.
Patterns matter for both performance and appearance. Take your time and pick the patterns that fit your needs. With the right patterns and material, your screen will work better and last longer.
Removing Old Plates
Safe Removal Steps
You’re ready to take off the old perforated plate screen. This part can get messy, but you can make it easy if you follow the right steps. Start by making sure the machine is off and locked out. You don’t want anything moving while you work.
Here’s a simple way to remove the old plate:
- Use a heat gun or hairdryer to warm up any decals or adhesive on the plate. The heat helps loosen sticky spots.
- Grab a plastic card or scraper. Slide it under the edge of the decal or adhesive. Hold the card at an angle so you don’t tear the material.
- Peel the decal or plate away slowly. Try to keep a 45-degree angle as you pull. This helps you avoid bending or cracking the plate.
- If you see glue or sticky residue, use a glue remover. Let it sit for a minute. Wipe it off with a clean cloth.
- Wash the surface with soap and water. This gets rid of dirt and leftover glue.
Tip: Always wear gloves when you handle old plates. Some edges can be sharp. Safety glasses protect your eyes from dust or flying bits.
Sometimes bolts or clamps hold the plate in place. Use your socket wrench or drill to loosen them. If a bolt feels stuck, tap it gently with a hammer. Don’t force it. You might break the bolt or damage the deck.
Check for hidden fasteners. Some screens have extra clips or rails. Look along the edges and corners. Remove every fastener before you lift the plate. If you miss one, the plate might bend or snap.
Handling Old Panels
Once you’ve removed the old plate, you need to handle it with care. Old panels can be heavy and awkward. You don’t want to drop them or hurt yourself.
Here are some tips for handling old panels:
- Lift with your legs, not your back. Bend your knees and keep your back straight.
- If the panel is large, ask a friend to help. Two people can move it safely.
- Place the old plate on a flat surface. Don’t lean it against a wall. It might fall and cause injury.
- Inspect the panel for sharp edges or rust. If you see damage, wear extra protection.
- Decide if you want to recycle or dispose of the panel. Many metal plates can go to a scrap yard.
| Handling Step | Why It Matters |
|---|---|
| Lift with legs | Prevents back injuries |
| Use two people | Safer for large panels |
| Lay flat | Avoids falling hazards |
| Check for sharpness | Protects hands and arms |
| Recycle if possible | Good for the environment |
Note: Never rush when you move old panels. Take your time and watch your step. A careful approach keeps you safe and protects your workspace.
Now you’ve finished removing the old plate. You’re ready for the next step—inspecting the deck and getting it ready for your new perforated plate screen.
Deck Inspection & Repair
Check for Damage
Before you install your new perforated plate screen, you need to check the deck for any signs of damage. This step helps you avoid problems later. If you skip this, your new screen might not last as long as you want.
Start by looking at the surface. Run your hand over the deck. Do you feel any splinters? Splintering wood can hurt your hands and make the job harder. If you find rough spots, grab some sandpaper and smooth them out.
Next, look for any signs of mold, mildew, or algae. These often grow in shady or damp spots. Mold and algae can make the deck slippery. You do not want to slip while working. If you see any, clean the area with a brush and a mild cleaner.
Check for water stains or standing water. Water that does not drain can cause the deck to rot over time. Look for dark spots or puddles. If you find any, you may need to fix the drainage before you continue.
Take a look at the spaces between the boards. You want to see clear gaps. If dirt or debris fills the spaces, moisture can get trapped. This can lead to rot or mold. Use a small tool to clear out any buildup.
Here’s a quick checklist to help you spot common problems:
- Splintering or rough wood
- Mold, mildew, or algae growth
- Water stains or standing water
- Tight or clogged board spacing
- Signs of insect damage (like small holes or sawdust)
- Cracks around fasteners
- Soft or rotting boards
Tip: If you see any soft spots, press down gently with your foot. If the board feels spongy, it may be rotting and should be replaced.
Repair Supports & Rails
Once you finish checking for damage, focus on the supports and rails. These parts hold your screen in place. If they are weak or broken, your new plate will not stay secure.
Start by tightening any loose bolts or screws. Use your socket wrench for this. If you find missing fasteners, replace them right away.
Look at the support bars. Are they straight? Bent or cracked bars need attention. You can sometimes straighten a slightly bent bar with a hammer. If the damage is bad, you should replace the bar.
Check the tension rails. These rails keep the plate tight against the deck. If you see rust or corrosion, clean it off with a wire brush. If the rail is too damaged, swap it out for a new one.
Here’s a table to help you remember what to check and what to do:
| Part to Inspect | What to Look For | What to Do |
|---|---|---|
| Support Bars | Bends, cracks | Straighten or replace |
| Tension Rails | Rust, corrosion | Clean or replace |
| Bolts/Screws | Loose or missing | Tighten or replace |
| Wear Liners | Excessive wear | Replace if needed |
Note: Always double-check your repairs before moving on. A strong, clean deck gives your new perforated plate screen the best chance to work well and last a long time.
Now your deck is ready for the next step. You can move forward with confidence, knowing your supports and rails are in top shape!
Perforated Plate Screen Installation
Ready to tackle your perforated plate screen installation? This step-by-step guide will walk you through every part of the process. You’ll learn how to align the plate and holes, choose the best fastening methods, and make sure your installation stands up to tough conditions. Let’s get started!
Step-by-Step Guide
You want your perforated plate screen installation to go smoothly. Follow this step-by-step guide and you’ll avoid common mistakes. Here’s how you do it:
- Plan and Measure the Installation Area
Start by measuring the area where you’ll install the plate. Mark the mounting points so you know exactly where everything goes. Double-check your measurements to make sure the plate fits snugly and the holes line up with your deck. - Install the Mounting System
Attach brackets or channels to your deck. These will hold the plate in place. Make sure they’re secure and level. If you use rails, check that they run straight across the deck. - Position the Perforated Plate Screen
Place the plate onto the mounting system. Align the holes with the mounting points. You want the plate to sit flat and not wobble. If you see gaps, adjust the supports until the plate fits tight. - Secure the Plate with Fasteners
Use bolts, clamps, or rails to hold the plate down. Insert fasteners through the holes and tighten them by hand first. Make sure every hole has a fastener so the plate stays secure. - Finish the Edges and Joints
Trim any rough edges. Seal the joints with strips or liners to prevent gaps. This keeps material from leaking and helps your installation last longer. - Final Inspection and Touch-Ups
Check the alignment of the plate and holes. Make sure all fasteners are tight. Look for any loose spots or gaps. If you find any, fix them before you start up the machine.
Tip: Always follow this step-by-step guide for every perforated plate screen installation. You’ll save time and avoid costly mistakes.
Aligning Plate & Holes
Getting the alignment right is key for a successful perforated plate screen installation. If the holes don’t match up, your screen won’t work as it should. Here’s what you need to know:
- Slot-type screens have holes that run in one direction. Debris passes through if it fits the opening.
- Hole-type screens have holes that work in two directions. Debris must fit both ways to pass through. These screens capture more material and work better for pre-screening.
- Hole-type screens can boost capture rates by up to 30% compared to slot-type screens. They’re great for tough jobs but cost more and need careful maintenance.
When you align the plate, make sure the holes match the deck’s mounting points. Use a level to check that the plate sits flat. If you see any misalignment, adjust the plate before you tighten the fasteners.
Note: Proper alignment of holes improves screening performance and helps your installation last longer.
Fastening Methods
You want your perforated plate screen installation to stay secure, even when the machine vibrates. Picking the right fastening method makes a big difference. Let’s look at your options.
Bolts, Clamps, Rails
Steel bolts work best for high-vibration environments. They hold the plate tight and resist loosening. Tests show steel bolts can handle loads up to 45.97 kN, which is much higher than other methods. Clamps and rails also help keep the plate in place, but bolts give you the strongest hold.
Other methods like epoxy, aluminum bolts, or nylon reinforcement don’t perform as well. Steel bolts create a strong connection and prevent the plate from shifting or delaminating.
Here’s a quick list of fastening methods:
- Steel bolts for maximum strength
- Clamps for quick adjustments
- Rails for even pressure across the plate
Tip: Always use steel bolts for heavy-duty perforated plate screen installation. You’ll get better results and fewer problems.
Tightening Sequence
You need to tighten the fasteners in the right order. Start at the center of the plate and work outward. This keeps the pressure even and prevents warping.
Check the spacing and torque for each fastener. Here’s a table to help you:
| Fastener Type | Torque Setting |
|---|---|
| General Fasteners | 8–12 N·m |
| Screws or Rivets | 6–8 N·m |
For bolt spacing, use these guidelines:
- Visible rivet mount: 10–12 mm between holes
- Concealed hook mount: 8–10 mm between holes
- Clip-on system: 6–8 mm between holes
Tighten each fastener to the recommended torque. Don’t overtighten, or you might damage the plate. If you use a torque wrench, set it to the right value for your fastener type.
Note: Always check your OEM specifications for bolt spacing and torque. Following these numbers helps your perforated plate screen installation last longer and work better.
Now you’ve finished the step-by-step guide for perforated plate screen installation. You’ve learned how to align the plate and holes, pick the best fastening methods, and tighten everything to the right specs. Your installation is ready for action!
Final Checks & Start-Up
You’re almost done! Before you power up your machine, you need to check a few important things. These last steps help you avoid leaks, rattles, and early wear. Let’s make sure your perforated plate screen works perfectly from the start.
Clearance & Sealing
You want to keep material from leaking out during operation. Good clearance and sealing help you do that. If you skip this step, you might see dust, debris, or even product loss.
Here’s a table to help you understand what affects seal performance:
| Factor | Description |
|---|---|
| Seal Life Expectancy | How long the seal lasts before you need to replace it. |
| Material Degradation | Some chemicals and pressure changes can wear out seals faster. |
| Temperature and Pressure | Seals work best within certain temperature and pressure ranges. |
| Material Choices | PTFE and elastomers handle different challenges. |
| Surface Finish | Smoother surfaces help seals last longer and reduce wear. |
You can follow these tips to get the best seal:
- Use seals made for your machine’s temperature and pressure.
- If you run at high pressure, pick a seal material that won’t squeeze into the gap.
- For high temperatures, try a harder seal or add a back-up ring.
- Keep the gap between the plate and deck as small as possible.
- Check that the surface is smooth before you install the seal.
Tip: A tight seal keeps your work area clean and your machine running longer.
Edge Gaps
Edge gaps are the spaces between your plate and the deck frame. If these gaps are too big, material can leak out or get stuck. You want to keep these gaps small and even.
Here’s how you can check and fix edge gaps:
- Look along all the edges of your plate. Use a flashlight if you need to see better.
- Slide a thin piece of paper or a feeler gauge into the gap. If it slides in too easily, the gap might be too wide.
- Add sealing strips or adjust the plate to close any large gaps.
- Make sure the plate sits flat and tight against the deck.
Note: Even small gaps can cause big problems over time. Take a few extra minutes to check every edge.
Initial Run & Inspection
Now you’re ready for the first run! This is your chance to catch any issues before they turn into bigger problems. Here’s a simple checklist for your initial inspection:
- Watch the screen as it starts up. Listen for rattling or strange noises.
- Check the plate and fasteners. Make sure nothing moves or loosens.
- Look for leaks around the edges and seals.
- Use a caliper or micrometer to measure the plate thickness at the reject end.
- Inspect the plating or coating each month to spot early wear.
- If you see unusual wear, make a mold with dental compound and send it to your OEM for advice.
- If you need to replace the coating, ask your OEM for the best repair method.
Alert: Always stay nearby during the first run. If you see or hear anything odd, stop the machine and check again.
A careful start-up helps your new perforated plate screen last longer and work better. You’ve got this!
Common Mistakes & Fixes
Even if you follow every step, you might run into a few common mistakes during your perforated plate screen installation. Don’t worry—these problems happen to everyone, and you can fix them with a little know-how. Let’s look at the most frequent issues and how you can solve them.
Misalignment
Misalignment can sneak up on you fast. If your plate or frame isn’t lined up just right, you’ll notice problems right away. Here are some signs you might spot:
- Parts don’t line up as they should.
- The plate feels uneven or wobbly.
- The load-bearing strength drops.
- The whole installation feels weak or unstable.
- You see gaps or air leaks around the edges.
- The machine vibrates more than usual.
- Doors or covers don’t close easily.
You can fix misalignment by loosening the fasteners and gently shifting the plate until everything lines up. Use a level to check your work. If the frame sizes don’t match, you may need to adjust the supports or get a plate that fits better. Always double-check before tightening everything down.
Tip: Take your time with alignment. A few extra minutes here can save you hours of trouble later.
Fastener Issues
Fasteners hold your plate in place, so you want them to work perfectly. Sometimes, you might run into these problems:
- Bolts or screws don’t fit the holes.
- Fasteners feel loose even after tightening.
- You miss a fastener, leaving part of the plate unsecured.
- Over-tightening causes the plate to bend or crack.
If you spot a problem, stop and check each fastener. Make sure you use the right size and type. Tighten them in the correct order, starting from the center and moving outward. If a fastener won’t hold, replace it with a new one. Never force a bolt that doesn’t fit—this can damage the plate or the deck.
Alert: Always use steel bolts for the best grip and long-lasting strength.
Plate Gaps
Plate gaps can cause big headaches. If you leave spaces between the plate and the deck, you’ll see leaks, rattles, and poor screening. Gaps also let material escape, which can lower your machine’s efficiency.
Here’s a quick look at how plate gaps and opening rates affect your screening:
| Property | Effect on Screening Efficiency |
|---|---|
| Opening Rate | High opening rates boost screening and production but can shorten the life of your screen. |
| Increasing Opening Rate | More open space helps with screening but may need stronger support to prevent early wear. |
| Self-Cleaning Plates | These plates reduce clogging and keep your screen working at its best. |
To fix plate gaps, add sealing strips or adjust the plate until it sits tight against the deck. Check every edge with a feeler gauge or a piece of paper. If you find a gap, fix it before you start the machine.
Note: Small gaps can turn into big problems. Always check your work before calling the job done.
By watching out for these common mistakes, you’ll keep your perforated plate screen running smoothly and avoid costly repairs down the road.
Troubleshooting & Maintenance
Loosening & Noise
You might notice your perforated steel screen starts to make noise or feels loose after some time. This can happen when bolts or clamps lose their grip because of constant vibration. If you hear rattling or banging, stop the machine and check every fastener. Tighten any loose bolts with your wrench. If you find a bolt that keeps coming loose, try using a lock washer or thread-locking compound. Sometimes, the deck itself can shift, so look for any movement in the supports. A tight, quiet perforated steel screen means your machine works better and lasts longer.
Tip: Always listen for new sounds during operation. Strange noises often mean something needs your attention.
Wear & Damage
Perforated steel screens work hard every day. Over time, you might see signs of wear or even damage. If you ignore these signs, your screen could fail when you need it most. You can keep your perforated steel in top shape by following a few simple steps:
- Set up inspection schedules to check for clogs, cracks, or worn spots on your screen.
- Use high-pressure water jets to clean the holes and remove stuck material. If your screen design allows, you can also clean by hand.
- Always follow safety protocols when you inspect or clean your perforated steel. Wear gloves and eye protection to avoid injuries.
If you spot a worn area or a crack, replace that section of perforated steel right away. Waiting too long can lead to bigger problems and more expensive repairs. Keep a record of your inspections so you know when it’s time for maintenance.
Pegging & Blinding
Pegging and blinding happen when material gets stuck in the holes of your perforated steel screen. This can slow down your process and lower your screening efficiency. You can fight pegging and blinding with a few smart tricks:
- Increase the speed or stroke of your screen to shake loose stuck pieces.
- Place ball trays under the deck. These bounce and knock fines free from the perforated steel.
- Try heated decks if moisture causes sticky build-up.
- Adjust your feed rate to avoid overloading the screen.
- Use spray bars to wash away sticky fines.
- Switch to self-cleaning screen media that flex and move, clearing out blockages.
- For pegging, choose slot openings or tapered designs in your perforated steel. These shapes help more material pass through and reduce clogging.
Note: Regular cleaning and the right screen design keep your perforated steel working at its best.
If you stay alert and follow these tips, you’ll keep your perforated steel screen running smoothly and avoid most common problems.
Re-Tightening Schedule
You want your perforated plate screen to stay tight and secure. Vibrations and heavy use can loosen bolts and clamps over time. If you ignore this, you might hear rattling, see gaps, or even lose a plate during operation. Setting up a re-tightening schedule helps you avoid these problems and keeps your screen working its best.
Why re-tighten?
Bolts and fasteners can loosen because of constant movement. Even if you tightened everything during installation, you still need to check them. A loose plate can cause noise, leaks, or even damage your machine. Regular checks help you catch small issues before they turn into big repairs.
How often should you check?
You should check your fasteners more often when the screen is new. After that, you can move to a regular schedule. Here’s a simple table to guide you:
| Time After Installation | What To Do |
|---|---|
| After first 2 hours | Check and re-tighten all |
| After 24 hours | Check and re-tighten all |
| Every week (first month) | Inspect and tighten as needed |
| Every month | Inspect and tighten as needed |
| After heavy use | Always check and tighten |
Tip: Always keep a logbook or checklist. Write down the date and what you checked. This helps you remember and spot patterns if something loosens often.
What should you look for?
When you check your screen, look for these signs:
- Loose bolts or nuts
- Gaps between the plate and deck
- Unusual noise or vibration
- Shiny spots around fasteners (this means movement)
If you find a loose fastener, tighten it right away. Use a torque wrench if you have one. Follow the recommended torque settings from your manufacturer. Always start tightening from the center and work outward. This keeps the pressure even and prevents bending.
Quick Re-Tightening Checklist:
- Machine is off and locked out
- All tools ready (wrench, torque wrench, logbook)
- Check every bolt and clamp
- Tighten as needed, using correct sequence
- Record your work in the logbook
Note: If you notice the same bolt loosening again and again, try using a lock washer or thread-locking compound. Sometimes, you may need to replace a worn fastener.
A good re-tightening schedule keeps your perforated plate screen safe and strong. You’ll spend less time on repairs and more time getting the job done right!
Customization & Support
Custom Patterns & Thickness
You might want a perforated plate screen that fits your exact needs. Good news—you can customize almost every part of your screen! You get to pick the hole shape, the thickness, and even the material. This means your screen will work better for your job and last longer.
Here’s a quick look at the options you can choose from:
| Hole Shape | Thickness Choices |
|---|---|
| Square | 1/2″, 3/4″, 1″, 1 1/4″ |
| Round | 1/2″, 3/4″, 1″, 1 1/4″ |
| Hex | 1/2″, 3/4″, 1″, 1 1/4″ |
| Custom Shapes | Designed in AutoCAD |
| Blank Out Areas | Custom for impact zones |
| Skid Bars | 2″ high, custom thickness |
| Patterns | Round, Square, Slotted, Special Shapes |
| Materials | Steel, Stainless Steel, Aluminum, etc. |
You can also pick from many materials. Some people use steel for strength. Others choose aluminum for a lighter screen. Stainless steel works well if you need something that won’t rust. You can even ask for copper, brass, bronze, or plastic if your job needs it.
Here are some things you can customize:
- Alloy type (like 6061 aluminum or 316 stainless steel)
- Thickness and sheet size
- Hole size and pattern
- Finish (anodized, powder coated, or plain)
- Special features like blank-out areas or skid bars
Tip: If you have a special idea, you can ask for a custom design. Many companies use AutoCAD to make your pattern just right.
Requesting a Quote
Ready to get your own custom perforated plate screen? You can make the process easy if you have the right info. Here’s what you need to share when you ask for a quote:
- How many pieces or square feet you need
- The thickness (in gauge or inches)
- The type of metal (like aluminum or stainless steel)
- The width and length, plus any tolerances
- How you want the pattern to sit on the sheet
- The size of the holes (in inches)
- The shape of the holes (round, square, slotted, or something special)
- How the holes are arranged (staggered or straight line)
- The spacing between holes or the percent open area
- If you need solid margins on the edges
- Any finish you want (like powder coating or anodizing)
- Extra details for slotted holes
- Shipping and delivery instructions
If you give all this info, you’ll get a fast and accurate quote. You can even ask for help if you’re not sure about something. Most suppliers want to help you get the perfect screen for your project.
Note: The more details you give, the better your custom screen will fit your needs. Don’t be afraid to ask questions or share your ideas!
With these options and support, you can build a perforated plate screen that does exactly what you want. Customization makes your job easier and your equipment stronger.
Conclusion
You’ve learned the key steps for installing a perforated plate screen. Measure carefully, pick the right pattern, and always follow safety rules. Use this step-by-step guide to make your job easier and get great results. Need a custom screen? We can help! Just send us your machine model and deck size. We’ll give you a fast quote and help you find the perfect fit.
FAQ
How do I know which perforated plate pattern is best for my job?
You should match the pattern to your material and screening goal. For more airflow, pick larger holes. For fine separation, choose smaller holes. If you’re unsure, ask your supplier for advice.
Can I install a perforated plate screen by myself?
Yes, you can. Small screens are easy to handle alone. For large or heavy plates, ask a friend for help. Safety comes first. Always use gloves and follow lockout/tagout steps.
What tools do I need for installation?
You need a socket wrench, screwdrivers, a level, clamps, and a torque wrench. A measuring tape helps you check fit. Keep all tools nearby for a smooth job.
How often should I check the fasteners?
Check after the first two hours of use. Then, check again after 24 hours. Inspect weekly for the first month. After that, monthly checks keep your screen secure.
What should I do if my screen rattles or makes noise?
Stop the machine. Check all bolts and clamps. Tighten any loose parts. If the noise continues, inspect the supports and rails for damage.
Can I customize the size and shape of my perforated plate screen?
Yes! You can pick the size, thickness, hole shape, and pattern. Just share your machine model and deck size with your supplier. They’ll help you design the perfect fit.
How do I prevent material from clogging the holes?
Try self-cleaning patterns or use spray bars. Increase the screen’s vibration if possible. Clean the plate regularly with water jets or brushes to keep holes clear.
Is aluminum a good choice for outdoor screens?
Aluminum works well outdoors. It resists rust and stays strong for years. It’s also lightweight, which makes installation easier.