Technical Advice
Technical Advice for Screening Media
If your screening surface fails earlier than expected (and it’s not normal wear), use this page as a quick field guide: identify the failure zone, verify tension and support conditions, then choose a better configuration for the feed zone and classification zone.
Fast Selection Support
Send us your material, moisture, target cut size, throughput, and screen model. We’ll recommend media type + aperture + segment layout.
Where failures usually start
Feed impact area · Along support ribs · Fold/edge corners · Panel joints
Breakage Troubleshooting (not caused by normal wear)
Pick the failure location first. Each location points to a different root cause and a different fix path.
1. Breaks in the feeding zone
Most commonly linked to impact energy and uneven material distribution.
- Make sure to spread the material over the entire width of the mesh toutilize the entire screening area.
- Minimize the height of the fall of theproducts to be sorted onto the meshby using a fall arrest channel.
- Use the most suitable mesh for theproduct you are classifying; you can use a rubber, polyurethane or perforated sheet mesh in the first position of the screen, which havegreater resistance to abrasion.
2. If it breaks following the machine's support ribs
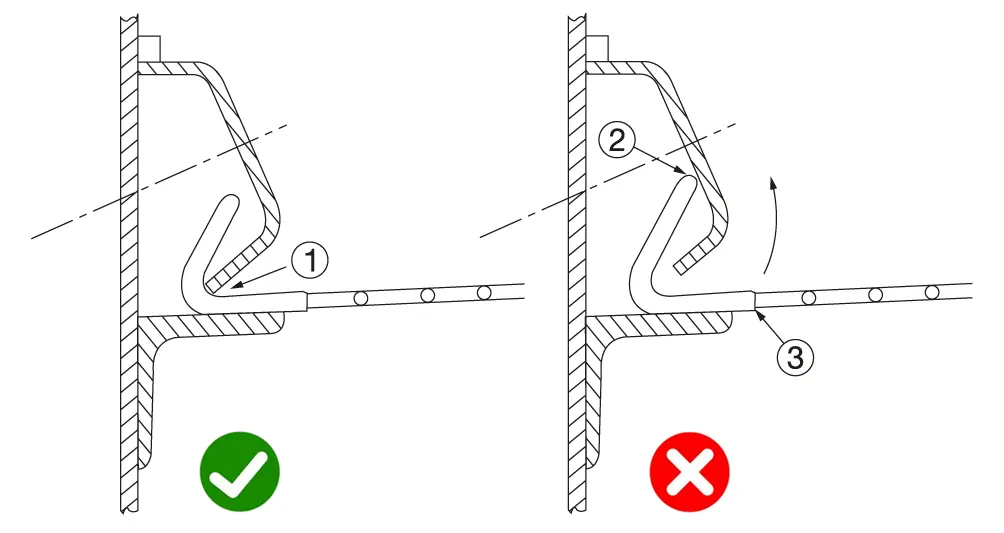
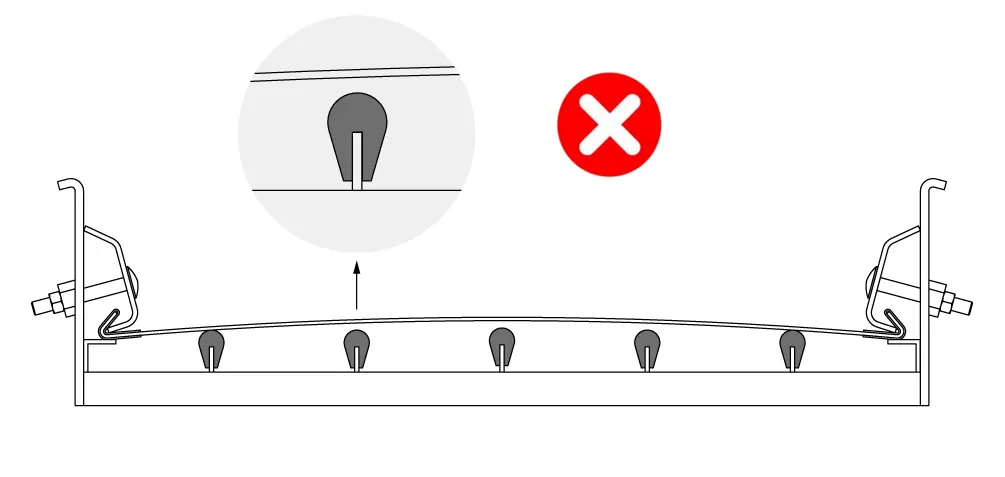
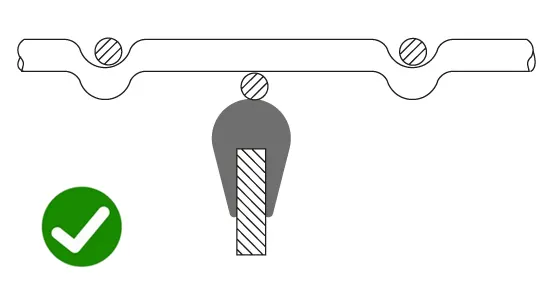
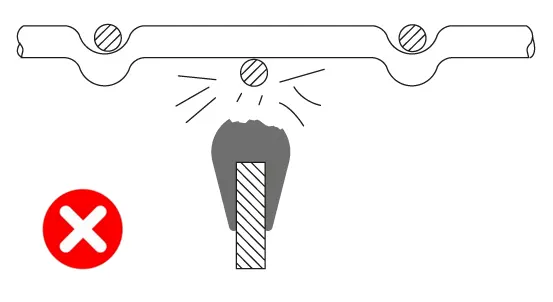
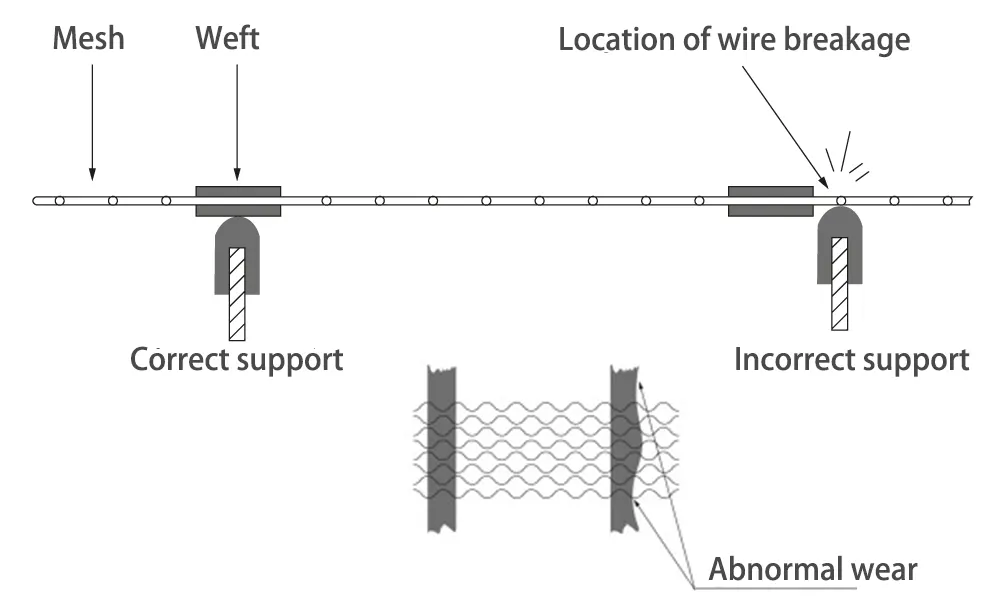
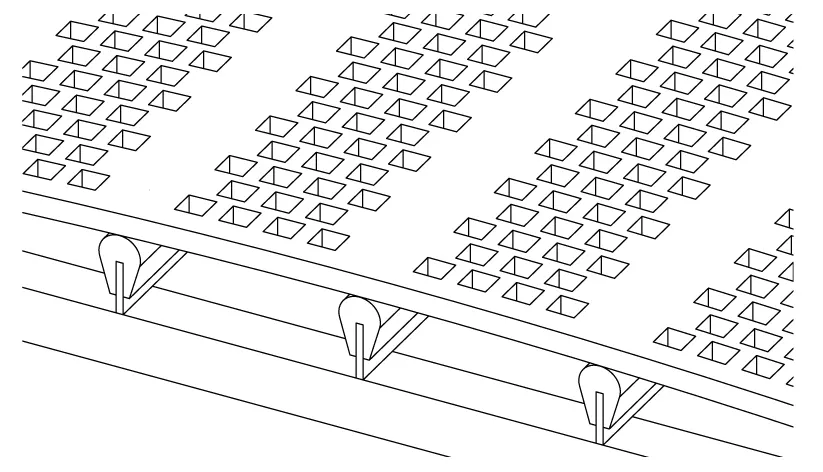
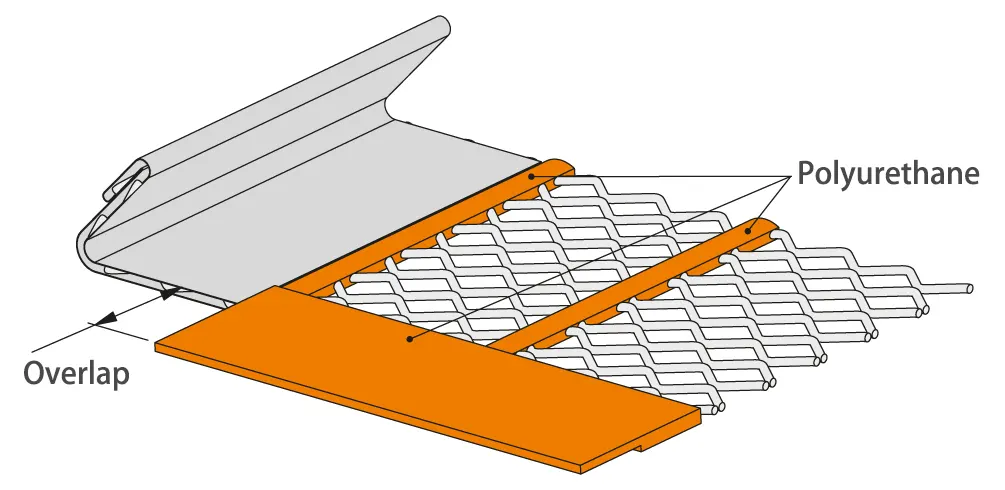
It’s essential to regularly check that the mesh tension is correctly set. Incorrect tension is a major cause of premature damage to screening surfaces. If the mesh is not properly tensioned, the screen’s vibrations will cause it to hit the support panels, creating micro-fractures that can eventually lead to mesh breakage.
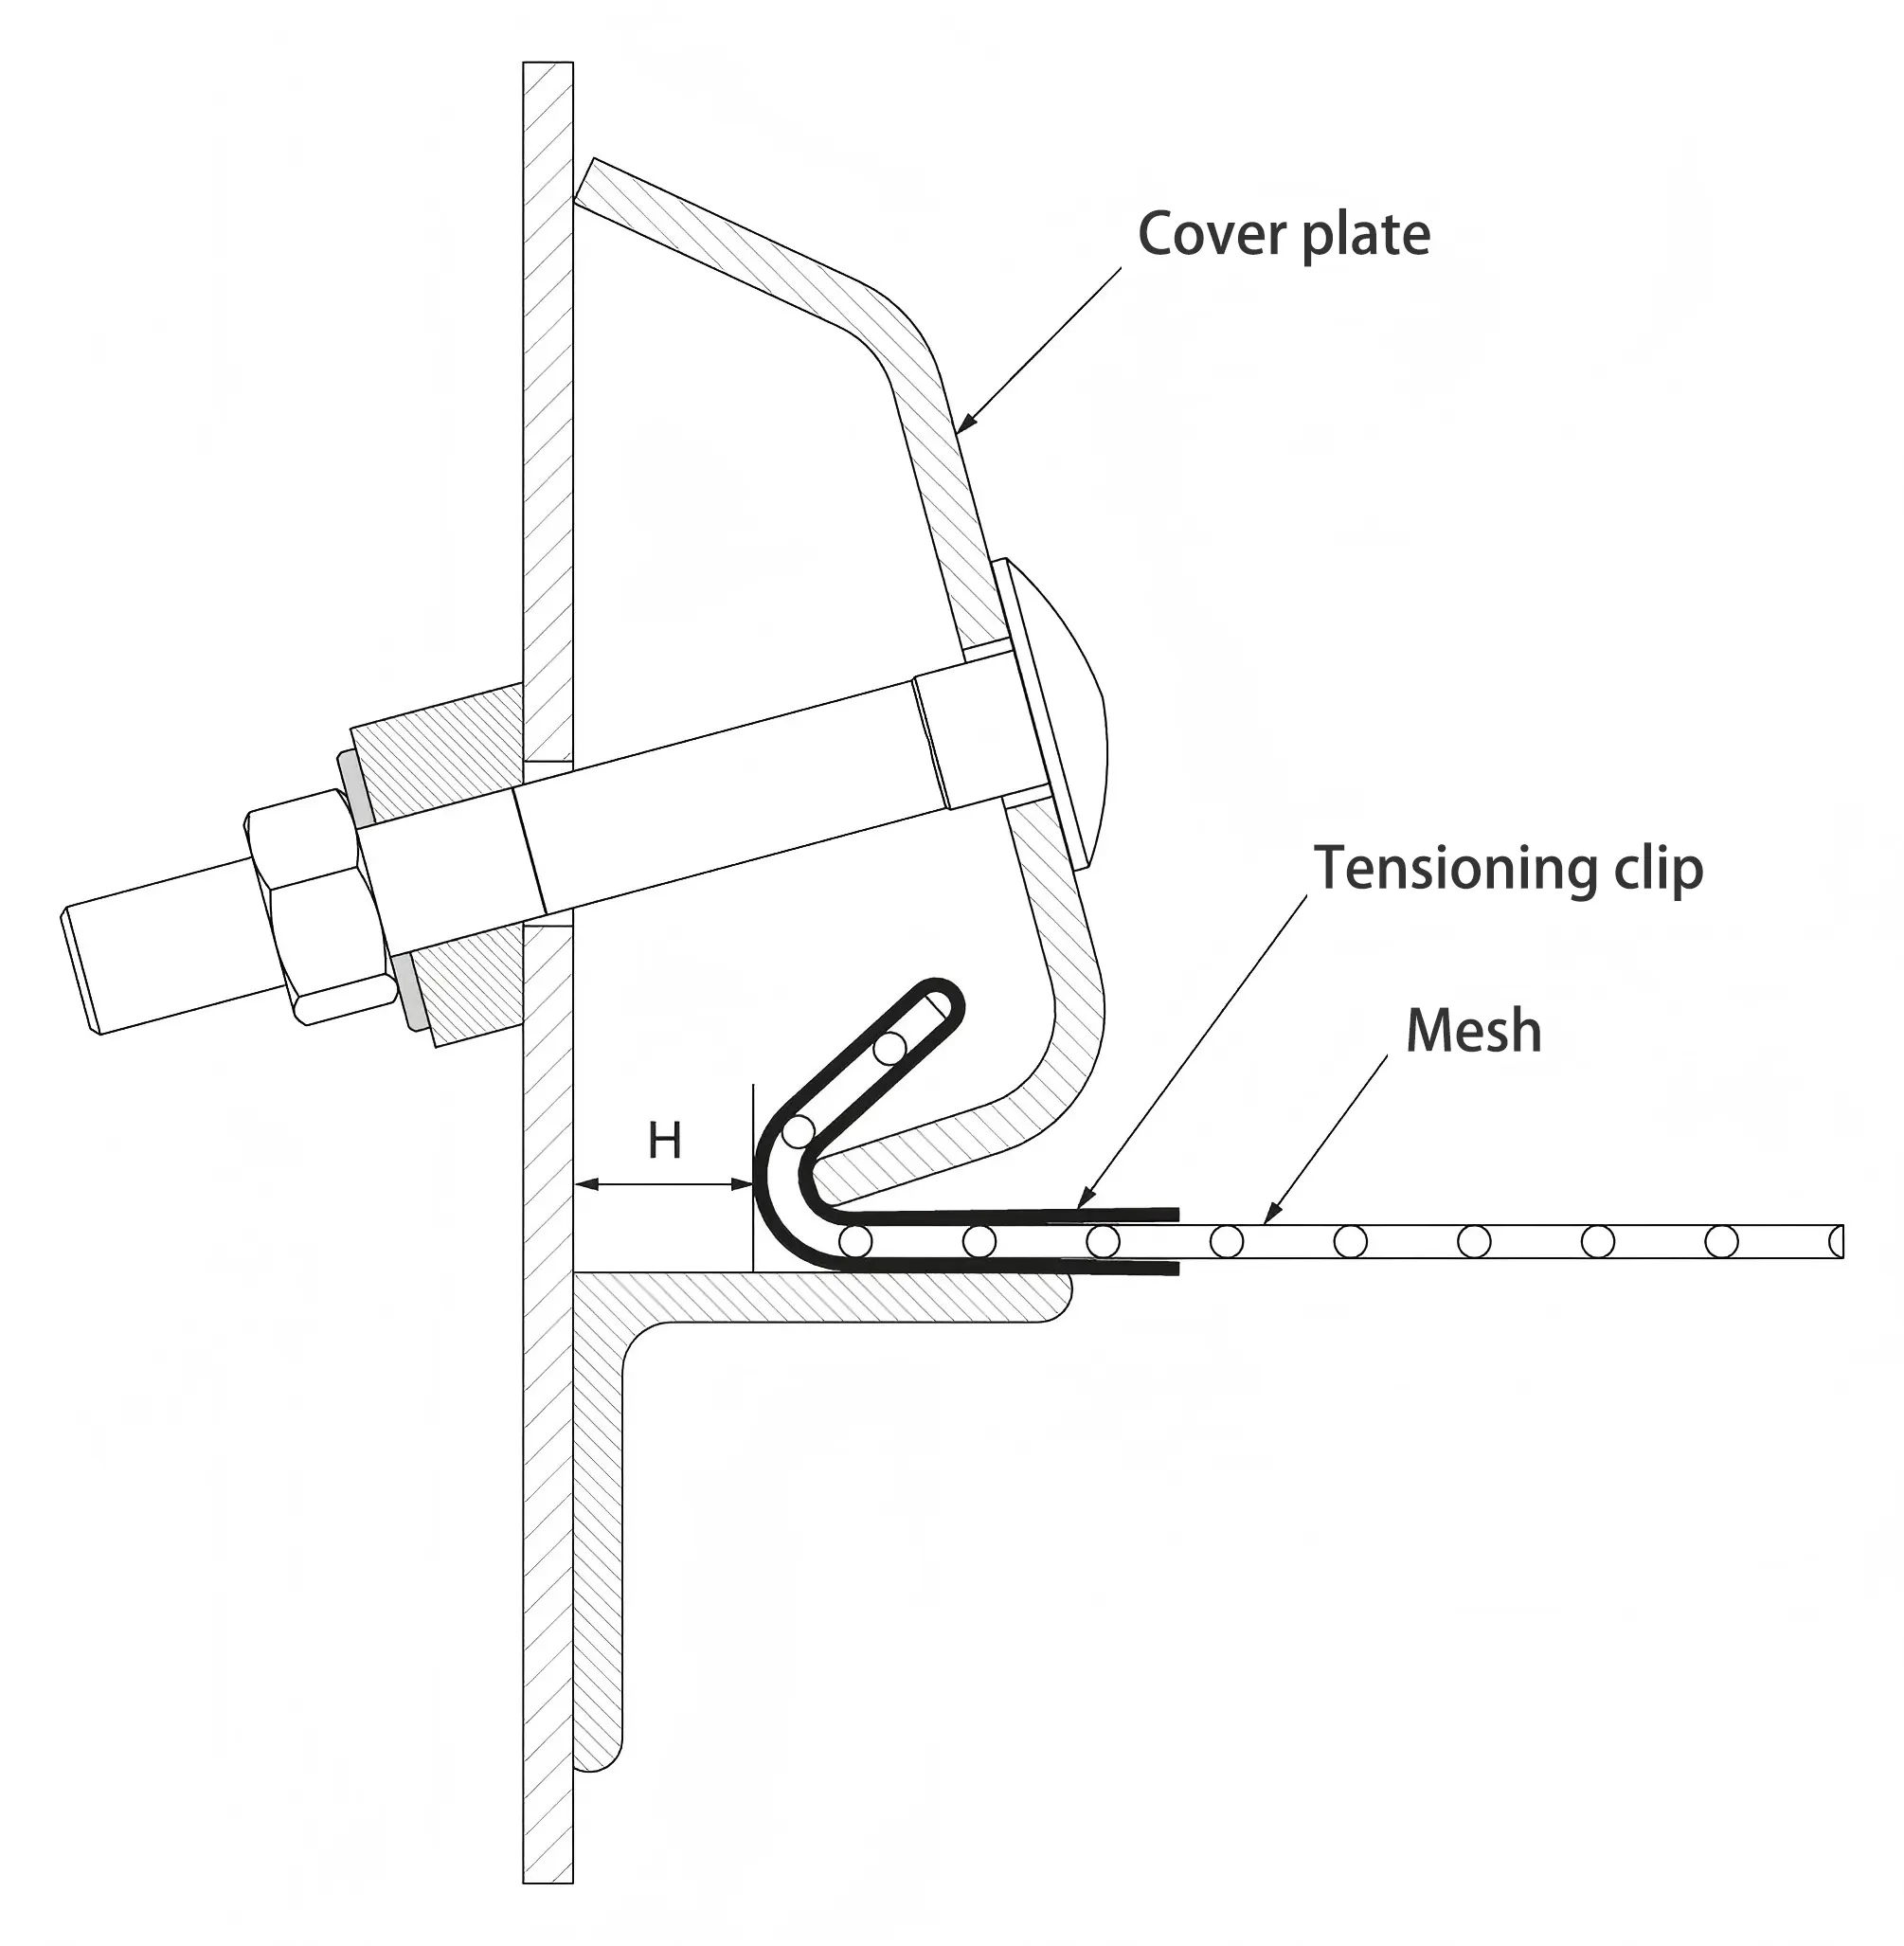
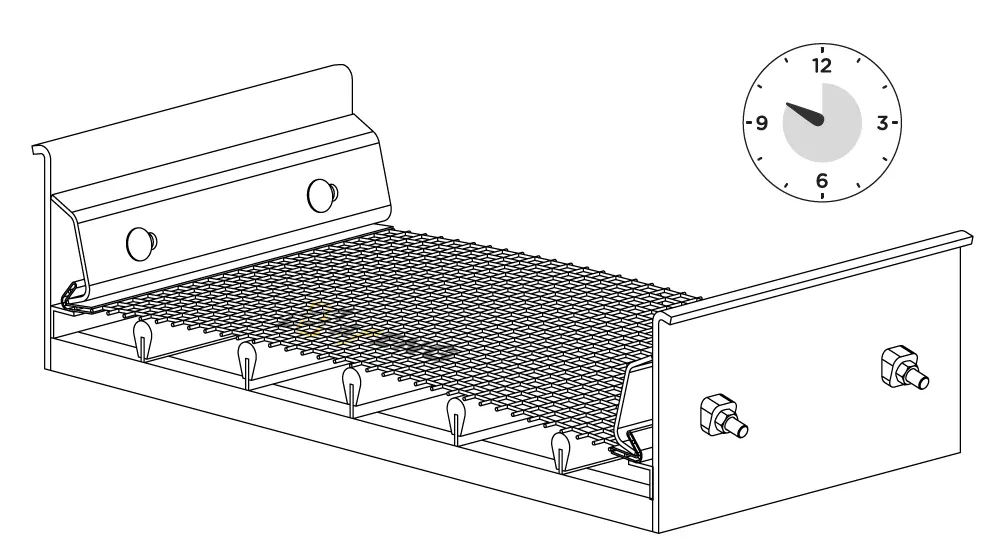
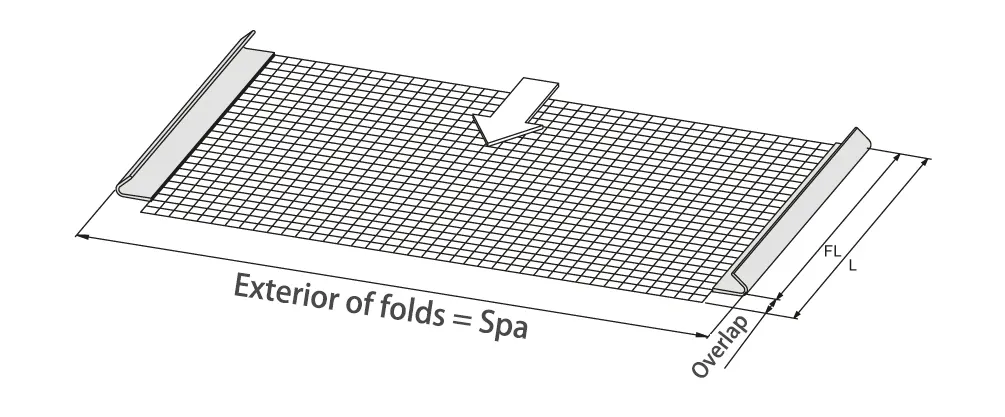
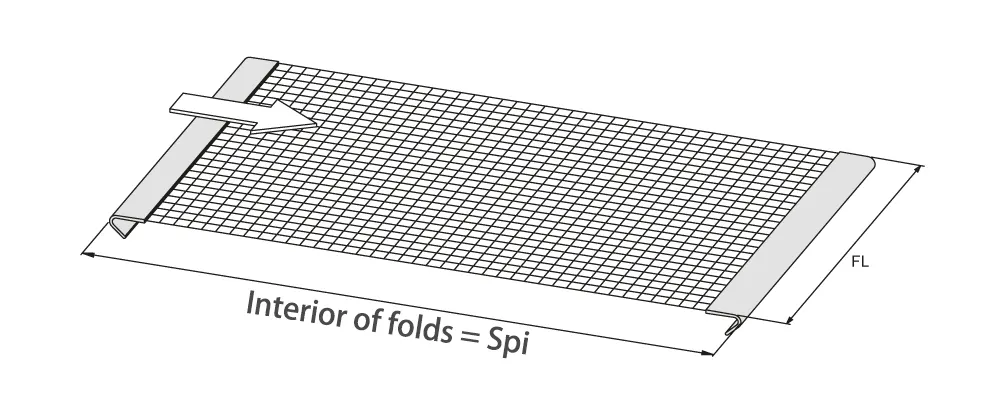
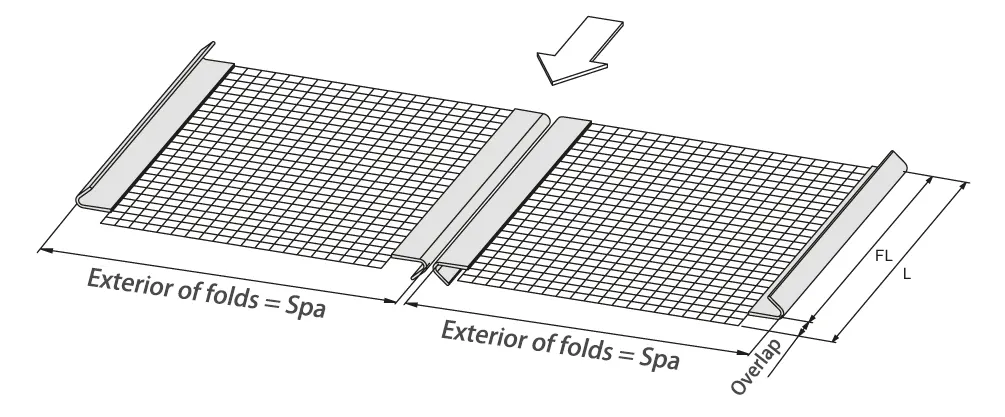
For transverse tensioned meshes, make sure there is adequate clearance (H) between the mesh and the drawer walls. The mesh should never come into contact with the walls, as this can cause unnecessary wear and potential damage.
3. If it tears at the edge of the cloth fold
To ensure the correct positioning of the tile on the mesh fold, focus on point 1. If the tile touches point 2, it will cause a twist at the corner of the fold, leading to mesh breakage at point 3.
For proper tension on the screening surfaces, each mesh panel must have its own individual tension tile on each side of the box. When a tile is mounted on two mesh panels, it is impossible for it to exert equal tension on both, so one mesh will be loose.
The tensioning systems (tiles) must ensure that the mesh forms a single unit with the box; otherwise, the mesh will hit the screen frame and eventually break.
With thick wire mesh – greater than 6,3 mm – it is difficult, due to its rigidity, for the entire surface of the mesh to rest evenly on the support plates. Therefore, plates with clamps (clamps) must be placed at different points along the mesh.
In meshes that have thick wires, greater than 6,3 mm, the tiles can easily loosen even if the screws have been tightened well, so it is necessary to retighten them after about ten hours of work.
Always ensure that the rubber covering the support plates is in good condition when installing mesh. When the rubber is worn, it creates a gap between the mesh and the support, increasing the risk of breakage from impact. Furthermore, over time the rubber hardens and can damage the mesh.
The polyurethane weaves on the anti-clogging meshes must match the rubber support profiles of the screen; otherwise, in addition to losing screening surface, we can accelerate the breakage of the mesh.
If the mesh is made of polyurethane or rubber, check that the Blind areas coincide with the support ribs of the sieve.
Types of overlap
It is recommended that ight meshes smaller than 14 mm be provided with an overlap to prevent contamination between panels.
Types of voltage
| mm cut | Wire Mesh | Double Mesh | PU mesh | Rubber Mesh | ||||
|---|---|---|---|---|---|---|---|---|
| Natural | Crushed | Natural | Crushed | Natural | Crushed | Natural | Crushed | |
| 1 | 1,12 | 1,25 | 1 | 1,2 | – | – | – | – |
| 1,25 | 1,4 | 1,6 | 1,3 | 1,5 | – | – | – | – |
| 1,6 | 1,8 | 2 | 1,75 | 2 | – | – | – | – |
| 2 | 2,24 | 2,5 | 2,2 | 2,5 | – | – | – | – |
| 2,5 | 2,8 | 3,15 | 2,5 | 3 | – | – | – | – |
| 3,5 | 3,55 | 4 | 3,3 | 3,5 | – | – | – | – |
| 4 | 4,5 | 5 | 4,2 | 4,5 | 5 | 5,6 | 5,5 | 6,3 |
| 5 | 5,6 | 6,3 | 5,5 | 6 | 6,3 | 7,1 | 6,5 | 7,5 |
| 6,5 | 7,1 | 8 | 7 | 7,5 | 7,1 | 8,5 | 7,5 | 8,5 |
| 7,1 | 8 | 9 | 7,5 | 8 | 8,5 | 9,5 | 8,5 | 9,5 |
| 8 | 9 | 10 | 9 | 10 | 9,5 | 10,5 | 9,5 | 10,5 |
| 9 | 10 | 11,2 | 10 | 11 | 10,5 | 11,5 | 11 | 12 |
| 10 | 11,2 | 12,5 | 11 | 12 | 12 | 13 | 12,5 | 13,5 |
| 11,2 | 12,5 | 14 | 12 | 13 | 13,5 | 14,5 | 14,5 | 15,5 |
| 12,6 | 14 | 15 | 14 | 15 | 14,5 | 16 | 16 | 17 |
| 14 | 16 | 17 | 15 | 16 | 16,5 | 18 | 18 | 19 |
| 16 | 18 | 19 | 18 | 19 | 18,5 | 20 | 20 | 21 |
| 18 | 20 | 21 | 20 | 21 | 20 | 23 | 23 | 24 |
| 20 | 22 | 23 | 22 | 23 | 22,4 | 25 | 25 | 26 |
| 22,4 | 24 | 25 | 24 | 25 | 25 | 28 | 27 | 29 |
| 25 | 27 | 28 | 27 | 28 | 28 | 31,5 | 31,5 | 33,5 |
| 28 | 30 | 31,5 | 30 | 31,5 | 31,5 | 35,5 | 35 | 37 |
| 31,5 | 34 | 35,5 | 34 | 35,5 | 35,5 | 38 | 38 | 40 |
| 35,5 | 38 | 40 | 38 | 40 | 38 | 40 | 43 | 45 |
| 40 | 43 | 45 | 43 | 45 | 42 | 45 | 50 | 52 |
| 45 | 48 | 50 | – | – | 48 | 50 | 55 | 57 |
| 50 | 53 | 56 | – | – | 53 | 56 | 60 | 62 |
| 63 | 65 | 70 | – | – | 65 | 68 | 74 | 76 |
| 80 | 85 | 90 | – | – | 85 | 90 | 98 | 100 |
| 100 | 105 | 112 | – | – | 105 | 112 | 115 | 120 |
| 120 | – | – | – | – | – | – | 135 | 140 |
| 150 | – | – | – | – | – | – | 170 | 175 |
Tell us your material, moisture, target cut size, throughput, and screen model. We will suggest the best media type (wire / self-cleaning / PU / rubber / plate), aperture, wire diameter, and a segmented deck layout.