Installing wire mesh is a practical way to create durable fencing, protect gardens, reinforce surfaces, or divide outdoor spaces. With proper planning, suitable materials, and basic tools, the job can be manageable for beginners. This guide explains the essential steps, helping you achieve a neat, stable installation that performs reliably over time.
Before starting, measure the installation area carefully and choose wire mesh suited to your purpose. Consider mesh opening size, wire thickness, corrosion resistance, and required height. Preparing sturdy posts, level ground, and secure fixing points makes installation easier. A methodical approach prevents sagging, uneven tension, and unnecessary material waste during the project.
Where to Install Wire Mesh?
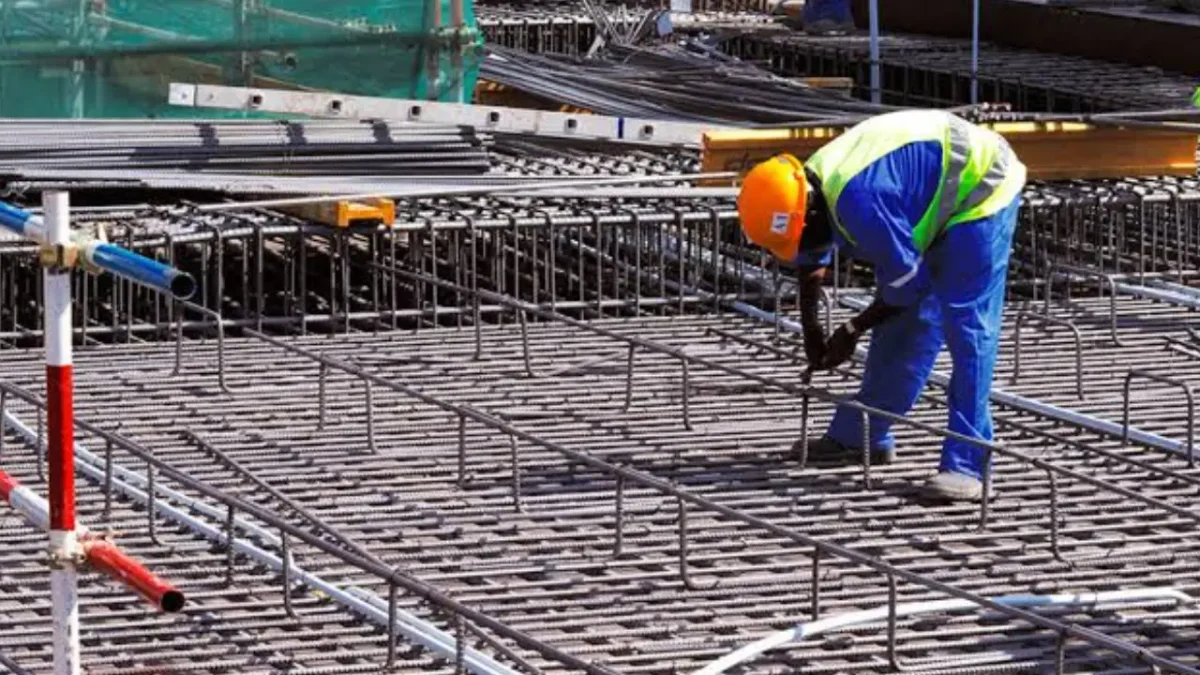
Wire mesh can be installed wherever reinforcement, filtration, separation, or protection is needed. It supports construction, well, agricultural, industrial, and landscaping projects by improving durability, safety, drainage, and material control in demanding environments.
- Construction foundations and concrete slabs: Place welded wire mesh in slabs, driveways, footings, and walkways to distribute loads and limit cracking. Use spacers to keep it properly positioned within the concrete.
- Water wells and borehole screens: Install corrosion-resistant wire mesh in well screens to filter sand and sediment while allowing water flow. Select the correct opening size to protect pumps and maintain output.
- Fencing and site security: Use wire mesh around construction sites, equipment areas, utility compounds, and property boundaries. Galvanized or coated mesh provides durable protection while maintaining visibility and airflow.
- Retaining walls and slope stabilization: Install wire mesh behind retaining walls or along slopes to contain soil, reduce erosion, and stabilize loose materials. Combine it with anchors, rock, or geotextiles.
- Drainage and aggregate filtration: Place wire mesh around drains, gravel systems, catch basins, and filtration units. It separates materials, blocks debris, and supports reliable water flow in wet conditions.
- Industrial equipment guards: Fit wire mesh around machinery, platforms, ventilation openings, and storage areas. It improves worker safety, contains materials, and preserves airflow, light, and site visibility.
How to Install Wire Mesh?
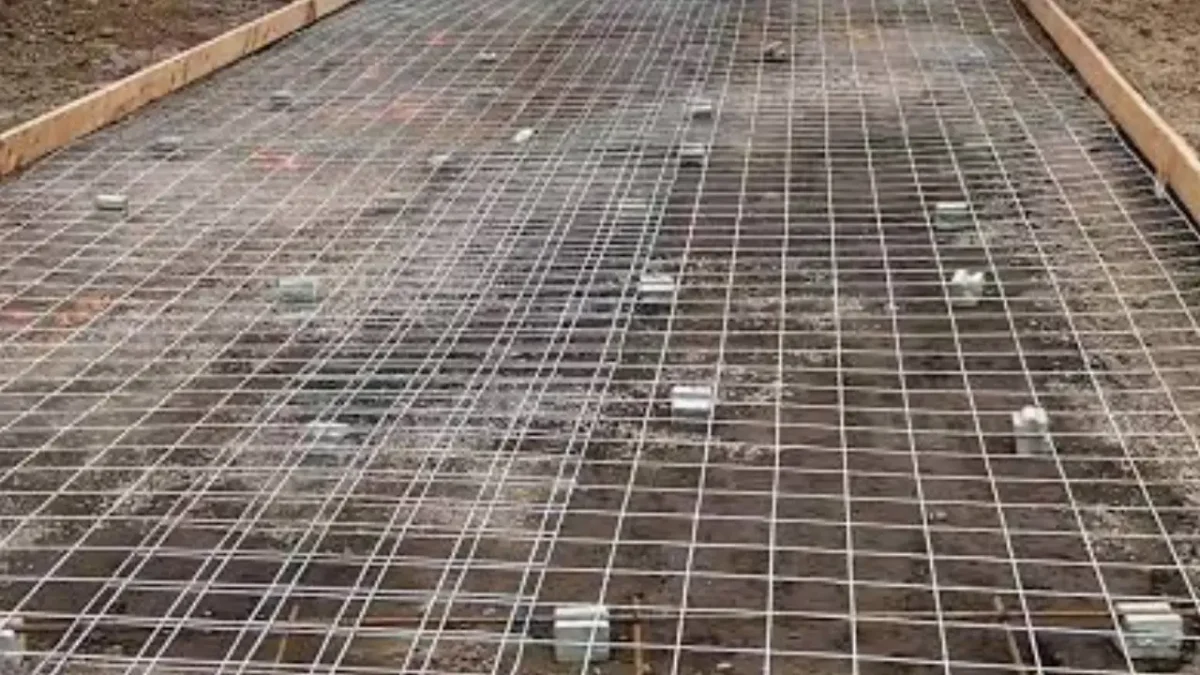
Installing wire mesh correctly helps create durable fencing, filtration systems, concrete reinforcement, well screens, and protective barriers. Successful installation requires careful planning, stable supports, precise mesh placement, and secure fastening.
By completing one action at a time, you can improve safety, reduce material waste, and create a professional result for construction, water-well, agricultural, and industrial projects.
Tools Needed
- Tape measure
- Work gloves
- Safety glasses
- Wire cutters
- Pliers
- Hammer or post driver
- Level
- Shovel
- Fence staples or wire ties
- Tensioning tool or come-along
- Posts or support frames
- Project-appropriate fasteners
Step 1: Measure the Installation Area
Measure the complete installation route before ordering or cutting wire mesh. Record the overall length, height, corners, gates, support positions, and any changes in ground level. Identify the project purpose, such as fencing, concrete reinforcement, well filtration, or drainage protection, because it determines the required mesh size, gauge, and dimensions.
Mark the measured installation line using stakes, string, chalk, or paint. Clearly identify the starting point, ending point, corners, gates, and support locations. Accurate layout markings help prevent uneven mesh sections, misplaced posts, unnecessary cutting, and material waste. Review all measurements once more before proceeding, especially when working around buildings, trenches, drainage systems, or equipment.
Step 2: Clear the Work Area
Remove vegetation, loose rocks, construction debris, and other obstructions from the marked installation area. Create a clear path wide enough to handle the mesh roll, tools, and support materials safely. Clearing the area reduces tripping hazards, prevents mesh damage, and makes it easier to maintain straight alignment during the following installation stages.
Inspect the cleared area for uneven ground, soft soil, drainage issues, underground utilities, and other site conditions. Adjust the project layout when necessary to avoid hazards or unstable sections. For water-well and drainage applications, check moisture exposure and surrounding material conditions. Early site inspection helps prevent shifting supports, poor filtration results, and difficult repairs later.
Step 3: Install the Support Posts
Dig holes for posts or prepare the locations for frames and anchors according to the project measurements. Keep support spacing consistent across the installation line. Set posts deeply enough to resist pulling force, wind, impact, and soil movement. Use stronger corner and end supports because these points carry additional tension from the wire mesh.
Position each post or frame upright before adding concrete, backfill, or permanent anchors. Use a level to verify that every support remains vertical and aligned with the marked route. Allow concrete footings to cure fully where required. Straight, stable supports create a reliable base for the mesh and reduce the risk of sagging, twisting, or shifting.
Step 4: Measure the Wire Mesh
Measure the wire mesh length needed for the first installation section. Include additional material for overlaps, corners, fastening edges, and minor on-site adjustments. Keep the mesh roll or panel on a flat, stable surface while measuring. Confirm dimensions against the installed supports before cutting, because incorrect measurements can create gaps or require unnecessary material replacement.
Check the mesh orientation before preparing the material for cutting. Ensure the selected opening size, wire gauge, and panel direction match the project requirements. For fencing, align the mesh to maintain consistent openings. For filtration, drainage, or well-screen applications, verify that the aperture supports the intended particle-control function and water-flow requirements.
Step 5: Cut the Wire Mesh
Wear gloves and safety glasses before cutting wire mesh. Use wire cutters, bolt cutters, or an angle grinder that matches the mesh wire thickness. Cut along a straight wire line whenever possible to create a clean edge. Keep hands clear of the cutting area because released wire ends can move suddenly and cause injury.
Remove or bend back sharp wire ends after cutting each section. Check that the cut panel fits the prepared installation space without forcing, stretching, or excessive gaps. Make minor trimming adjustments only after testing the fit. Clean edges make fastening easier, improve safety, and help adjoining mesh sections overlap properly during final installation.
Step 6: Attach the First Mesh Edge
Place the first edge of the cut wire mesh against the starting post, frame, or support point. Align the mesh with the required bottom height, top height, and side position. Keep the panel straight before securing it. Proper starting alignment prevents the entire installation from drifting, sloping, or becoming difficult to tension later.
Secure the first mesh edge using temporary ties, staples, clips, or fasteners. Add enough connections to hold the mesh firmly while leaving the remaining section free for tensioning. Use fasteners suitable for the mesh material and environment. For outdoor, well, or drainage work, corrosion-resistant hardware helps maintain dependable long-term support and performance.
Step 7: Tension the Wire Mesh
Pull the free end of the wire mesh toward the next end post or support frame. Apply steady tension across the full panel, keeping mesh openings even and the material aligned with supports. Use a tensioning tool, come-along, or controlled manual force for larger sections. Avoid over-pulling, which can deform wires or lean posts.
Check the mesh surface after applying tension. The panel should feel firm without visible sagging, distorted openings, or uneven edges. Reposition the mesh if the bottom or top line has shifted from the intended level. Correct tension improves impact resistance, appearance, and stability, especially for fencing, security barriers, and containment applications in exposed locations.
Step 8: Fasten the Mesh to Supports
Attach the tensioned wire mesh permanently to intermediate posts, frames, or anchors. Install staples, clips, ties, or approved fasteners at consistent intervals along the top, middle, and bottom sections. Keep each connection tight without crushing wires. Proper fastening distributes load across the installation and prevents the mesh from pulling away during use.
Inspect every connection after fastening the mesh. Replace weak, loose, damaged, or incorrectly positioned fasteners before moving to the next panel. Confirm that the mesh remains level, tensioned, and properly supported along the full length. Consistent fastening is particularly important in construction, industrial, well-screen, and high-use security applications where vibration or pressure may occur.
Step 9: Overlap Adjacent Mesh Sections
Position the next mesh section so it overlaps the installed section along the required joining edge. Maintain a consistent overlap width that suits the project design and application. Keep both sections aligned so openings match as closely as possible. Proper overlap prevents gaps that could weaken fencing, reduce filtration control, or allow material movement.
Secure the overlap using ties, clips, lacing wire, or fasteners placed evenly along the joint. Check that both mesh layers remain flat and firmly connected without bulging. Trim any excess wire only after the joint is secure. A properly joined overlap provides continuous coverage and helps the installation resist movement, vibration, pressure, and weather exposure.
Step 10: Inspect the Finished Installation
Walk along the completed wire mesh installation and inspect every panel, support, fastener, edge, and overlap. Look for loose sections, sharp wire ends, gaps, sagging, uneven tension, and damaged coatings. Confirm that posts remain upright and stable. For drainage or well applications, make sure mesh openings remain clear and correctly positioned for flow.
Correct any problems found during the final inspection before placing the installation into service. Tighten loose fasteners, adjust tension, cover sharp edges, replace damaged mesh, and remove debris from the work area. Schedule regular future checks, particularly after storms, ground movement, equipment contact, or heavy use. Timely maintenance supports long-lasting safety, function, and performance.
How to Install Wire Mesh for Concrete?
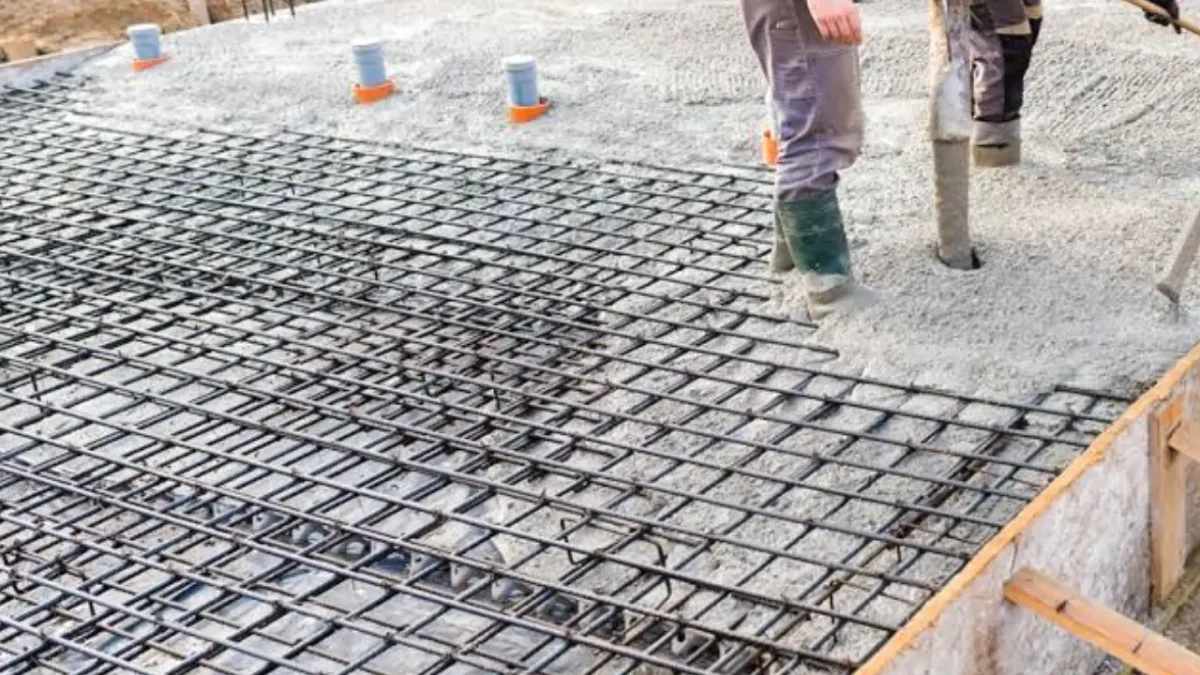
Wire mesh reinforces concrete slabs by helping control cracking and distribute stresses across the surface. Correct placement is essential: mesh must remain at the specified depth during the pour, not rest on the subgrade. Always follow the approved structural drawings and local code requirements, especially for load-bearing slabs, foundations, and engineered construction projects.
Tools Needed
- Tape measure
- Work gloves
- Safety glasses
- Wire cutters or bolt cutters
- Pliers
- Tie wire
- Mesh chairs or concrete spacers
- Shovel or rake
- Level
- Chalk line or marking paint
- Approved welded wire mesh
Step 1: Review the Project Drawings
Review the approved concrete drawings before handling the wire mesh. Confirm the specified mesh type, wire gauge, spacing, panel layout, cover depth, and overlap requirements. Structural plans take priority over general installation guidance. Contact the project engineer when requirements are unclear, particularly for foundations, heavy-load slabs, structural walls, or commercial concrete work.
Step 2: Prepare the Subgrade
Prepare the subgrade to the required elevation before placing any reinforcement. Compact soil or aggregate evenly and remove loose material, standing water, sharp debris, and unstable areas. A smooth, stable base helps maintain the designed slab thickness. Verify grades carefully so the finished concrete depth and reinforcement position remain consistent across the entire pour area.
Step 3: Install the Forms
Install the concrete forms along the planned slab perimeter. Set each form to the required height and secure it firmly to resist movement during concrete placement. Check straightness, corners, and finished elevation using a level or laser. Properly installed forms define the concrete dimensions and provide a reliable reference for mesh placement throughout construction.
Step 4: Measure the Mesh Area
Measure the prepared slab area before cutting or arranging wire mesh sheets. Include the full length and width, while allowing for specified overlaps between adjoining sections. Use the drawings to identify openings, joints, edges, and changes in slab geometry. Accurate measurements reduce wasted material and help maintain continuous reinforcement coverage throughout the concrete placement zone.
Step 5: Cut the Wire Mesh
Cut each wire mesh sheet to the measured dimensions using appropriate wire cutters or bolt cutters. Wear gloves and safety glasses because sharp ends may move unexpectedly during cutting. Keep cuts straight and avoid damaging nearby welded intersections. Place cut sections beside their intended locations, making installation orderly and reducing unnecessary handling before concrete placement begins.
Step 6: Place Mesh Supports
Place approved mesh chairs, bolsters, spacers, or concrete blocks across the prepared base. Space supports closely enough to prevent sagging while workers place concrete. Support requirements depend on mesh weight, slab design, and site conditions. Proper support keeps reinforcement at its specified elevation instead of allowing it to settle directly onto the subgrade.
Step 7: Position the First Mesh Sheet
Lift the first wire mesh sheet onto the installed supports. Align it with the slab layout, required edge clearances, and marked control features. Keep the panel flat without bending or twisting individual wires. The mesh should remain at the location specified by the drawings, commonly within the slab’s middle zone for typical slabs.
Step 8: Position the Next Mesh Sheet
Place the next mesh sheet on the supports beside the first installed sheet. Align the panel carefully so its wires run in the planned direction and its edges remain parallel. Do not force sheets into position or leave large gaps. Accurate alignment produces a consistent reinforcement layout and makes the required lap joint easier to form.
Step 9: Overlap the Mesh Sheets
Overlap adjoining mesh sheets by the distance specified in the approved drawings. When plans do not state a lap requirement, consult the project engineer rather than relying on a universal field rule. Published specifications may require at least one mesh opening or a stated minimum distance, depending on the reinforcement and application.
Step 10: Tie the Mesh Overlap
Tie the overlapped mesh sections together using suitable tie wire. Place ties at intervals that keep the sheets connected during concrete placement without shifting or separating. Twist tie ends downward to reduce safety hazards and avoid interfering with finishing. Secure laps help maintain continuity, but they do not replace the overlap length required by the design.
Step 11: Check the Mesh Elevation
Check that the entire mesh assembly remains at the specified depth below the finished concrete surface. Adjust chairs or spacers where the mesh sags, rises, or touches the base. Reinforcement must be held securely in position throughout placing operations. It should not be left on the ground or pulled upward only after concrete placement starts.
Step 12: Pour the Concrete
Place concrete carefully around the supported wire mesh without dislodging the reinforcement. Use controlled placement methods and avoid dropping large loads directly onto the panels. Watch the mesh continually as concrete spreads across the area. If movement occurs, pause work and restore the mesh to the approved elevation before continuing with placement operations.
Step 13: Recheck the Mesh Position
Recheck reinforcement position during the concrete pour, especially near overlaps, slab edges, and high-traffic working areas. Confirm that chairs remain upright and mesh has not sunk, shifted, or become exposed. Make adjustments promptly while the concrete is workable. Maintaining placement protects the intended crack-control function and supports compliance with the project design requirements.
Step 14: Finish the Concrete Surface
Finish the concrete surface after the mesh remains fully embedded and correctly positioned. Strike off, screed, float, texture, or trowel the slab according to the project specification. Avoid aggressive finishing practices that disturb reinforcement below the surface. Complete curing according to the approved concrete plan to support strength development, surface durability, and long-term slab performance.
Wire Mesh Installation Tips
Proper wire mesh installation starts with careful planning, accurate measurement, and materials suited to the project environment. Whether the mesh supports concrete, protects a construction area, filters water, or forms fencing, correct positioning prevents early failure. Use project drawings and engineer-approved specifications for structural or water-well applications, rather than relying on general installation rules alone.
Wire Mesh Installation Tips
- Choose mesh material for the environment. Use galvanized, coated, or stainless steel mesh where moisture, soil, chemicals, or outdoor exposure could cause corrosion. Match the wire gauge and opening size to the expected load, filtration requirement, security level, or containment purpose.
- Measure the installation area twice. Record lengths, heights, corners, slopes, openings, and connection points before cutting any material. Accurate measurements help prevent shortages, awkward patches, excess waste, and poorly aligned sections. Allow additional material where specified overlaps, bends, or fastening edges are needed.
- Wear protective equipment throughout installation. Gloves protect hands from sharp cut wire, while safety glasses protect eyes from fragments or spring-back. Use sturdy footwear and long sleeves when handling rolls. Keep bystanders away while cutting, tensioning, or moving heavy mesh panels.
- Prepare stable supports before attaching mesh. Posts, frames, anchors, or concrete chairs must be properly installed and aligned first. Stable support systems limit sagging and movement after installation. Check vertical alignment, spacing, and anchorage strength before placing mesh, particularly on exposed outdoor or sloping sites.
- Keep mesh correctly positioned in concrete. Support welded wire reinforcement on chairs, spacers, or bolsters instead of leaving it on the subgrade. Placement depth must follow approved drawings. Unsupported mesh can be pushed downward during the pour, reducing its intended crack-control performance.
- Secure mesh overlaps consistently. Overlap adjacent sections according to approved project drawings, then tie the joint to prevent separation during installation. Requirements vary by mesh type and application, so avoid treating one lap distance as universal. Stagger joints where the design requires it.
- Apply even tension to fencing mesh. Pull mesh gradually from one support to the next, keeping wires straight and openings uniform. Excessive force may deform wires, loosen posts, or create weak connections. Correct tension produces a firm barrier without visible sagging or distorted panel edges.
- Use suitable fastening hardware. Select clips, staples, ties, bolts, or lacing wire compatible with both the mesh and support material. Corrosion-resistant fasteners improve outdoor durability. Space fasteners consistently, keeping connections secure without crushing the wire or damaging protective surface coatings.
- Eliminate exposed sharp wire ends. Trim surplus wire only after checking alignment and fastening. Bend cut ends inward, downward, or cover them with protective caps where people may come into contact. This small finishing step reduces injury risks and creates a neater, more professional installation.
- Inspect the completed installation regularly. Check for loose fasteners, corrosion, sagging, damaged coatings, gaps, debris, and shifted supports. Inspect after storms, ground movement, heavy equipment contact, or concrete placement. Early repairs protect the mesh system’s safety, function, appearance, and expected service life.
Conclusion
A well-installed wire mesh structure offers long-term strength, protection, and flexibility for residential, agricultural, and commercial projects. Whether you are building a garden boundary, animal enclosure, security fence, or support system, careful measurement and proper tensioning create better results. Taking time to prepare the site helps the mesh remain secure, straight, and dependable.
Use the appropriate tools, including gloves, wire cutters, pliers, a tape measure, and reliable fasteners, to make the work safer and more efficient. Check that every post is stable before attaching the mesh, then pull the material evenly as you secure it. Regular inspections can identify loose ties, damaged sections, or corrosion before they worsen.
For dependable materials and cost-effective supply options, consider purchasing wholesale wire mesh from Apscreens. Choosing quality mesh that matches your project requirements can simplify installation and improve durability in demanding conditions. With the right product, sound preparation, and careful finishing, your wire mesh installation can provide reliable performance and a clean, professional appearance.