Polyurethane screen panels help you get the most out of your vibrating screens. When you install them the right way, you boost fitment, sealing, and wear life. You also make your screening process more efficient. Even the best panels can fail if you skip steps or rush. Many teams find that regular checks before changing panels prevent cracks and loose parts. You can even cut your installation time by about 40% compared to steel screens. Standard bolt holes and interlocking edges make it easy to swap sections and keep your setup running strong. This guide shows you how to install polyurethane screen panels with clear steps and practical advice.

Key Takeaways
- Always lock out and tag out your vibrating screen before you start. This keeps everyone safe.
- Wear the right personal protective equipment like gloves and goggles. This helps stop injuries while you work.
- Gather all the tools and materials you need before you begin. This saves time and keeps your workspace neat.
- Check the type of panels and fastening methods again. Make sure they work with your vibrating screen.
- Look at deck supports and seals before you install anything. This helps stop problems later and gives the panels a strong base.
- Line up and place panels carefully by following your deck plan. This stops gaps and helps the screen work well.
- Tighten fasteners evenly to hold the panels in place. This keeps them from moving when the screen is on.
- Run the screen with nothing on it after you finish installing. This lets you check for problems before you add material and makes sure everything works right.
Safety and Preparation
Before you start installing polyurethane screen panels, you need to make sure you and your team stay safe. Good preparation helps you avoid injuries and keeps your work area organized. Let’s walk through the key steps.
Lockout/Tagout
Always lock out and tag out the vibrating screen before you do anything else. This step stops the machine from starting up while you work. You don’t want any surprises. Use the lockout/tagout system your site provides. Double-check that all energy sources are off. If you skip this step, you put yourself and your team at risk.
Tip: Place your lock and tag in a spot everyone can see. This reminds others that work is happening and keeps everyone safe.
PPE and Safe Handling
You need the right personal protective equipment (PPE) for this job. Polyurethane panels are heavy and sometimes slippery. You might work in tight spaces or need to use tools in awkward positions. Hand injuries happen often during maintenance, especially when you use hammers or work over the screen deck. Protect yourself and your team by wearing:
- Gloves to shield your hands from cuts and pinches
- Goggles to keep dust and debris out of your eyes
- Face masks or respirators if there’s dust or fumes
- Chemical-resistant clothing if you use adhesives or cleaners
Lift panels with care. Get help if a panel feels too heavy. Use proper lifting techniques to avoid back injuries. If you work in a cramped spot, take your time and watch your hand placement. Never rush, even if you want to finish quickly.
Note: Most injuries happen when people hurry or use tools in the wrong way. Slow down and check your grip before you move or hit anything.
Tools and Materials
Gather all your tools and supplies before you start. This saves time and helps you avoid searching for missing items in the middle of the job. Here’s a handy checklist:
- Wrenches or socket sets for bolts and fasteners
- Rubber mallet or hammer for seating panels (use with care)
- Pry bar for removing old panels
- Cleaning brushes and rags for wiping down surfaces
- Adhesive or sealant if your panels require it
- Replacement fasteners, clips, or screws
- Measuring tape or ruler for checking panel alignment
- PPE (as listed above)
Keep your tools close but out of the way of your feet. Clean up any spills right away. A tidy workspace helps you work faster and safer.
Pro Tip: Lay out your panels in the order you’ll install them. This makes the process smoother and helps you spot any missing parts before you begin.
Now that you’re set up and safe, you’re ready to move on to the pre-installation checks.
Pre-Installation Checks
Panel Type and Fastening Method
Before you start, you need to know exactly what kind of polyurethane screen panels you have and how they attach to your screen deck. Not all panels fit every machine, so double-checking saves you a lot of trouble later. You’ll find several types of panels and fastening systems out there. Here’s a quick look at the most common ones:
| Type of Panel | Thickness (mm) | Dimensions (mm) | Aperture (mm) | Typical Use |
|---|---|---|---|---|
| Polyurethane Screen Panels | 20 to 60 | 305×305, 610×350 | 1 to 100 | Coal, iron ore, sand |
| Modular Screen Panels | N/A | N/A | N/A | Many uses, easy to swap |
| Tensioned Panels | N/A | N/A | Varied | Replace woven wire screens |
You might see these fastening systems:
- Modular systems: Small panels you can swap out one at a time.
- Tensioned panels: Lightweight, with extra support for heavy loads.
- Pin & Leg Panel System: Fits many machines, often in 1’x1’ or 1’x2’ sizes.
Tip: Always match your panel type and fastening method to your screen’s design. If you’re not sure, check your machine manual or ask your supplier.
Panel Layout and Aperture Sizes
Now, take a close look at your panel layout. Each panel needs to go in the right spot, facing the correct direction. If you mix up the order or orientation, you might get poor screening or even damage your panels. Check the aperture sizes too. The holes in each panel must match your screening needs—too big, and you lose product; too small, and you slow down production.
Here’s a simple checklist to help you:
- Lay out your panels in the order you’ll install them.
- Check the size and shape of each aperture.
- Make sure the flow direction arrows (if any) point the right way.
- Confirm that each panel matches the spot on your deck plan.
Note: Mixing up panel sizes or directions is a common mistake. Take your time during this step.
Inspect Deck Supports
Your panels need a solid base. If your deck supports—like rails or crown bars—are worn, bent, or rusty, your panels won’t sit flat. This can cause them to flex too much, wear out early, or even break. Studies show that compromised deck supports and improper tensioning are top reasons for panel failure. You want to avoid uneven backing because it creates high-stress spots.
Take a few minutes to:
- Look for cracks, rust, or missing pieces on the supports.
- Clean off any dirt or old adhesive.
- Make sure all supports are straight and secure.
If you spot any problems, fix them before you install new panels. A strong, clean deck means your panels will last longer and work better.
Check Seals
Seals might seem like a small detail, but they play a huge role in your screen’s performance. If you skip checking the seals, you could end up with leaks, lost material, or even faster wear on your new panels. You want to make sure every seal is in good shape before you start the installation.
Start by looking at all the seals around your screen deck. These usually sit along the sides, at the discharge end, and sometimes between panels. You might see rubber strips, polyurethane seals, or even foam gaskets. Each one helps keep material where it belongs and stops fines from sneaking through gaps.
Here’s a quick checklist to guide you:
- Inspect for Damage: Look for cracks, tears, or missing pieces. Even a small gap can let material leak out.
- Check for Hardening or Brittleness: Old seals can get stiff or brittle. If you press on a seal and it doesn’t bounce back, it’s time to replace it.
- Clean the Seal Area: Dirt and old adhesive can stop new seals from sticking. Wipe down the area with a clean rag before you install anything new.
- Test the Fit: Lay a panel in place and check if the seal touches the panel edge all the way along. You want a snug fit, not a loose one.
Tip: If you see dust or fines collecting under the deck, that’s a sign your seals aren’t working right. Fix this before you install new panels.
You might need to replace seals if you spot any of these problems. Most suppliers offer replacement seals that match your screen model. Always use the right type and size. If you try to make do with the wrong seal, you could end up with more leaks or even damage your panels.
When you install new seals, press them firmly into place. Some seals need adhesive, while others snap or slide into a groove. Follow the instructions from your supplier. Take your time here—good sealing now saves you a lot of headaches later.
Pro Tip: Keep a few spare seals in your maintenance kit. That way, you can swap out a bad seal right away and keep your downtime to a minimum.
Checking your seals only takes a few minutes, but it makes a big difference. You’ll get better screening, less mess, and longer panel life. Now you’re ready to move on to the installation itself.
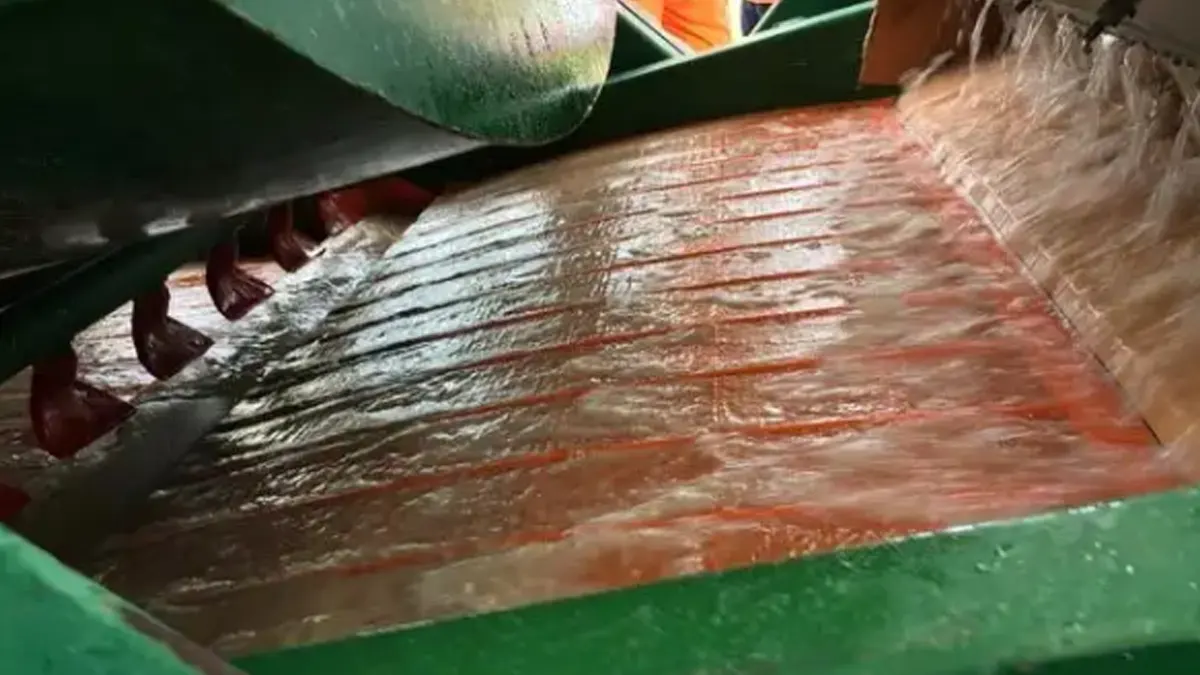
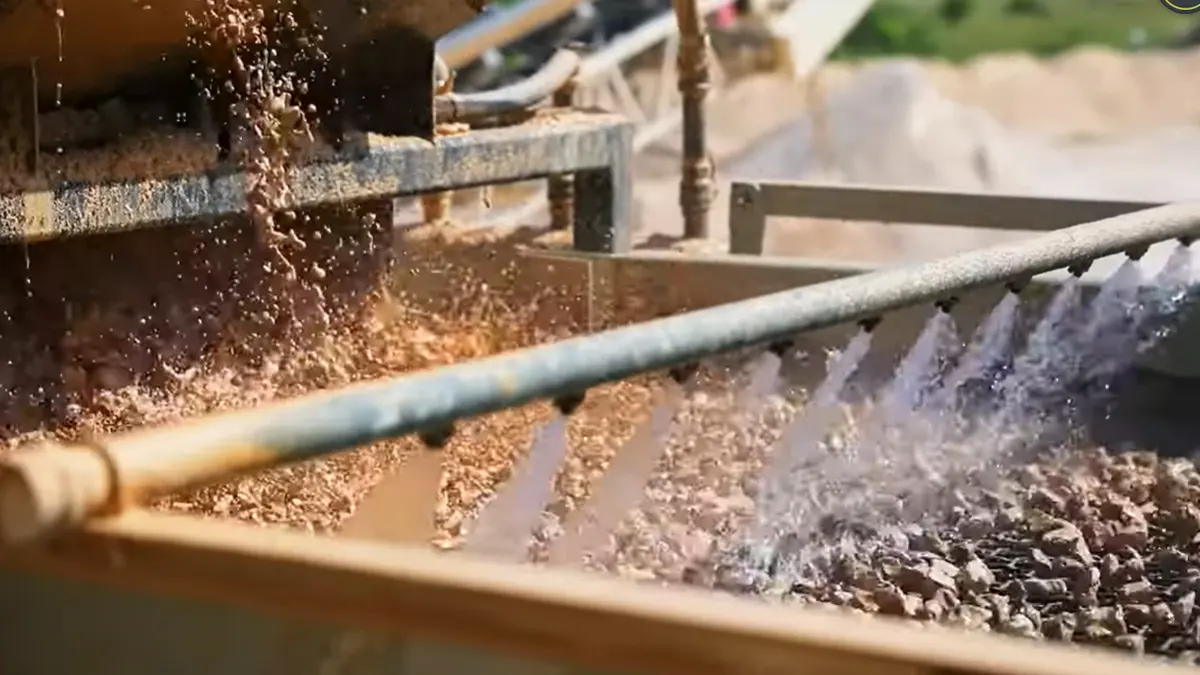
How to Install Polyurethane Screen Panels
Remove Old Panels
Start by taking out the old panels from your vibrating screen. Use a pry bar or the right tool for your fastening system. If the panels are stuck, tap them gently with a rubber mallet. Always watch your fingers and keep your hands clear of pinch points. Some panels may have bolts, clips, or pins. Remove all fasteners and set them aside if you plan to reuse them. If you see any broken or worn fasteners, replace them with new ones.
Work from one end of the deck to the other. This helps you keep track of your progress and makes it easier to spot any problems. Stack the old panels in a safe spot. Clean up any loose debris as you go. Removing all the old panels gives you a clear view of the deck supports and seals.
Tip: Take a quick photo of the old panel layout before you start. This can help you remember the order and orientation for the new panels.
Clean Contact Surfaces
Once you remove the old panels, you need to clean the contact surfaces. Dirt, dust, and old adhesive can stop new panels from sitting flat. If you skip this step, you might get gaps or uneven wear. Use a brush or rag to wipe down the rails, crown bars, and any other surfaces where the panels will sit.
For a deeper clean, pick the right cleaning agent for the job. Here’s a handy table to help you choose:
| Cleaning Agent | Use Case |
|---|---|
| Isopropyl Alcohol (IPA) | For non-oily dirt and dust removal |
| Xylene or Toluene | For oily dirt or films |
| 50% IPA solution | General cleaning for non-porous surfaces |
| 70% IPA solution | Rubbing alcohol for cleaning |
Always let the surfaces dry before you move on. If you see any rust or damage, fix it now. A clean, smooth surface helps your new panels last longer and work better.
Note: Never use harsh chemicals that could damage the polyurethane or metal parts. Stick to the recommended cleaners.
Align and Place Panels
Now you’re ready to start placing the new panels. Lay out each panel in the right spot, following your deck plan. Make sure the apertures (holes) face the correct direction for material flow. If your panels have arrows or markings, line them up as shown in your plan.
Getting the alignment right is key. Here are some common techniques used in the field:
| Technique | Key Details |
|---|---|
| Tension-Type Installation | Ensures a tight fit; uses laser rangefinder for alignment; employs hydraulic systems for tensioning. |
| Inlay Mount (Dovetail Groove) | Needs precise groove machining; uses epoxy resin and fiberglass for sealing. |
| Bead Connection & Bolt-On Methods | Focus on bolt spacing and torque for a secure connection. |
For most jobs, you’ll line up the holes in the panel with the holes in the deck. Press the panel down so it sits flat on the supports. If you use a tension-type system, check that the panel is tight and straight. For inlay mounts, make sure the panel fits snugly in the groove. If you use bolts or clips, get them ready for the next step.
Pro Tip: Work with a partner if the panels are large or heavy. This helps you keep the panels straight and makes the job safer.
Take your time with this step. Good alignment means better screening and longer panel life. If you rush, you might end up with gaps or uneven wear.
If you want to know how to install polyurethane screen panels the right way, always double-check your alignment before fastening anything down. This step sets the stage for a smooth and trouble-free installation.
Fasten Panels (Tension Bolts, Screws, Clips)
Now you have your panels lined up and ready. It’s time to lock them in place. You want each panel to stay put, even when your screen is shaking hard. The way you fasten the panels depends on your system. Most screens use tension bolts, screws, or clips. Here’s how you can do it right:
- Start at One End: Pick a corner and begin there. This helps you keep the panels straight as you move across the deck.
- Insert Fasteners: Drop bolts, screws, or clips into the holes. Make sure each one lines up with the deck frame.
- Tighten Evenly: Use a wrench or socket to tighten each fastener. Don’t crank one side all the way down before the others. Go back and forth, tightening a little at a time. This keeps the panel flat and avoids bending.
- Check for Gaps: After you tighten, look for any spaces between the panel and the deck. If you see a gap, loosen the fastener, adjust the panel, and try again.
- Repeat for Each Panel: Move to the next panel and repeat the steps. Always double-check your work as you go.
Tip: If you use tension bolts, make sure you reach the right torque. Too loose, and the panel might lift. Too tight, and you could crack the polyurethane.
Here’s a quick table to help you remember which fastener goes with which system:
| Fastener Type | Common Use | Tool Needed |
|---|---|---|
| Tension Bolts | Modular/tensioned panels | Wrench/socket |
| Screws | Bolt-on panels | Screwdriver |
| Clips | Quick-swap systems | Pliers or hands |
If you want to know how to install polyurethane screen panels the right way, always check your fasteners before you move on. A loose bolt can cause a lot of trouble later.
Join Panels with Adhesive
Some screens need you to join panels with adhesive. This step helps seal the joints and keeps material from leaking through. Not every system uses glue, but if yours does, here’s what you need to do:
- Pick the Right Adhesive: Use only the adhesive your supplier recommends. Some glues work better with polyurethane than others.
- Apply Evenly: Squeeze a thin, even line of adhesive along the edge where two panels meet. Don’t use too much. Extra glue can squeeze out and make a mess.
- Press Panels Together: Push the panels tight against each other. Hold them for a few seconds so the adhesive can grab.
- Clean Up: Wipe away any glue that oozes out. Use a rag or a scraper, but be gentle so you don’t damage the panel.
- Let It Cure: Give the adhesive time to set. Check the label for how long you need to wait before running the screen.
Note: If you skip this step or use the wrong glue, you might get leaks or loose panels. Always follow the instructions for your adhesive.
Joining panels with adhesive is a key part of how to install polyurethane screen panels, especially if you want a tight seal and long-lasting fit.
Verify Seating and Sealing
You’re almost done! Before you call the job finished, you need to check that every panel sits flat and seals tight. This last step can save you from big problems later.
- Look for Gaps: Walk around the deck and look at every edge. You shouldn’t see any spaces between the panels or between the panel and the frame.
- Press Down: Push on each panel with your hand or a rubber mallet. The panel should not rock or move. If it does, check your fasteners again.
- Check Seals: Make sure the side and end seals touch the panels all the way along. If you see daylight or feel air moving, you might need to adjust or replace a seal.
- Test the Fit: Try to slide a thin piece of paper between the panel and the frame. If it slips in, you have a gap that needs fixing.
Pro Tip: Take a flashlight and shine it along the seams. Light will show you any spots you missed.
If you want to master how to install polyurethane screen panels, never skip this final check. Good seating and sealing mean less downtime, better screening, and longer panel life.
Now you’re ready to move on to start-up and testing. You’ve done the hard part—your screen is almost ready to go!
Start-Up and Testing
Run Empty and Inspect
You finished installing your polyurethane screen panels. Now it’s time to see how they perform. Before you add any material, always run your vibrating screen empty. This step helps you spot problems early and keeps your team safe.
Start by turning on the screen with no load. Watch and listen closely. You want to see smooth movement and hear only normal operating sounds. If you notice any rattling, banging, or odd vibrations, stop the machine right away. These signs can mean a panel is loose or out of place.
Walk around the screen while it runs. Look for these things:
- Panels sitting flat with no rocking or lifting
- No visible gaps between panels or along the edges
- Seals touching the panels all the way along
- No dust or fines leaking out
Tip: Use a flashlight to check under the panels and along the sides. Light helps you spot small gaps or leaks that you might miss.
If you see anything wrong, shut down the screen and fix it before you move on. Running empty gives you a safe way to catch mistakes before they turn into bigger problems.
Check Fasteners and Movement
After your first empty run, check every fastener. Loose bolts, screws, or clips can cause panels to shift or even break during operation. Use your wrench or socket to make sure each fastener is tight. Don’t forget the corners and the middle of each panel.
Next, check for movement. Press down on each panel with your hand. The panel should not move or bounce. If you feel any movement, tighten the fasteners again. Sometimes, panels settle into place after the first run. A quick check now saves you from trouble later.
Here’s a simple checklist for this step:
- Tighten all bolts, screws, and clips
- Press on each panel to check for movement
- Look for any new gaps or loose seals
- Listen for unusual sounds during a short test run
Note: If you hear squeaks or see dust escaping, stop and inspect the panels again. Small issues can lead to big repairs if you ignore them.
When you finish these checks, you can feel confident that your screen is ready for full operation. Taking a few extra minutes now helps you avoid downtime and keeps your screening process running smoothly.
Troubleshooting and Common Mistakes
Wrong Panel Layout
You might think any panel will fit anywhere, but that’s not true. If you mix up the layout, your screen won’t work as it should. Putting panels in the wrong spots can mess up your screening results. You may see uneven material flow, poor separation, or even damage to your panels. Sometimes, the wrong layout causes errors that make your data unreliable or your product quality drop.
- You could see strange patterns in your screened material.
- The screen might miss fine particles or let oversized pieces through.
- Your throughput could drop, and you might notice more downtime.
Tip: Always double-check your deck plan and panel orientation before you start. If you’re unsure, ask your supplier for a layout drawing.
Poor Seating or Gaps
If your panels don’t sit flat or you leave gaps, you’ll run into trouble fast. Gaps let material leak through, which can cause wear on your frame and panels. You might also see dust or fines escaping, making a mess and lowering your screening efficiency.
Here’s a quick table to help you spot and fix poor seating or gaps:
| Key Point | Explanation |
|---|---|
| Proper Installation | Make sure each panel sits tight against the frame. No rocking or movement. |
| Tensioning | Tighten panels evenly using the right tools. This keeps them snug and secure. |
| Regular Checks | Inspect your panels at every shift. Catch small problems before they grow. |
If you skip these steps, panels can shift during operation. Misaligned or unevenly tensioned panels often lead to edge wear and even frame damage. Sometimes, mixing old and new panels creates uneven flexing, which adds stress and causes cracks.
Note: Always clean the deck before installing new panels. Dirt or leftover adhesive can stop panels from sitting flat.
Worn Supports
Your panels need a strong base. If the supports under your panels are worn, bent, or rusty, you’ll see problems right away. Panels might not sit flat, and you could get uneven loading. This puts extra stress on both the panels and the frame. Over time, you’ll notice cracks, early wear, or even broken panels.
Here’s what you should look for:
- Cracks or rust on rails and crown bars
- Missing or loose support pieces
- Uneven or sagging areas under the panels
If you spot any of these issues, fix them before you install new panels. Neglecting the support frame can lead to premature failure and more downtime. Regular inspections help you catch these problems early.
Pro Tip: Never ignore small issues with your supports. Fixing them right away saves you time and money later.
By watching out for these common mistakes, you keep your screen running smoothly and your panels lasting longer.
Sealing Issues
Sealing problems can sneak up on you fast. If you miss a bad seal, you might see leaks, lost material, or even faster wear on your new panels. You want to keep everything tight so nothing slips through the cracks. Let’s talk about how you can spot sealing issues and fix them before they cause trouble.
Why do seals matter?
Seals keep your screened material where it belongs. They stop dust, fines, and water from leaking out the sides or ends of your screen deck. Good seals also protect your frame and panels from extra wear. If you ignore a bad seal, you might see:
- Piles of dust or fines under the screen
- Wet spots or sticky buildup around the frame
- Panels wearing out faster along the edges
- More cleaning and maintenance work
Tip: If you see dust clouds or wet streaks near your screen, check your seals right away. That’s usually the first sign something’s wrong.
How do sealing issues start?
Seals can fail for a few reasons. Sometimes, the seal gets old and brittle. Other times, you might install a panel and pinch or stretch the seal by mistake. Dirt and old glue can also stop a new seal from sticking. Here are some common causes:
| Cause | What You’ll Notice |
|---|---|
| Old or brittle seal | Cracks, hard spots, or missing bits |
| Poor installation | Gaps, loose edges, or pinched seals |
| Dirty surfaces | Seal won’t stick or falls off |
| Wrong seal type | Doesn’t fit or leaves open spaces |
How can you fix sealing issues?
You don’t need fancy tools to fix most sealing problems. You just need to pay attention and take your time. Here’s what you can do:
- Inspect every seal: Look for cracks, gaps, or spots where the seal doesn’t touch the panel.
- Clean the area: Wipe away dust, dirt, and old glue before you put in a new seal.
- Use the right seal: Always match the seal to your screen model. Don’t try to force a seal that’s too big or too small.
- Press seals firmly: Make sure the seal sits flat and touches the panel all the way along.
- Check after running: After you start the screen, look for leaks or dust. If you see any, stop and fix the seal.
Pro Tip: Keep a few spare seals in your toolbox. Swapping out a bad seal right away saves you from bigger problems later.
Sealing issues might seem small, but they can cause big headaches if you ignore them. Take a few minutes to check your seals every time you change panels. You’ll get better screening, less mess, and longer panel life. That’s a win for you and your whole team!
Maintenance Tips
Keeping your polyurethane screen panels in top shape doesn’t have to be hard. You just need a good routine and a sharp eye. Let’s break down what you should do to keep your panels working their best.
Inspection Points
You want to catch problems before they get big. Regular checks help you spot cracks, loose panels, or odd wear patterns. Here’s a simple table to guide your inspection schedule:
| Inspection Point | Frequency |
|---|---|
| Visual inspections for cracks | Daily |
| Tension verification | Monthly |
| Wear pattern analysis | Quarterly |
Look over your panels every day. Check for cracks or any signs of damage. Once a month, grab your tools and check the tension. Every few months, study the wear patterns. This helps you see if something is off with your setup.
Tip: Keep a logbook for your inspections. Write down what you find. This helps you spot trends and plan repairs before things break.
Cleaning Guidance
Clean panels last longer and work better. Dirt and debris can hide damage or cause extra wear. Here’s how you can keep your panels clean and in good shape:
- Clean regularly. Use a soft brush or a vacuum to remove dirt and debris from the panels.
- Check for damage while you clean. Look for holes, tears, or worn spots in the mesh.
- Replace damaged sections right away. Don’t wait for a small problem to get worse.
You don’t need fancy tools for cleaning. A simple brush and a little time do the trick. If you see something wrong, fix it fast.
Note: Never use harsh chemicals or metal tools. These can scratch or weaken the polyurethane.
Monitoring Wear
You can’t stop wear, but you can manage it. Start with regular visual checks. Look for thinning spots, holes, or areas that look different from the rest. These signs tell you where the panel is wearing out.
Try running a sieve analysis now and then. This test shows how well your panels are screening material. If you see more oversized pieces getting through, your panels might be wearing down.
Some sites use digital tools to track wear. Remote monitoring software can give you real-time updates on your screen’s health. This helps you plan maintenance and avoid surprises.
Scheduled maintenance keeps your panels working longer. It also keeps your team safe. When you stick to a routine, you cut down on breakdowns and keep your operation running smooth.
Pro Tip: Set reminders for your checks and cleaning. A little effort now saves you time and money later.
Taking care of your polyurethane screen panels isn’t just about fixing problems. It’s about staying ahead. With these tips, you’ll get the most life and performance out of every panel.
Troubleshooting Table
Sometimes, problems happen with your polyurethane screen panels even if you try your best. Don’t worry because most problems are easy to fix. Use this table to find issues quickly and get your screen working again.
| Issue | Likely Cause | What You’ll Notice | Fix |
|---|---|---|---|
| Panel lifting | Loose fasteners, wrong tension | Panels pop up or move during operation | Tighten or replace fasteners, check torque |
| Broken fasteners | Over-tightening, old hardware | Missing bolts, clips, or screws | Replace with new fasteners, use correct torque |
| Premature wear | Poor seating, worn supports | Panels wear out faster than expected | Reseat panels, repair supports, check alignment |
| Bypass at sides | Damaged or missing seals | Material leaks at edges, dust under screen | Replace seals, ensure proper fit |
| Carryover | Blinded apertures, wrong panel size | Oversized material stays on screen | Clean panels, check aperture size |
| Blinding | Wet or sticky material, fine particles | Holes clog up, reduced screening | Clean panels, use anti-blinding panels |
| Uneven wear | Misaligned panels, uneven supports | Some panels wear faster than others | Realign panels, fix supports |
| Excessive noise | Loose panels, worn deck parts | Loud rattling or banging sounds | Tighten panels, inspect and repair deck |
Tip: If you hear a strange noise or see dust in a new spot, stop and check your panels right away. Small problems can turn into big repairs if you ignore them.
Quick Troubleshooting Steps
- Look and Listen: Walk around your screen while it is running. Use your eyes and ears to find problems.
- Check Fasteners: Loose bolts or clips cause most panel problems. Tighten these first.
- Inspect Seals: If you see leaks or dust, look at the seals. Change any that are worn or broken.
- Clean Regularly: Dirt and sticky stuff can hide damage. Clean your panels often so you can check them easily.
Note: Keep a simple repair kit close by. Extra fasteners, seals, and a wrench can help you fix things fast when something goes wrong.
If you follow these steps and use the troubleshooting table, you will fix most problems before they slow you down. Stay alert, act quickly, and your screen will keep working well for you!
Conclusion
You now know how to install polyurethane screen panels the right way. Start with good prep, use the right tools, and check your work. Keep your panels tight and clean for the best results.
Need help picking panels? ANPENG team can match you with the best fit for your job.
FAQ
How often should I inspect my polyurethane screen panels?
You should check your panels every day. Look for cracks, loose fasteners, or worn spots. Regular inspections help you catch problems early and keep your screen running smoothly.
Can I reuse old fasteners when installing new panels?
You can reuse fasteners if they look good and work well. If you see rust, wear, or damage, swap them out for new ones. Good fasteners keep your panels secure.
What should I do if a panel keeps lifting during operation?
First, stop the machine. Check the fasteners and tighten them. If the problem continues, look for worn supports or wrong panel placement. Fix these issues before restarting.
Do I need special tools to install polyurethane screen panels?
Most jobs need basic tools like wrenches, screwdrivers, and a rubber mallet. Some systems may need a pry bar or adhesive. Always check your panel supplier’s instructions for any special tools.
How can I prevent blinding or clogging of the screen holes?
Clean your panels often. Use anti-blinding panels if you screen wet or sticky material. You can also tap the panels gently to loosen stuck material during shutdowns.
Is it okay to mix old and new panels on the same deck?
Try not to mix them. Old panels may wear differently and cause uneven screening. If you must mix, place new panels where wear is highest and check them more often.
What’s the best way to clean polyurethane panels?
Use a soft brush or vacuum. Avoid harsh chemicals or metal tools. Clean panels last longer and help you spot damage early.