How to screen sand and gravel starts with knowing your project needs. You want clean material for foundation work, driveways, drainage, or landscaping. When you learn how to screen sand and gravel, you make sure your base stays stable and your paths look neat. You can use simple tools or bigger machines, but how to screen sand and gravel always means sorting for the right size. If you need to screen landscape rock or tackle rock screening, you follow the same steps. The screening process helps you separate sand and gravel for parking areas or equipment pads. You see better results when you focus on how to screen sand and gravel for each job.
Key Takeaways
- Know what your project needs before you start screening. Figure out the right size and type of material for your job.
- Pick the best screening method for your material. You can use vibrating screens, roller screens, or trommel screens. Each one works best with certain materials.
- Set clear goals for the size you want your material to be. When you know the size you need, screening is easier and works better.
- Get your feed material ready before screening. Break up any clumps and take out big pieces. This helps the screening go smoothly.
- Choose the right screen media and mesh size for your material. This stops clogging and helps separate the material well.
- Check and take care of your screens often. Finding problems early can save you time and money later.
- Make sure you spread the material evenly on the screen. This helps the screening work better and gives you more output.
- Watch and change things like the screen angle and stroke. Small changes can make screening work much better.
What Is Sand and Gravel Screening?
Screening Defined
When you hear about screening, think about sorting. You take a mix of sand, gravel, and maybe some rocks, and you separate them by size. This step is a big part of making sure you get the right material for your project. You can use different machines or even simple hand tools, but the goal stays the same—get clean, uniform pieces. Here’s a quick look at some common screening methods:
| Screening Method | Description |
|---|---|
| Vibrating Screens | Use vibration to separate materials by size, giving you a consistent final product. |
| Roller Screens | Use rotating rollers with gaps to let smaller particles fall through. |
| Rotary Screens | Use a spinning drum to handle large amounts of coarse material. |
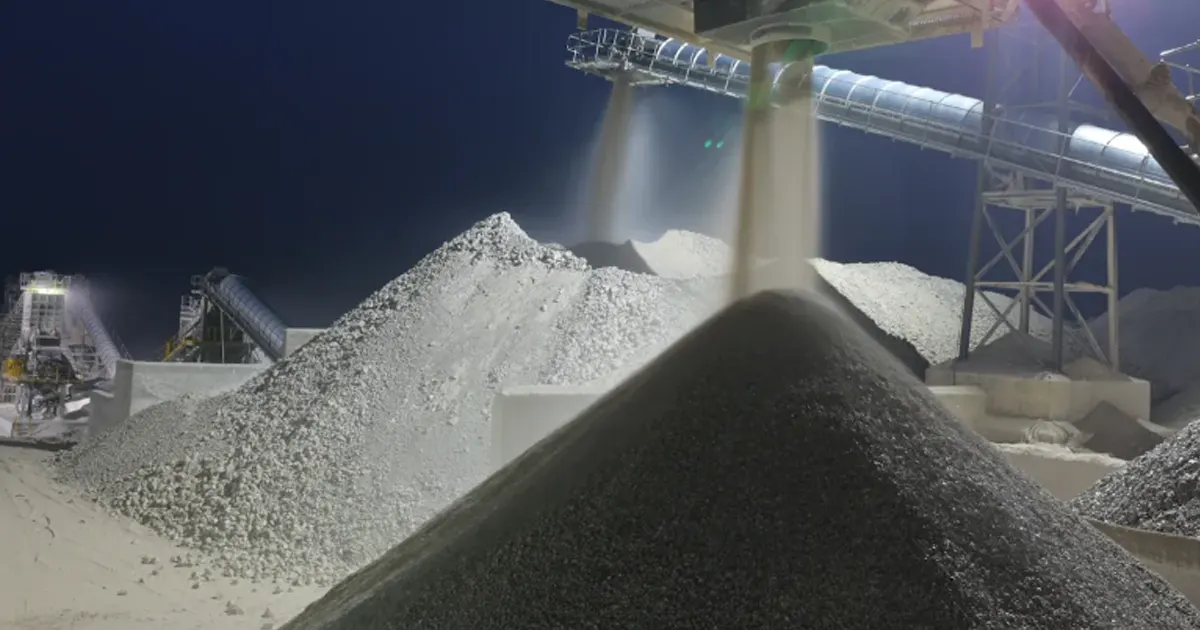
Screening separates your mix into different size categories. This step keeps your materials up to standard and helps you meet construction needs. When you screen properly, your finished product lasts longer and holds up better.
Purpose of Screening
You want your sand and gravel to work well for your project. The screening process helps you get there. For example, you might need to remove fine dust from gravel or clean river rock for a garden bed. Take a look at how screening helps with different materials:
| Material Type | Primary Objectives | Benefits |
|---|---|---|
| Gravel | Remove fines, get even sizing | Better drainage |
| River Rock | Clean gently, remove debris | Looks nicer in landscaping |
| Crushed Granite | Remove dust, keep sizes uniform | Great for driveways and pathways |
Screening landscape rock can boost drainage by up to 40% compared to using unscreened material. That means your outdoor projects last longer and work better.
Types of Screening (Scalping, Sizing, Finishing)
You will see three main types of screening in action. Each one has a different job:
| Process Type | Description | Precision Level |
|---|---|---|
| Scalping | Handles big, bulky stuff first. Good for sorting before the next step. | Less precise |
| Sizing | Makes sure you get a clean, even product. Used in many projects. | More precise |
| Finishing | Gives you a specific size for the end product. Used at the final stage. | Highly precise |
- Scalping: You use this when you want to get rid of the biggest pieces right away. It’s not about being exact, just about clearing out the chunks.
- Sizing: Here, you focus on getting a clean, even mix. This step is more exact and helps you get the right material for your job.
- Finishing: This is the last step. You want a very specific size, so you use finishing to get it just right.
When you follow the right process, you make sure your sand and gravel are ready for anything—whether you’re building a driveway, laying a foundation, or creating a garden path.
How to Screen Sand and Gravel: Step-by-Step Screening Process
Set Target Gradations
Before you grab your tools or start up any machines, you need to know what size material you want. This is your target gradation. Think about your project. Do you need fine sand for a paver base? Are you after coarse gravel for a driveway? Each job calls for a different mix of sizes.
You can check project specs or talk to your supplier. Write down the size range you need. For example, you might want gravel between 3/8″ and 3/4″, or sand that passes through a 1/8″ mesh. When you set clear targets, you make the rest of the screening process much easier.
Tip: If you’re not sure about the right size, ask a local contractor or look up standards for your project type.
Prepare Feed Material
Now, get your raw material ready. You want to break up any clumps and remove big chunks that don’t belong. If your material has a lot of clay or sticky soil, you’ll need to loosen it up. You can use tools like shovels, rakes, or even a garden hoe for small batches. For bigger jobs, machines like log washers or rotary scrubbers work well. These tools help break apart clay-bound material and free up the individual particles.
If you see a lot of fine dirt or silt, try pre-screening. This means you run the material over a coarse mesh first to knock out the smallest bits. Pre-screening keeps your main screen from clogging and helps your tools last longer. It also stops you from over-crushing the material, which saves time and energy.
Note: Clean, loose feed material makes the screening process smoother and gives you better results.
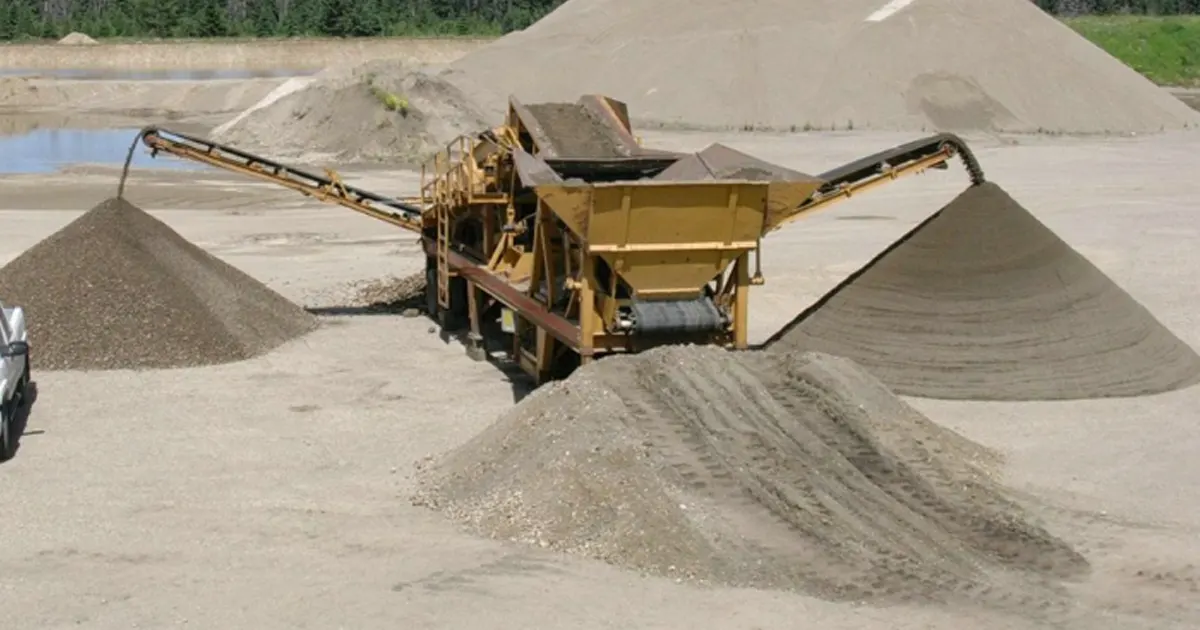
Choose Screening Equipment
You have lots of options when it comes to screening tools. The right choice depends on your material, the amount you need to process, and your budget. Here’s a quick look at common equipment:
| Screening Method | Description | Best Use Case |
|---|---|---|
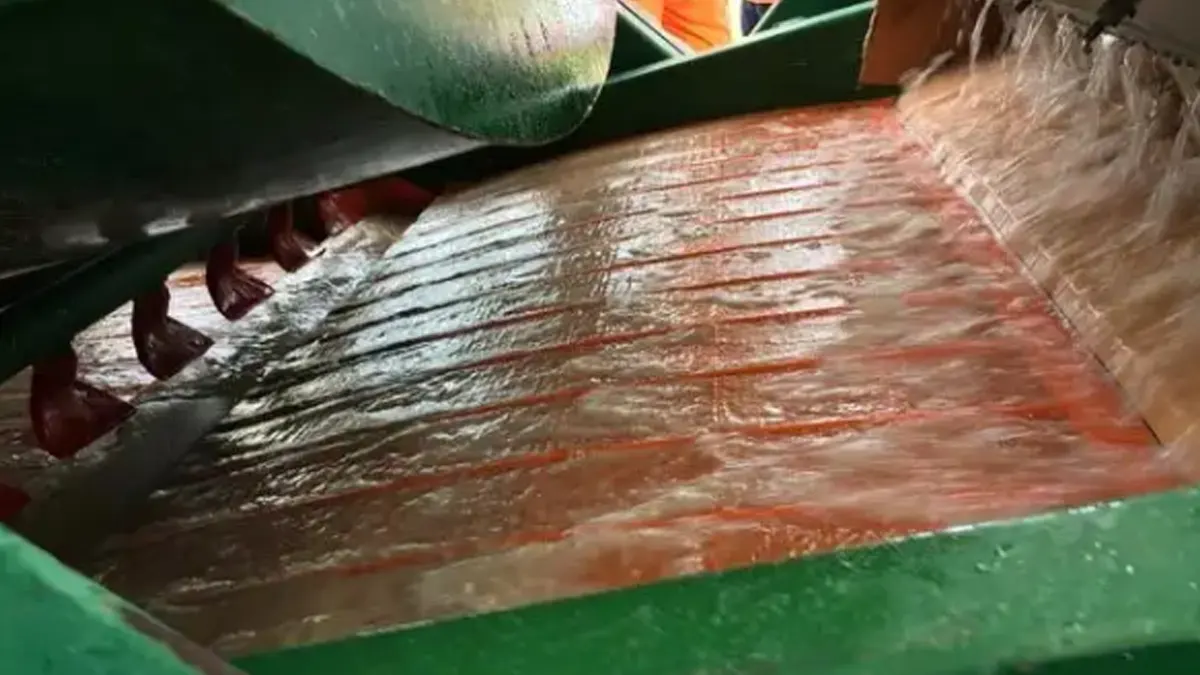
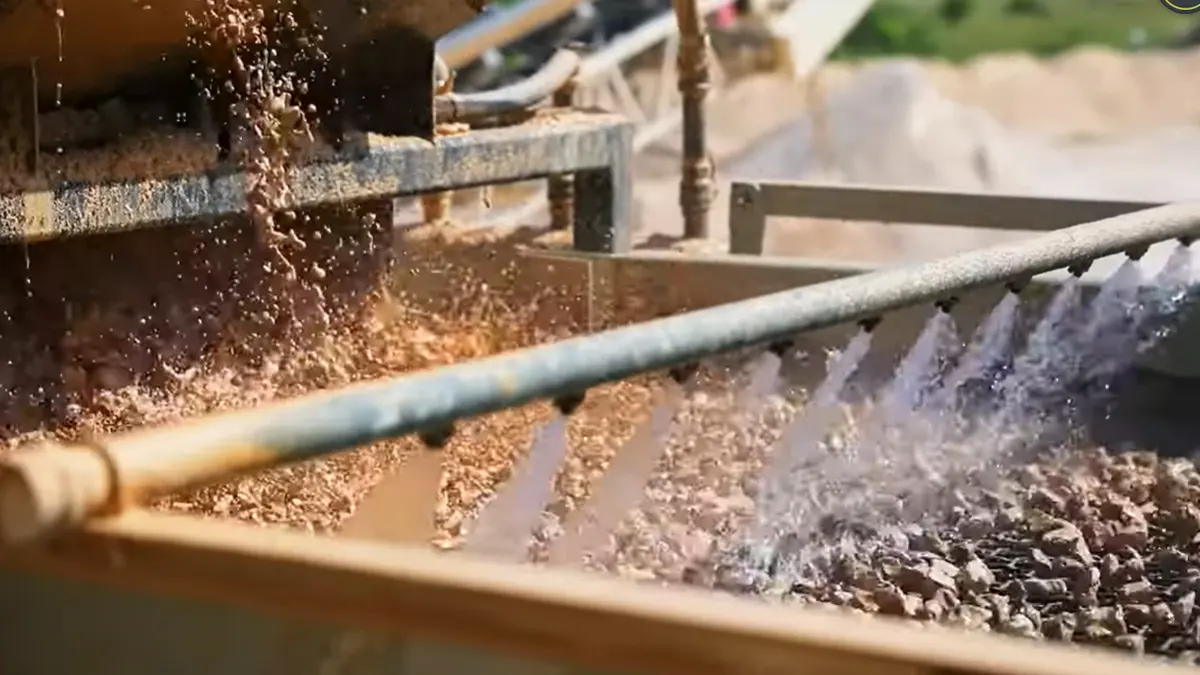
| Dry Screening | Uses airflow and vibration to separate particles without water. | Free-flowing materials, high-volume applications |
| Wet Screening | Adds water to help separate sticky or wet material. | Materials with high moisture or that clump easily |
| Vibrating Screens | Use controlled vibration for efficient separation. | Most sand and gravel jobs, multiple deck options |
If you’re working on a small project, you can build a simple sifter with wood and mesh. For bigger jobs, look at vibrating screens or rotary trommels. Wet screening works best if your material is damp or sticky.
- Dry screening is fast and works well for most gravel and sand.
- Wet screening helps when you have tough, sticky material.
- Vibrating screens handle a wide range of jobs and give you lots of control.
Pick the equipment that matches your material and your target gradation. The right tools make your step-by-step screening process more efficient and give you a better final product.
Select Screen Media and Mesh Size
You want to pick the right screen media and mesh size for your job. Screen media is the material stretched across your frame. It can be woven wire, polyurethane, or self-cleaning panels. Mesh size means the size of the openings in your screen. This choice decides what stays on top and what falls through.
Here’s why mesh size matters:
- The mesh size controls which particles pass through. If you want fine sand, use a smaller mesh. For bigger gravel, use a larger mesh.
- The right mesh size keeps your screen from clogging. Clogs slow down your process and make you work harder.
- When you match mesh size to your target output, you keep your operation running smoothly. You get the right amount of material without delays.
Tip: For DIY projects, you can use hardware cloth or chicken wire for coarse jobs. For fine sand, look for mesh with smaller openings. Always check your mesh for damage before you start.
If you run a larger operation, you might use heavy-duty woven wire or polyurethane panels. These last longer and handle more material. Always match your screen media to the type of material and the amount you need to process.
Adjust Operating Parameters
Now, you need to fine-tune your screening setup. Adjusting the right settings helps you get the best results. Here’s what you should look at:
- Set the speed so material moves at the right rate. Too fast, and you miss small pieces. Too slow, and you waste time.
- Watch the bed depth. If the layer of material is too thick, fine particles can’t reach the mesh. Try to keep the bed depth four to six times the opening size at the discharge end.
- Change the vibration frequency and amplitude. Higher speed and less stroke work best for fine screening. Lower speed and more stroke help with coarse separation.
- Adjust the deck angle. A steeper angle moves material faster, but you might lose accuracy. A flatter angle gives you better separation but takes longer.
Note: Always check your machine’s manual before making changes. Small tweaks can make a big difference in how well your screen works.
Inspect Results
You want to make sure your screened material meets your needs. Inspection is a key part of the process. Here are some ways you can check your results:
| Method Description | Advantages |
|---|---|
| Local sampling (grab a handful from different spots) | Fast and easy for small jobs |
| Hardware system with vibrating disk (for bigger setups) | Spreads out sand and gravel for even sampling |
| Software for gradation detection (industrial use) | Checks grain size automatically and saves time |
For most DIY jobs, you can scoop samples from your finished pile and check the size by hand. For larger operations, you might use machines that sample and measure the material for you. These systems can spot problems early and help you fix them before they get worse.
Tip: Check your output often, especially when you start a new batch or change your setup. Regular checks help you catch mistakes and keep your project on track.
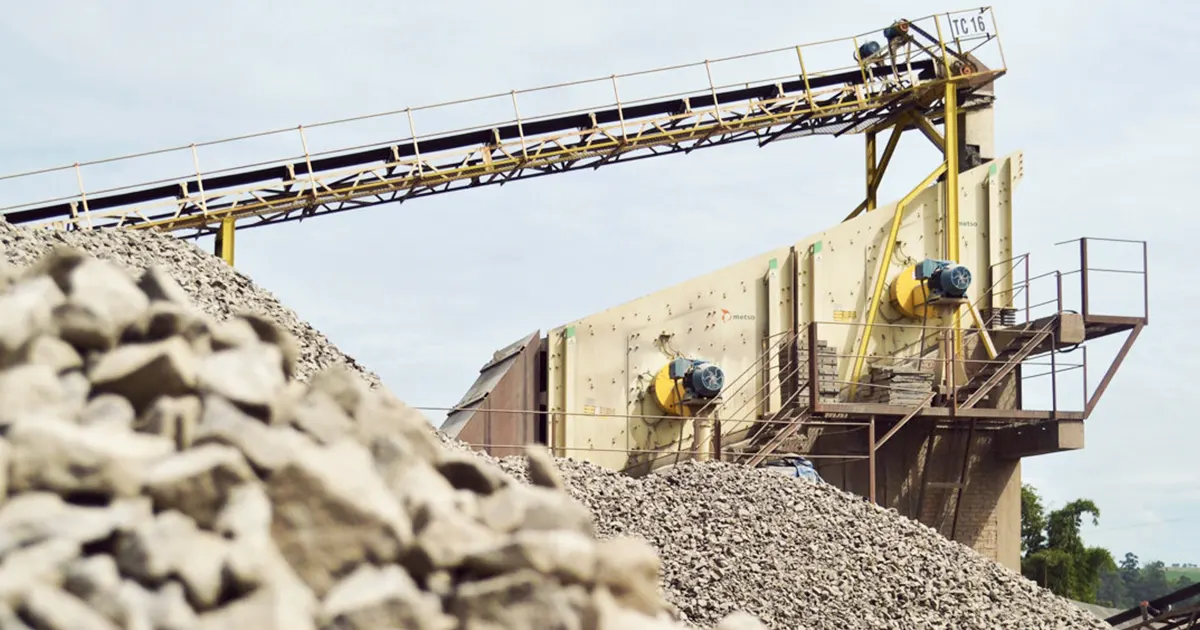
Screening Equipment Overview
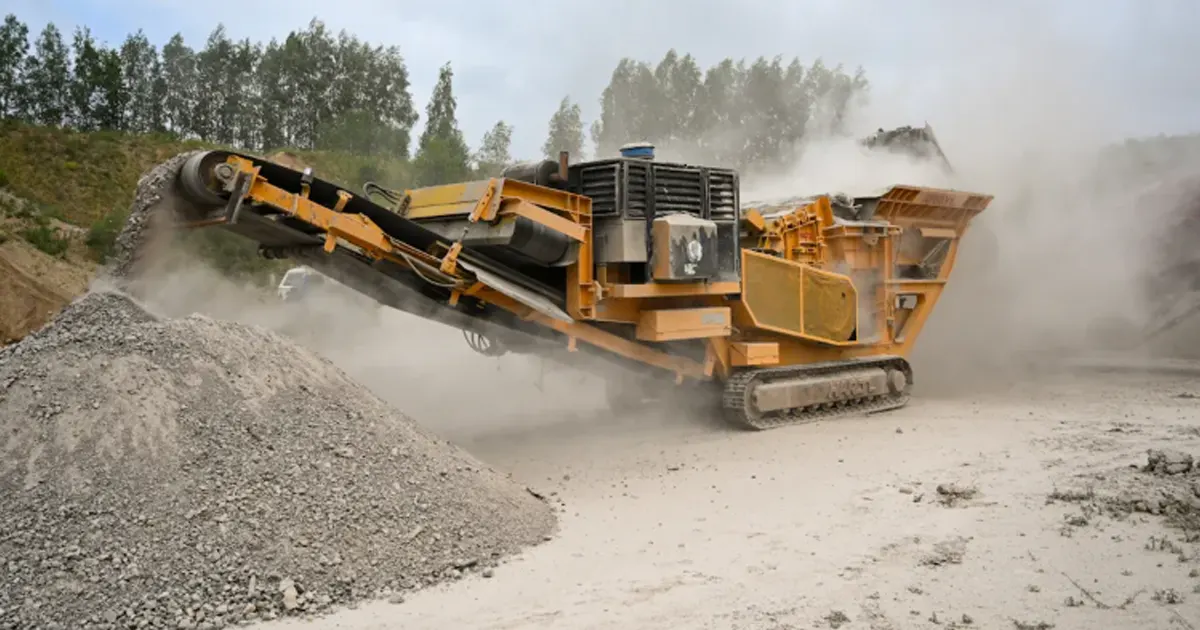
Vibrating Screens
Suitable Materials
You can use vibrating screens for many types of sand and gravel. These machines handle dry, fine materials really well. If you need to sort crushed stone or clean up river rock, vibrating screens work fast and give you a consistent product. They also handle larger batches, so you can process more material in less time.
Pros and Cons
Let’s look at the ups and downs of this equipment:
- Pros
- High efficiency, usually between 85% and 95%.
- Works across multiple decks, so you can sort several sizes at once.
- Great for dry materials and fine sand.
- Recovers more fine sand, with rates up to 95%.
- Cons
- Needs more maintenance because parts wear out.
- Uses more energy compared to other equipment.
- Not the best choice for sticky or wet materials.
If you want to boost your throughput, vibrating screens can process up to 50 tons per hour. That’s double the industry average for similar equipment.
Typical Uses
You’ll see vibrating screens in big sand and gravel operations. They help you make clean aggregates for construction, landscaping, and drainage. You can also use them for dewatering, which means removing water from wet material. If you run a quarry or a large plant, vibrating screens are a solid choice.
Trommel Screens
Suitable Materials
Trommel screens shine when you deal with sticky or wet material. The rotating drum helps break up clumps and keeps the screen from clogging. You can use trommel screens for compost, topsoil, and moist sand. They also work well for gravel with lots of clay.
Pros and Cons
Here’s what you need to know:
- Pros
- Handles wet and sticky materials without trouble.
- Needs less maintenance and lasts longer.
- Simple design makes it easy to use.
- Cons
- Lower efficiency, usually between 75% and 85%.
- Not as fast as vibrating screens for dry material.
- Can take up more space on your site.
Trommel screens are tough and durable. You won’t spend much time fixing them, so you can focus on your project.
Typical Uses
You’ll find trommel screens in recycling yards, landscaping companies, and soil processing plants. If you need to screen material with lots of moisture, this equipment is your best bet. Trommel screens also help you clean up gravel for garden beds and playgrounds.
Scalping Screens
Suitable Materials
Scalping screens tackle the big stuff first. You use them to remove oversized rocks and debris before you move on to finer screening. They work well for raw sand, gravel, and even construction waste.
Pros and Cons
Check out these points:
- Pros
- Protects other equipment by removing large chunks early.
- Keeps your screening process running smoothly.
- Handles heavy loads without slowing down.
- Cons
- Not precise—just clears out the big pieces.
- Doesn’t sort material into exact sizes.
- May need extra equipment for finishing.
Scalping screens are a smart first step. They help you avoid jams and keep your main screens from wearing out too fast.
Typical Uses
You’ll use scalping screens at the start of your screening line. They’re common in quarries, mining sites, and large construction projects. If you want to keep your equipment safe and your process efficient, add a scalping screen to your setup.
Grizzly Rock Screens
Suitable Materials
Grizzly rock screens help with tough, chunky material. They work best with raw sand, gravel, and rocks with big pieces. If you have heavy loads or rough material, these screens can handle it. You can use them for mining, construction, or recycling jobs. They are great for separating big rocks from sand and gravel before using other equipment.
Grizzly rock screens do more than sort. They protect your other equipment by taking out things that could cause jams or damage.
Pros and Cons
Let’s look at what’s good and not so good about grizzly rock screens. It’s smart to know this before you add them to your setup.
Pros:
- Handles big rocks and debris easily.
- Keeps your main screening equipment safe from damage.
- Simple design means less maintenance and fewer moving parts.
- Works well in tough, heavy-duty places.
Cons:
- Doesn’t give you exact sizing—just takes out the big stuff.
- You may need more equipment for finer screening.
- Can use up more space than other screens.
- Not the best for projects that need exact gradations.
If you have a small DIY project, you can build a basic grizzly screen with a strong frame and metal bars. This saves money and protects your other equipment.
Typical Uses
Grizzly rock screens are used to scalp material before crushing or finer screening. You’ll see them at mining sites, construction areas, and recycling yards. These screens help your operation by removing big unwanted pieces early.
Here’s a quick look at where grizzly rock screens work best:
| Scenario | Effectiveness |
|---|---|
| Mining | Takes out unwanted material, keeps equipment clean and ready. |
| Construction | Removes big contaminants, protects equipment that comes next. |
| Recycling | Handles tough, rough material, stops damage to other screens. |
| Heavy-duty use | Built for tough jobs, great for scalping before crushing. |
You can use grizzly rock screens for big or small projects. If you want to keep your equipment safe and your screening process smooth, grizzly screens are a good choice. They help you avoid jams, lower wear, and make sure only the right material moves forward.
Tip: For DIY jobs, try making a simple grizzly screen with angle iron and rebar. Put it over a wheelbarrow or bin. This helps save your main equipment from extra wear and tear.
Choosing Screen Media
Woven Wire Screens
Woven wire screens are common in sand and gravel jobs. These screens use wires that cross each other to make openings. If you need to sort fine materials, woven wire is a good choice. You can change panels fast if you want a new size. Woven wire screens help you get sharp cuts and clean results. They do not last as long as other screens when the job is rough, but they keep your sizes right.
Here’s how woven wire and polyurethane panels compare:
| Screen Type | Durability in Abrasive Conditions | Precision Screening | Suitable Applications |
|---|---|---|---|
| Woven Wire Screens | Not as tough | Very precise | Fine screening materials |
| Polyurethane Panels | Tougher | Pretty precise | Wet screening, rough materials |
Tip: Pick woven wire screens if you need to sort fine sand or want to change mesh sizes often.
Polyurethane Panels
Polyurethane panels are strong and last a long time. You can use them for jobs where other screens wear out fast. Polyurethane lasts about twice as long as many other products. These panels resist damage, so you spend less time fixing them. They work best for wet or rough materials. You get pretty good sorting, which works for most building and mining jobs.
Look at this table to see how common screen media compare:
| Type of Screen Media | Lifespan and Characteristics |
|---|---|
| Polyurethane | Lasts long, tough, resists damage. Lasts about twice as long as injection-molded products. |
| Rubber | Thick, quiet, handles big hits. Good for large top sizes. |
| Perforated Plates | Can be made to fit, heavy-duty, comes in different toughness levels. |
Note: Polyurethane panels help you screen rough materials without stopping for repairs.
Self-Cleaning Screens
Self-cleaning screens make your work easier. These screens use wires or shapes that move and bend. This keeps the holes clear, even with sticky or wet materials. You do not have to stop and clean the screen by hand. That means you keep working without losing time.
Here’s what self-cleaning screens give you:
| Benefit | Explanation |
|---|---|
| Less Clogging | Stops clogging, so you work smoother and waste less time. |
| Keep Working | No need to clean by hand, so you keep production going. |
| More Output | Keeps your system running, so you get more done. |
If you want to keep your materials moving and avoid delays, self-cleaning screens are a smart pick.
You can choose the best screen media by thinking about your materials, your job site, and how often you want to change screens. Each type has its own strengths, so match your choice to what your project needs.
Picking Mesh Size and Wire Diameter
Choosing the right mesh size and wire diameter can make or break your screening results. You want your screen to last, but you also want it to do its job well. Let’s break down what you need to think about before you pick.
Particle Size
Start with the size of the material you want to separate. Mesh size means the number of openings per inch. If you want to catch fine sand, you need a higher mesh size with smaller holes. For bigger gravel, go with a lower mesh size and larger openings.
- The screen opening should always be bigger than the largest particle you want to pass through.
- If you bump up the aperture size by about 10%, you keep the material flowing and avoid clogging.
- Higher mesh sizes give you more holes and better accuracy for tiny particles.
- Lower mesh sizes let more material through but don’t filter as tightly.
Tip: Write down the size of your target material before you buy your screen. This helps you avoid mistakes and wasted money.
Material Shape and Moisture
Not all sand and gravel look the same. Some pieces are round, some are sharp, and some are sticky. Wet or sticky material can block your screen if you don’t plan ahead.
- Round particles move through screens more easily than flat or odd-shaped ones.
- Sticky or wet material needs a slightly bigger opening to keep things moving.
- If you screen wet sand, try a self-cleaning screen or a mesh with wider openings.
Wire diameter matters here, too. Thicker wires last longer when you screen rough or sharp material. Thinner wires work for light-duty jobs and can save you money on maintenance if you don’t need heavy-duty strength.
Note: Thicker wires resist wear but can cost more and may not flex as much. Thinner wires are cheaper and easier to replace, but they wear out faster.
Deck Position
Where you place your screen deck changes what mesh size and wire diameter you need. The top deck takes the hardest hits from big rocks and debris. The lower decks handle finer material.
- Use thicker wires and bigger mesh on the top deck to handle impact and protect the lower screens.
- On lower decks, you can switch to thinner wires and smaller mesh for better accuracy.
- Always match your screen material to the environment. If you work in a tough spot, pick a wire that can handle it.
If you’re not sure, ask your supplier for advice based on your machine and material. The right choice keeps your operation running and your costs down.
Choosing mesh size and wire diameter isn’t just about numbers. It’s about knowing your material, your equipment, and your goals. Take a few minutes to plan, and you’ll get better results every time.
Common Screening Problems and Solutions
Screening sand and gravel can throw a few curveballs your way. You might see problems like blinding, pegging, or low throughput. Let’s break down what causes these issues and how you can fix them fast.
Blinding
Causes
Blinding happens when particles block the openings in your screen. You’ll notice the material stops flowing, and your output drops. Here’s why blinding shows up:
- Fine particles settle into the screen holes and get stuck, blocking other material.
- Moisture causes sand or gravel to stick to the screen surface and cover the openings.
- You see this most often with particles that are about the same size as your screen openings—usually between 0.5 and 1.5 times the opening size.
- Handling dense or powdery material makes blinding worse.
- It’s a common headache in industrial screening, especially with standard equipment.
Blinding slows down your production and often means you need to stop and clean the screens. That downtime can really add up.
Fixes
You can fight blinding with a few smart moves:
- Use self-cleaning screens or flexible wire cloth. These shake off stuck particles and keep the holes open.
- Try ball trays under your screens. Bouncing balls knock loose any material that starts to clog the mesh.
- Adjust your feed material. If it’s too wet, let it dry out a bit before screening.
- Check your mesh size. Sometimes, bumping up the opening by 10% helps keep things moving.
- Clean your screens regularly to prevent buildup.
Pegging
Causes
Pegging looks a lot like blinding, but here, individual stones or gravel pieces wedge into the screen holes. This usually happens when:
- The shape of your material matches the size of the screen opening.
- You use rigid screens with little flexibility.
- Mechanical parts or worn screens interfere with the openings.
Fixes
You can stop pegging before it starts:
- Pick screens designed for your material’s size and shape.
- Use self-cleaning wire cloth or flexible screen media. These move just enough to shake out stuck pieces.
- For smaller openings (less than 30 x 30 mm), flexible screens work best.
- For larger openings, make sure nothing blocks the holes and consider adding blank areas to your screen media.
- Ball trays also help keep the screen clear.
Low Throughput
Causes
Low throughput means your plant isn’t moving enough material. You might notice piles building up or your output dropping. Here’s what causes it:
- Feeding too quickly overwhelms your screen and slows everything down.
- Feeding too slowly wastes time and leaves your equipment underused.
- Poor equipment selection or lack of maintenance can drag down performance.
- Not matching your feed rate to your plant’s capacity leads to jams or empty runs.
Fixes
You can boost your throughput with a few simple steps:
- Match your feed rate to your screen’s capacity. Don’t overload or underfeed.
- Keep your equipment in good shape. Clean and check screens often.
- Choose the right screen for your material and target gradation.
- Watch your process and adjust as needed to stay in the optimal range.
If you keep an eye on these common problems, you’ll see better results and less downtime in your sand and gravel operation.
Poor Separation
You want your screened sand and gravel to come out clean and sorted, but sometimes you see a mix of sizes in your final pile. That’s poor separation. It means your screen isn’t doing its job well. Let’s look at why this happens and how you can fix it.
Causes
Poor separation usually pops up when:
- The screen mesh size doesn’t match your material.
- Material clogs or blinds the screen, blocking the flow.
- The screen deck sits at the wrong angle or moves too slowly.
- Moisture makes sand or gravel stick together.
- The screen media has too many blank spots or isn’t tight enough.
You might notice uneven piles or find big rocks mixed with fine sand. That’s a sign your screen needs attention.
Fixes
You can get better separation with a few smart moves:
- Watch for signs of blinding or clogging. If you see material building up, stop and clear it out.
- Try a different mesh size or add a spray system to keep things moving.
- Use ball trays under your screen. These bounce and knock loose any stuck pieces.
- If moisture is a problem, heated screen decks can help dry things out.
- Adjust the stroke and speed of your screen. Sometimes a faster or slower shake makes all the difference.
- Change the shape of your mesh holes. Square or slotted holes can help prevent larger pieces from getting stuck.
- Pick flexible screen media like rubber or synthetic panels. These bend and shake off sticky material.
- Cut down on blank areas in your screen. More open space means less clumping.
- Try thinner media for more flexibility and less clogging.
- Check and tighten your screen tension often. Loose screens don’t separate well.
Tip: Regular checks and small tweaks can turn a poor separation problem into a smooth-running operation.
Excessive Wear
Screen media takes a beating every day. If you see holes, thin spots, or broken wires, you’re dealing with excessive wear. This problem can slow you down and cost you money.
Causes
Here’s what usually causes screens to wear out too fast:
- The constant flow of sand and gravel erodes the screen surface.
- Picking the wrong screen material or design for your job.
- High water content in your material speeds up erosion.
- Tough working conditions, like high gas production rates, can make wear even worse.
You might see worn spots where the material hits hardest or notice your screens need replacing more often than they should.
Fixes
You can make your screens last longer if you:
- Choose the right screen media for your material and job site. Polyurethane or rubber panels last longer in tough spots.
- Adjust your water use. Less water means less erosion.
- Spread out the feed material so it doesn’t hit one spot over and over.
- Check your screens often for early signs of wear.
- Replace worn panels before they break and cause bigger problems.
Note: A little prevention goes a long way. The right screen and regular checks can save you time and money.
Screen Tearing
Screen tearing can stop your project in its tracks. You see rips, holes, or even whole sections missing. This usually means your screen needs some TLC.
Causes
Screen tearing happens when:
- You miss early signs of wear and keep running the screen.
- The screen isn’t tight enough, so it moves too much and tears.
- Heavy impacts or sharp rocks hit the same spot again and again.
- You skip regular maintenance checks.
Fixes
You can prevent screen tearing with these steps:
- Inspect your screens often. Look for small tears or worn spots before they get worse.
- Keep your screens tight. Proper tension helps them last longer and work better.
- Set up a routine for maintenance checks. Don’t wait for a problem to show up.
- Use digital monitoring tools if you have them. These can spot trouble before you do.
- Fix minor issues right away. Small repairs now can stop big problems later.
Stay ahead of screen tearing with regular checks and quick fixes. Your equipment will thank you!
Tips to Improve Screening Efficiency
Optimize Feed Distribution
You want your screening process to run smoothly from the start. The way you feed material onto your screen makes a big difference. If you dump sand or gravel in one spot, you get uneven wear and poor results. Spread the material evenly across the whole screen. This helps every part of the screen work at its best.
Here are some ways you can optimize feed distribution:
- Pick the right equipment for your material and project size.
- Keep your equipment in good shape with regular maintenance.
- Use a feeder or chute that spreads material evenly.
- Adjust your feed rate so you don’t overload or underfeed the screen.
- Try prescreening to remove fines before the main screen.
- Use multi-deck screens if you need to separate several sizes at once.
- Watch moisture levels. Too much water can cause clumping and slow down the process.
- Train your team so everyone knows how to keep things running efficiently.
Tip: You can use monitoring tools to check how well your feed is spreading. Small changes can boost your output and save you time.
Adjust Screen Angle and Stroke
The angle and stroke of your screen affect how fast material moves and how well it separates. If you set the screen at a steep angle, material moves faster. This can increase how much you process, but you might miss some smaller pieces. A flatter angle slows things down and gives you better separation.
The stroke is how much the screen moves up and down. If the stroke is too long, material might bounce over the openings and not get sorted. If the stroke is too short, material can pile up and block the screen. You want to find the sweet spot where material moves just right.
Try these steps:
- Start with the manufacturer’s recommended settings for your screen.
- Watch how material moves. If it’s too fast, lower the angle or shorten the stroke.
- If material piles up, try a steeper angle or a longer stroke.
- Make small adjustments and check your results often.
Note: The right angle and stroke help you get clean, sorted material without wasting time or energy.
Use Correct Screen Media
Choosing the right equipment and screen media is key for top performance. Screen media is the part of the screen that actually separates the material. You can pick from woven wire, polyurethane panels, or self-cleaning screens. Each type works best for different jobs.
Here’s what you should think about:
- Match the screen media to your material. Fine sand needs a different screen than coarse gravel.
- Use thinner wire for more open area and higher output, but only if your material isn’t too rough.
- Change screen media for each deck if you use a multi-deck screen. The top deck takes the hardest hits, so use tougher media there.
- Make sure you feed material evenly. Poor feeding can cut your efficiency in half.
| Screen Media Type | Best For | Durability | Output Quality |
|---|---|---|---|
| Woven Wire | Fine sand, quick changes | Medium | High |
| Polyurethane Panels | Rough, wet material | High | Good |
| Self-Cleaning Screens | Sticky or wet material | High | Very High |
If you’re not sure which screen media to use, ask your supplier for advice. The right choice can boost your efficiency and keep your operation running strong.
Monitor Bed Depth
You want your screen to work at its best. Bed depth is the layer of material sitting on top of your screen media. If you let the bed get too thick, fine particles cannot reach the openings. If the bed is too thin, you lose efficiency and waste energy.
Here’s how you can keep bed depth in check:
- Watch the material as it moves across the screen. The layer should not pile up or look too thin.
- Try to keep the bed depth at the discharge end about four to six times the size of the screen opening.
- Use a ruler or stick to measure the depth if you are not sure.
- Adjust your feed rate if you see the bed getting too thick or too thin.
Tip: A good bed depth helps you get clean, sorted material and keeps your screen from wearing out too fast.
| Bed Depth Issue | What You See | What To Do |
|---|---|---|
| Too Thick | Material piles up, slow flow | Lower feed rate |
| Too Thin | Fast flow, poor separation | Raise feed rate |
Check your bed depth often. Small changes can make a big difference in your screening results.
Inspect and Maintain Screens
You want your screens to last and work well. Regular inspection and maintenance help you catch problems early. You do not want to wait until you see holes or tears.
Here’s what you should do:
- Look for signs of wear, like thin spots, broken wires, or loose panels.
- Check the tension of your screen media. Tight screens work better and last longer.
- Clean off any buildup or stuck material. Use a brush or air hose for small jobs.
- Replace worn or damaged panels right away. Do not wait for a full breakdown.
- Keep a maintenance log. Write down what you check and when you fix things.
Note: A quick daily check can save you hours of downtime later.
If you use digital tools, set up alerts for wear or tension problems. If not, just use your eyes and hands. Stay ahead of problems, and your screen will keep running strong.
Sample Output Regularly
You want to know if your screening process works. Sampling your output helps you spot problems before they get big. You do not need fancy tools for this step.
Try these simple ways to sample:
- Grab a handful of screened material from different spots in the pile.
- Use a small scoop or bucket for bigger jobs.
- Check the size and look of the material. Does it match your target gradation?
- Write down your results in a notebook or on your phone.
Tip: Sample your output at the start of each shift, after any changes, or if you see something odd.
If you run a large operation, use a mechanical sampler or software to track gradation. For small jobs, your eyes and hands work fine. Regular sampling keeps your project on track and helps you fix issues fast.
Prevent Blinding and Pegging
Blinding and pegging can slow down your screening job. You want to keep your screens open and working. Here’s how you can stop these problems before they start:
- Watch your feed material. Wet or sticky sand and gravel cause blinding. Try to keep your material as dry as possible.
- Pick the right mesh size. If your mesh is too small, particles get stuck. Go up one size if you see lots of clogging.
- Use flexible screen media. Woven wire or rubber screens can shake off stuck pieces better than stiff metal.
- Add ball trays or sliders. These bounce under your screen and knock loose any material that starts to block the holes.
- Change your feed rate. If you dump too much material at once, your screen can’t keep up. Slow down and let the screen do its job.
- Try a spray bar. A little water can help wash sticky material through the mesh, but don’t overdo it.
Tip: Check your screens every hour when you start a new job. Early checks help you spot blinding or pegging before it gets out of hand.
Here’s a quick table to help you remember what works:
| Problem | What to Try | Why It Helps |
|---|---|---|
| Blinding | Flexible screens, ball trays | Keeps holes clear |
| Pegging | Bigger mesh, spray bar | Stops pieces from getting stuck |
You can fix most blinding and pegging issues with small changes. Stay alert and adjust your setup as you go.
Upgrade to Self-Cleaning Screens
If you want less downtime, self-cleaning screens are a smart upgrade. These screens use special wires or shapes that move and flex. This action shakes off sticky or odd-shaped material. You spend less time cleaning and more time working.
Here’s why you might want to switch:
- Less maintenance. You don’t have to stop and clean the screen by hand.
- More output. Your screen keeps running, so you get more done each day.
- Better results. You see fewer clogs and more even material sizes.
- Works with tough material. Wet, sticky, or odd-shaped particles don’t slow you down.
Note: Self-cleaning screens cost more up front, but they save you money on repairs and lost time.
You can find self-cleaning screens in woven wire, polyurethane, or hybrid designs. Ask your supplier which type fits your machine and material best.
If you want to boost your screening efficiency, upgrading to self-cleaning screens is a great move. You’ll notice the difference right away—less hassle, more production, and cleaner results.
Conclusion
You now know how to screen sand and gravel for your next project. Pick the right equipment and screen media for your job. This helps you get clean results and saves time. Anpeng offers woven wire screens, polyurethane panels, and self-cleaning screens. You can ask them for advice based on your cut size, moisture, throughput, or machine type. Get the best fit for your needs.
FAQ
What mesh size should I use for sand?
You want a mesh size between 1/16″ and 1/8″ for most sand. Fine sand needs a smaller mesh. Coarse sand works with a larger mesh. Always check your project specs before you choose.
Can I screen sand and gravel by hand?
Yes, you can! Use a simple wooden frame and wire mesh. Shovel material onto the mesh and shake it. This works well for small jobs like garden paths or home landscaping.
How do I keep my screen from clogging?
Try self-cleaning screens or flexible wire mesh. Keep your material dry. Use a ball tray under your screen. Check your feed rate. Clean your screen often to stop clogs before they start.
What’s the best screen for wet material?
Trommel screens or self-cleaning screens work best for wet or sticky material. These screens keep moving, so wet sand and gravel do not block the holes.
How often should I check my screen for wear?
Check your screen every day if you use it often. Look for thin spots, tears, or loose wires. Quick checks help you catch problems early and avoid downtime.
Can I use the same screen for sand and gravel?
You can use the same screen frame, but you may need to swap out the mesh. Sand needs a finer mesh. Gravel needs a larger opening. Change the mesh to match your material.
What safety tips should I follow when screening?
- Wear gloves and safety glasses.
- Keep hands clear of moving parts.
- Turn off machines before cleaning or repairs.
- Watch for sharp edges on mesh.
- Work with a buddy for big jobs.