Attaching wire mesh correctly is essential for building fences, garden barriers, animal enclosures, safety guards, and storage panels that remain stable over time. The right installation approach depends on the mesh material, frame type, opening size, and environment. Careful preparation prevents sagging, sharp edges, loose fasteners, and uneven tension throughout the project.
This guide explains easy, practical methods for securing wire mesh to wood, metal, or existing fencing. You will learn how to measure and cut panels, select suitable fasteners, maintain tension, and finish exposed edges safely. Whether completing a small home repair or a larger enclosure, sound attachment techniques create durable, professional-looking results.
Why Attaching Wire Mesh?
Attaching wire mesh turns flexible material into a stable barrier, guard, enclosure, or reinforcing layer. Proper fastening keeps the mesh aligned, tensioned, and secure against a frame, posts, or supporting structure. This improves safety, containment, durability, and appearance while helping the installation withstand everyday contact, weather exposure, vibration, and pressure.
Here are some reasons why wire mesh attachment is needed:
- Creates secure boundaries: Attaching wire mesh establishes clear, durable boundaries around gardens, yards, work areas, storage zones, and properties. A properly fastened mesh barrier helps discourage unauthorized access while keeping the protected space visible, ventilated, and easier to monitor than a solid wall or opaque fence.
- Protects people from hazards: Securely attached mesh can serve as a machine guard, fall-protection barrier, or restricted-access enclosure. It separates people from moving equipment, elevated edges, electrical areas, and other hazards while allowing operators or supervisors to observe conditions without entering the protected space.
- Contains animals and materials: Wire mesh helps keep pets, livestock, poultry, wildlife, tools, supplies, and stored goods where they belong. Fastening it tightly to posts and frames prevents gaps, sagging, and escape routes. The open grid still provides daylight, airflow, and visibility for more humane, practical containment.
- Prevents sagging and damage: Unsupported mesh can loosen, bow, rattle, or become damaged when exposed to wind, impacts, climbing, or repeated use. Regularly spaced attachments distribute tension across the frame, maintaining its intended shape and reducing localized stress that can cause torn wires, detached fasteners, or premature replacement.
- Supports structural reinforcement: When attached and positioned correctly within concrete work, welded wire mesh helps distribute loads and manage tensile stresses. This reinforcement can help control cracking and improve stability in slabs, pavements, columns, and related structures, provided the design and placement follow applicable engineering requirements.
- Maintains airflow and visibility: Unlike solid panels, attached wire mesh can protect an area without blocking air circulation or sightlines. These qualities are valuable for HVAC enclosures, industrial guards, storage cages, garden fencing, and security boundaries, where ventilation and visual supervision are important alongside physical separation.
- Extends service life: Choosing suitable corrosion-resistant mesh and compatible fasteners helps an installation resist rust, loosening, and weather-related deterioration. Galvanized and stainless options are commonly selected for demanding locations. Secure attachment also lowers movement-related wear, reducing maintenance needs and helping the system remain useful longer.
How to Attach Wire Mesh?
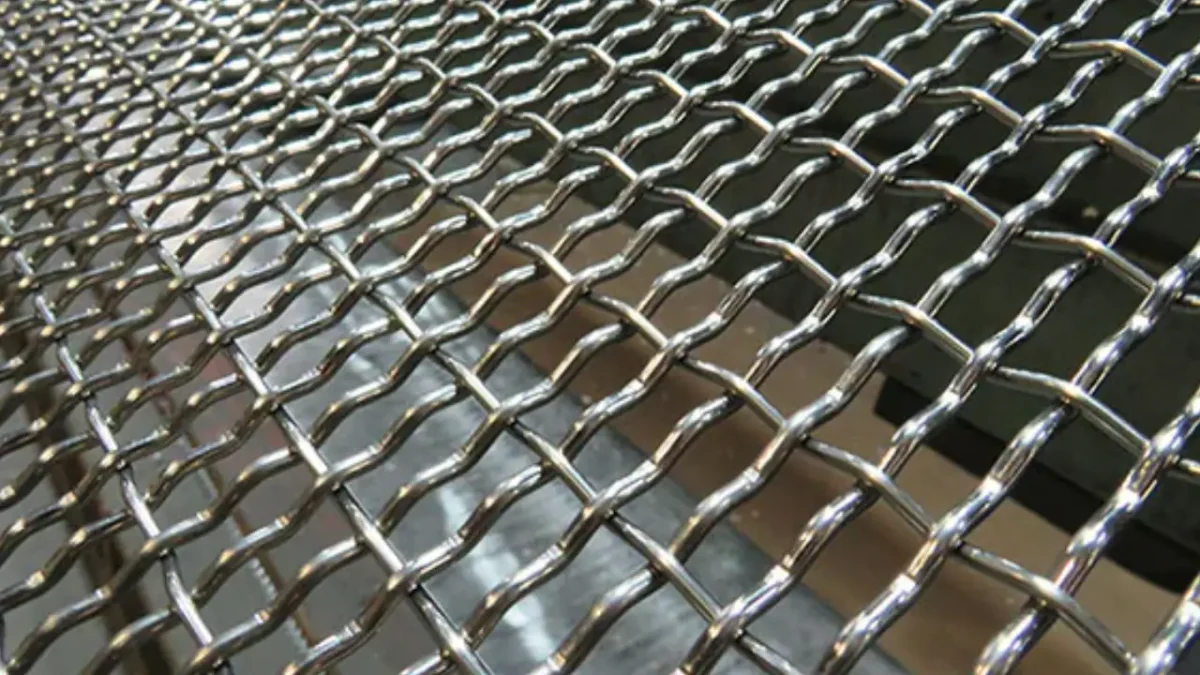
Attaching wire mesh securely requires a stable support, suitable fasteners, and even tension. The correct method varies for wooden frames, metal posts, masonry, and existing fences, but the objective is consistent: prevent sagging, gaps, sharp edges, and loose panels. Careful measuring, progressive fastening, and final inspection create a safe, durable, professional-looking result.
Tools Needed
- Cut-resistant work gloves
- Safety glasses
- Measuring tape
- Permanent marker or chalk
- Wire cutters or fencing pliers
- Hammer or heavy-duty staple gun
- Galvanized fence staples for wood
- Galvanized screws and washers for timber frames
- Cable ties, tie wire, or fence clips for metal posts
- Drill and suitable drill bits
- Come-along, mesh stretcher, or helper
- Level and straightedge
Step 1: Plan the installation
Measure the length and height of the opening, frame, fence line, or enclosure before buying or cutting mesh. Add enough extra material for overlaps, corners, ground contact, and secure fastening. Identify the supporting surface—wood, metal, masonry, or an existing fence—because each requires compatible fasteners and attachment spacing for reliable long-term support.
Inspect posts, rails, and frames for rot, rust, loose hardware, or misalignment before installation begins. Repair weak supports first, since tightly fastened mesh transfers force into the structure. Mark gate locations, corners, and changes in elevation clearly. Planning these details prevents wasted mesh, awkward joints, and difficult corrections after fastening begins.
Step 2: Prepare the frame
Make sure every post, rail, or frame member is straight, firmly anchored, and able to support mesh tension. For fences, establish corner and end posts before intermediate supports. Use a string line and level to check alignment. A secure, square frame provides a dependable base and helps the installed mesh remain even.
Remove protruding nails, splinters, rust flakes, loose paint, and obstacles that could damage the mesh or interfere with fasteners. If working with wood, choose galvanized staples or screws suitable for exterior exposure. For metal posts, prepare compatible clips, galvanized tie wire, or weather-resistant cable ties before unrolling the mesh.
Step 3: Measure and cut mesh
Unroll the wire mesh on flat ground with the panel facing the intended direction. Measure the required length again, then mark the cut line one full mesh opening beyond the final point when overlap is needed. Use fencing pliers, wire cutters, or bolt cutters appropriate for the wire gauge and material thickness.
Cut slowly and keep both hands away from freshly trimmed edges. Bend or file sharp wire ends inward after cutting to reduce injury risks. Preserve straight factory edges wherever possible because they simplify alignment. If multiple sections are required, plan each overlap at a post or firm support rather than midspan.
Step 4: Secure the starting edge
Position the first mesh edge flush against the corner, end post, or starting frame member. Align the top edge with the upper rail or marked height, then attach several temporary fasteners from top to bottom. Confirm that the mesh is upright and the openings are level before permanently securing the starting side.
For wood, place galvanized staples over mesh wires at regular intervals without crushing the wire. For metal supports, loop ties around both the mesh and post, then tighten them securely. Use clips where the post system accepts them. Fasten especially well at corners, gates, and ends where tension concentrates.
Step 5: Tension the mesh evenly
Pull the mesh toward the opposite end while keeping its top and bottom edges aligned with the frame. A helper can hold light mesh taut; wider or stronger fencing may require a stretcher bar and come-along. Apply even force across the panel so individual wires do not distort or form waves.
Avoid overtightening mesh until it becomes excessively rigid, because temperature changes, impacts, and ground movement can strain wires and fasteners. The panel should be firm with no significant sagging, but it should not resemble a tightly stretched instrument string. Recheck vertical alignment before permanently fastening the opposite edge.
Step 6: Fasten the remaining edges
Attach mesh along the top rail first, then secure vertical posts, followed by the bottom rail or ground-level edge. This sequence helps preserve tension and limits rippling. Use consistent fastener spacing, adding more attachments at corners, joins, and areas subject to pressure. Keep each wire section supported without flattening openings unnecessarily.
For wooden supports, exterior galvanized staples are commonly spaced about 10 to 15 centimeters apart for welded mesh, while requirements may vary by mesh weight and application. For metal supports, use clips or ties at regular intervals, tightening them enough to hold securely without crushing coating or deforming wire.
Step 7: Join the mesh sections
Where two wire mesh sections meet, overlap them by at least one full row of openings. Position the overlap over a post, rail, or other firm support whenever possible. This placement strengthens the joint and reduces movement. Use compatible tie wire, mesh clips, or galvanized fasteners to join both panels securely.
Start fastening at the top of the overlap, then work downward at even intervals. Pull the two sections together firmly without twisting the openings or creating a bulky ridge. For exterior projects, choose galvanized or stainless joining materials to help resist rust, retain strength, and maintain a consistent appearance over time.
Step 8: Finish exposed edges
Trim excess mesh only after all panels are fully attached and tensioned. Use wire cutters or fencing pliers suited to the wire gauge, then collect removed pieces immediately. Avoid leaving long, loose strands near corners, gates, or walkways because they can snag clothing, cause injuries, or weaken the finished installation.
Bend every sharp cut end inward, downward, or toward the protected side of the enclosure. Smooth rough points with a metal file if necessary. For frequently touched installations, add protective edging, caps, or a folded hem along exposed boundaries. These finishing measures improve safety, appearance, and everyday usability for everyone nearby.
Step 9: Inspect the installation
Walk along the complete wire-mesh installation and examine every edge, corner, post, rail, overlap, and fastener. Look for sagging areas, uneven tension, loose ties, unprotected cut ends, and gaps at ground level. Confirm that the mesh sits flat against its supports without rattling, bowing, or separating under light pressure.
Test gates, doors, or access panels to ensure they open and close without catching the mesh. Add fasteners wherever sections move or lift away from the frame. Check the installation again after several days, particularly outdoors, because settling, weather, temperature changes, and normal use may reveal areas that need minor adjustment.
How to Attach Wire Mesh to Brick Wall?
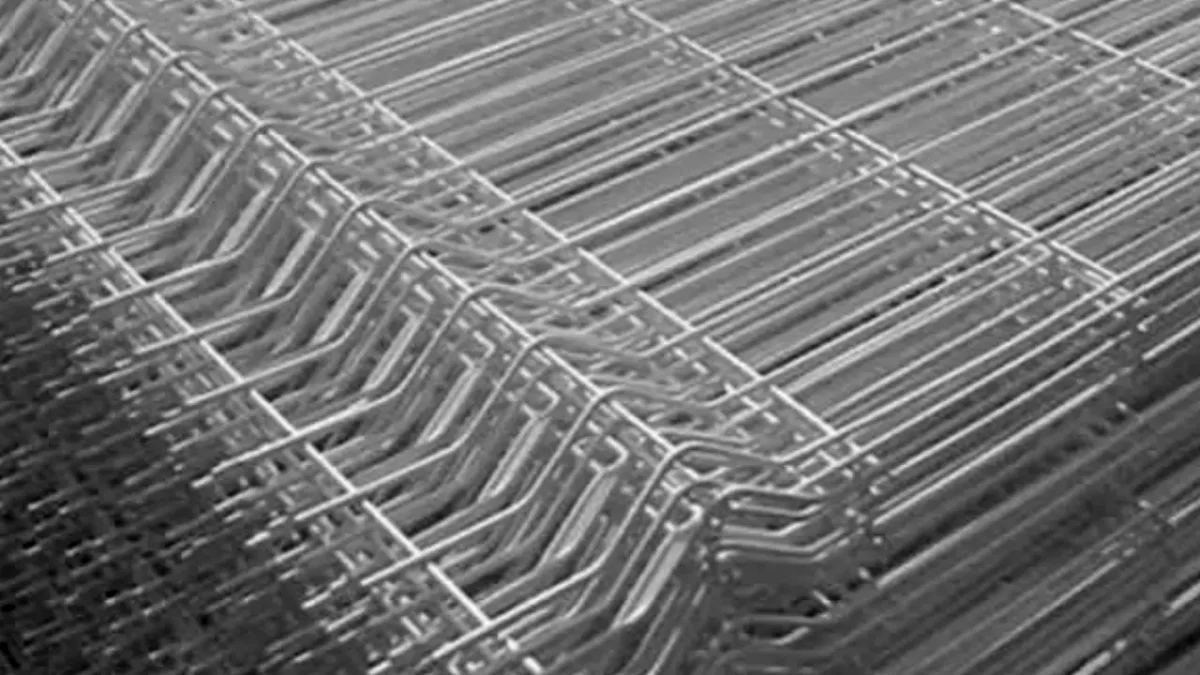
Attaching wire mesh to a brick wall is an effective way to cover vents, deter pests, support climbing plants, protect openings, or create a secure barrier. Use masonry-rated anchors, exterior screws, and wide washers to hold the mesh securely. Correct measurement, careful drilling, and evenly spaced fasteners help prevent gaps, rattling, corrosion, and premature loosening.
Tools Needed
- Cut-resistant work gloves
- Safety glasses and dust mask
- Measuring tape and marker
- Wire cutters or bolt cutters
- Metal file
- Hammer drill
- Masonry drill bit matched to anchors
- Wall plugs or masonry anchors
- Exterior-rated masonry screws
- Wide galvanized or stainless-steel washers
- Screwdriver bit or socket driver
- Vacuum, hand pump, or brush
- Silicone sealant or exterior caulk, if needed
Step 1: Plan the attachment layout
Measure the opening or wall area and decide whether the mesh will sit flat or stand off the brick using spacers. Add material for edge overlap, mark evenly spaced fastener locations, and select corrosion-resistant anchors, screws, and washers suited to the panel weight. Check for damaged brick and concealed services before drilling.
Step 2: Prepare and cut the mesh
Brush away dust, loose mortar, dirt, and peeling material so the mesh fits against a clean, sound surface. Measure and cut the panel on a flat work area using suitable wire cutters or bolt cutters. Leave enough perimeter coverage, then file or bend all sharp cut ends inward to improve safety.
Step 3: Position and mark fasteners
Hold the mesh in its final location with help or temporary support, ensuring that it sits level and fully covers the required area. Mark drilling locations through openings or close to wire intersections. Start near corners and edges, then add marks across larger panels to prevent flexing, gaps, lifting, or distortion.
Step 4: Drill pilot holes
Wear safety glasses and a dust mask, then fit a masonry drill bit matched to the selected anchor. Drill perpendicular holes to the specified depth using steady pressure, clearing dust after each hole with a vacuum, brush, or hand pump. Clean holes promote firm anchor engagement; drywall anchors are not appropriate.
Step 5: Insert anchors or wall plugs
Push or gently tap the correct masonry plugs or anchors into the cleaned holes until they sit flush with the brick face. Use hardware rated for solid or hollow brick as applicable. If an anchor spins, feels loose, or fits an oversized hole, replace it with a suitable alternative or relocate it.
Step 6: Fasten the wire mesh
Position the mesh once more, then drive exterior-rated screws through wide galvanized or stainless washers and into the anchors. Begin at the upper corners, complete the top edge, and work downward while maintaining gentle tension. Tighten enough to secure the wires without crushing openings, stripping anchors, or distorting the panel.
Step 7: Finish and inspect installation
Trim excess mesh after fastening, then file or bend sharp wire ends away from accessible areas. Check every edge, corner, overlap, and fastener for gaps, movement, or rattling. Tighten or add hardware where the mesh flexes. Use exterior sealant for small pest-exclusion gaps, and seek professional advice for heavy or overhead installations.
When to Attach Wire Mesh?
Attach wire mesh after the supporting surface is stable, correctly aligned, and ready to carry tension or load. The ideal timing depends on the application: fencing requires set posts and planned clearances, while concrete reinforcement must be positioned before the pour. Installing at the right stage prevents movement, poor alignment, damage, and unnecessary rework.
What time to attach wire mesh
- After posts and frames are secure: Attach mesh only when fence posts, rails, or surrounding frames are straight, firmly anchored, and adequately braced. A stable structure resists the pulling forces created during tensioning. Installing mesh too early can pull posts out of alignment, loosen hardware, and create sagging panels.
- After concrete has cured: If posts are set in concrete, wait until the concrete has developed sufficient strength before tensioning and attaching mesh. Some fence-installation guidance specifies allowing concrete or grout to cure for 72 hours before attachment, though actual curing needs depend on the product, weather, and project requirements.
- Before plants or animals occupy an enclosure: Install and inspect wire mesh before introducing pets, poultry, livestock, garden plants, or other protected contents. This timing lets you close ground-level gaps, remove sharp wire ends, test gates, and confirm the barrier is secure without risking escapes, injuries, or damage during later adjustments.
- Before outdoor weather becomes severe: Plan exterior mesh work during dry, calm conditions whenever possible. Rain-softened soil can affect post stability, strong wind makes large panels difficult to control, and extreme temperatures may complicate handling. Early installation before severe seasonal weather allows time to tension, inspect, and correct the finished system.
- After final measurements are confirmed: Attach mesh only after verifying boundary lines, panel height, gate positions, corners, slopes, and required overlap. Measure the finished support structure rather than relying only on an early plan. Confirming dimensions beforehand reduces cutting errors, avoids short panels, and places joins where they can receive proper structural support.
- During concrete placement: For reinforced concrete work, place and secure approved welded wire reinforcement on chairs or spacers before and during the pour so it stays at the designed depth. Mesh must not rest directly on soil or formwork; engineering drawings and applicable codes control its specified position.
- Before finishing surfaces are installed: Attach mesh that will sit behind plaster, stucco, cladding, or other finish materials before those coverings are applied. Securing it first ensures the mesh is properly supported and embedded as intended. Follow the applicable system manufacturer’s instructions and local building requirements for the specific assembly.
Conclusion
A secure wire-mesh installation begins with choosing materials suited to the task and fastening them at regular, reliable intervals. Start with a straight, properly supported frame, pull the mesh taut without overstretching it, and use corrosion-resistant staples, screws, clips, or ties appropriate for the setting. These details help prevent sagging, rattling, shifting, and premature failure over time.
Always inspect the completed installation before putting the fence, guard, enclosure, or panel into service. Check for sharp cut ends, loose attachment points, bowed sections, and gaps around corners or gates. Add extra fasteners where tension is greatest, especially along edges and openings. A careful final check improves safety, containment, appearance, and long-term performance in demanding daily conditions.
For dependable materials across residential, agricultural, commercial, and industrial projects, consider sourcing wholesale wire mesh from Apscreens. Selecting the proper mesh gauge, aperture, finish, and panel format helps simplify installation while supporting the required strength and durability. Pair quality wire mesh with suitable hardware and thoughtful installation practices to achieve a secure, lasting result.