You want your vibrating screen mesh installation to go smoothly, right? Good installation keeps your team safe, boosts machine performance, and makes your mesh last longer. If you rush or skip steps, you might see loose mesh, early wear, or even leaks. Take the time to learn the right tools, safety steps, and process before you start.
Key Takeaways
- Installing vibrating screen mesh the right way makes things safer and helps the machine work better.
- Always lock and tag the equipment before you start. This stops accidents from happening.
- Wear the correct personal protective equipment (PPE) to stay safe while you work.
- Check the mesh type and size again to make sure it fits your machine.
- Keep your workspace neat and tidy so you can work faster and safer.
- Pull the mesh tight and even so it does not break and works well.
- Look over everything carefully after you finish installing to find any problems before you turn on the machine.
- Plan regular maintenance checks to help your vibrating screen mesh last longer and save money on repairs.
Vibrating Screen Mesh Basics
What Is Vibrating Screen Mesh
You might wonder what a vibrating screen mesh actually is. Think of it as a special surface made to separate materials by size. You install this mesh inside a vibrating screen machine. The mesh acts like a filter. It lets smaller particles fall through while larger ones stay on top.
You will find several types of mesh used in screening. Here are some common materials:
- Woven Wire Mesh
- Perforated Plate Mesh
- Polyurethane Mesh
- Rubber Mesh
- Stainless Steel Mesh
- High-Carbon Steel Mesh
- High Tensile Spring Steel Mesh
- Manganese Steel Mesh
Most people choose a woven wire vibrating screen for its strength and flexibility. You can pick different mesh sizes and wire thicknesses to match your needs. The woven wire vibrating screen stands out because it handles tough jobs and lasts a long time.
Where Mesh Is Installed
You place the mesh inside the vibrating screen machine. The mesh sits on the screen deck, which is the flat frame inside the machine. You secure the mesh with clamps, hooks, or bolts. The woven wire vibrating screen fits tightly so it does not move during operation.
You might see more than one layer of mesh in some machines. Each layer can have a different mesh size. This setup helps you sort materials into several grades at once. The woven wire vibrating screen works well in both single and multi-layer setups.
Mesh’s Role in Screening
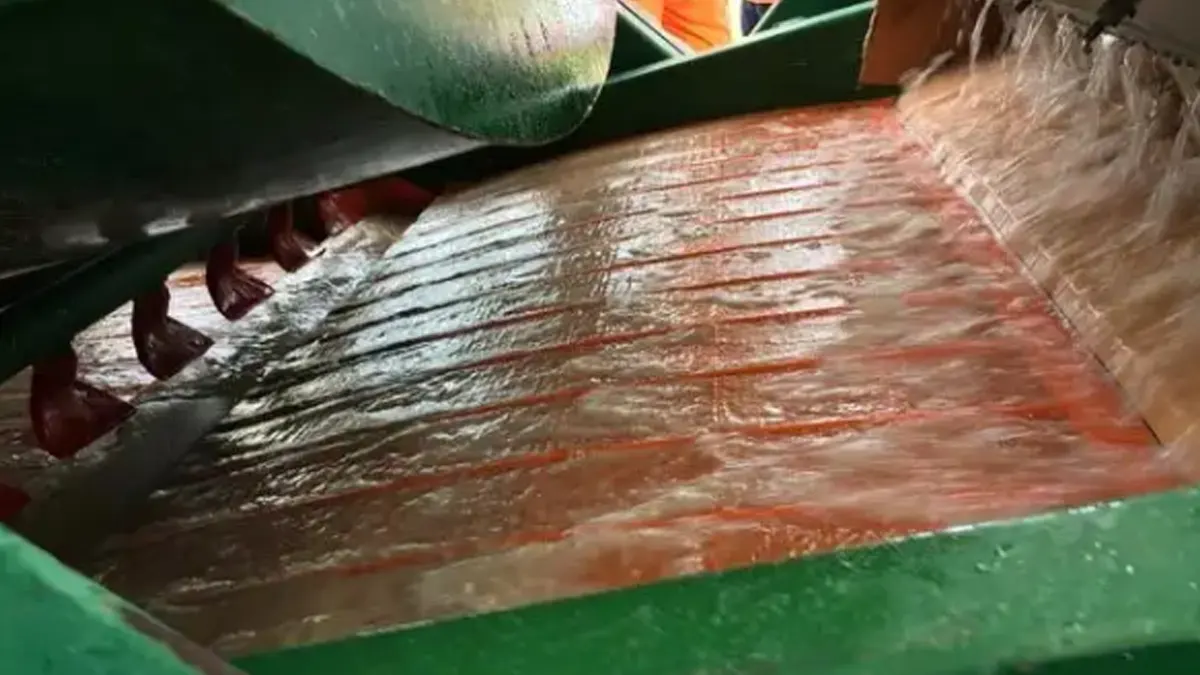
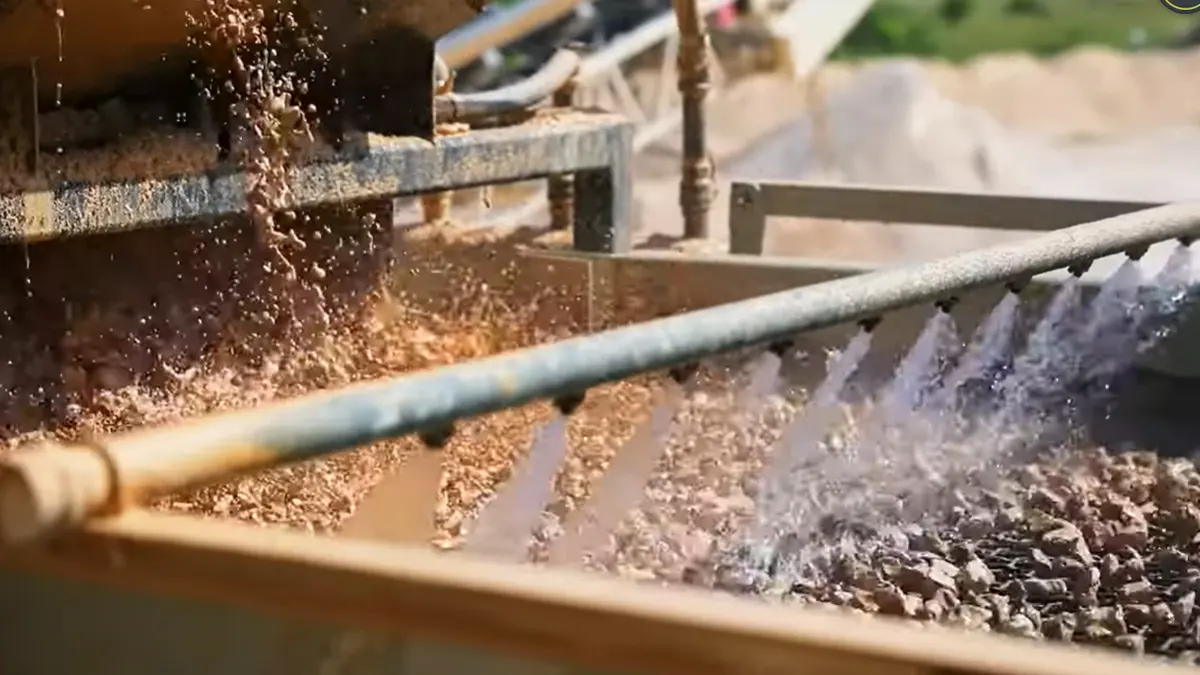
The mesh does more than just sit there. When the machine vibrates, the mesh shakes too. This action makes particles bounce and hop. Smaller pieces fall through the holes in the woven wire vibrating screen. Larger pieces stay on top and move off the end.
The mesh size matters a lot. A smaller mesh size gives you better separation and higher accuracy. If you need fine results, you pick a fine woven wire vibrating screen. Just remember, fine meshes can clog up faster, so you need to check and clean them often.
Tip: Always match your woven wire vibrating screen to the job. The right mesh size and type help you get the best results and keep your machine running smoothly.
A good vibrating screen mesh boosts your screening efficiency. You get cleaner, more accurate material separation. You also avoid problems like clogging and uneven wear when you choose the right woven wire vibrating screen.
Safety and Preparation for Installation
Before you start installing vibrating screen mesh, you need to focus on safety and preparation. Taking the right steps now helps you avoid injuries and costly mistakes later. Let’s walk through what you need to do before you even touch the mesh.
Lockout/Tagout Procedures
You must always lock out and tag out the equipment before you begin. This process keeps you and your team safe from accidental startups or energy releases. Here’s a simple step-by-step guide you can follow:
- Notify everyone nearby that you will take the machine out of service.
- Press the STOP button and wait for the machine to stop moving. Never touch the machine while it slows down.
- Turn off the main disconnect switch. Make sure you can reach it easily.
- Put your own padlock and tag on the disconnect. Each worker should use their own lock.
- If the machine uses air pressure, close the valve and release any trapped air.
- Try to start the machine. If it does not start, you have isolated the energy.
- Change the screen mesh. Keep all tools and removed parts in a safe spot.
- Check that you have all your tools and parts before putting the machine back together.
- Remove your lock and tag only after making sure everyone is clear.
- Turn the power back on and run the machine briefly without any load.
Safety Tip: Never skip lockout/tagout. Even a quick job can turn dangerous if the machine starts unexpectedly.
PPE and Workspace Setup
You need the right personal protective equipment (PPE) to stay safe. Here’s a quick look at what you should wear and why:
| PPE Type | Purpose |
|---|---|
| Safety Glasses | Protects eyes from dust and small particles during the screening process. |
| Ear Protection | Prevents hearing loss from high-decibel noise generated by the equipment. |
| Gloves | Shields hands from cuts, abrasions, and chemical exposure. |
| Safety Shoes | Protects feet from falling objects and sharp edges. |
Set up your workspace before you begin. Clear away clutter, sweep up dust, and make sure you have enough light. Keep all tools and materials within easy reach. A tidy area helps you work faster and safer.
Preparing Tools and Mesh
Mesh Specification and Dimensions
Check the mesh type, size, and hook style before you start. Make sure the new mesh matches your machine’s requirements. Double-check the dimensions so you do not waste time with the wrong part. If you use the wrong mesh, you could damage your equipment or get poor screening results.
Tools and Supplies Checklist
Gather all the tools and materials you need before you begin. Here’s a basic checklist:
- Screen mesh
- Glue
- Net frame
- Snap ring
- Netting tools
Having the right tools and materials ready saves you time and prevents mistakes. Lay everything out in your workspace so you do not have to search for items during installation. If you keep your tools and materials organized, you will work more efficiently and reduce the risk of accidents.
Pro Tip: Always double-check your tools and materials before starting. Missing even one item can slow you down or force you to stop mid-job.
Step-by-Step Guide to Vibrating Screen Mesh Installation
Shut Down and Secure Equipment
You want to start your vibrating screen mesh installation safely. The first thing you do is shut down and secure the vibrating screen machine. This step keeps you and your team safe from sudden movement or vibration.
Here’s a simple step-by-step guide to follow:
- Turn off the power to the vibrating screen machine. Make sure the machine cannot start by accident.
- Lock out and tag out the main disconnect switch. Each person working on the machine should use their own lock and tag.
- Wait for all moving parts to stop. Never touch the machine while it is still slowing down.
- Double-check that no one can turn the power back on until you finish the job.
Safety Tip: Always follow these steps before you touch the woven wire vibrating screen. Skipping this part can lead to serious injuries.
Remove Old Screen Mesh
Now you are ready to remove the old mesh. This part of the vibrating screen mesh installation helps you get rid of worn or damaged mesh and prepares the machine for a new start.
Loosen Clamps and Fasteners
Start by loosening all the clamps, bolts, or fasteners that hold the woven wire vibrating screen in place. Use the right tools for each fastener. Work slowly and carefully. If you rush, you might damage the frame or hurt yourself.
- Check for any material buildup around the clamps or fasteners. Clean away dirt or debris so you can see what you are doing.
- Prevent material buildup around moving parts. This helps you avoid part failures later.
Lift and Dispose of Old Mesh
Once you loosen all the fasteners, gently lift the old woven wire vibrating screen from the deck. Do not yank or force it. If the mesh is stuck, wiggle it free with care.
- Place the old mesh in a safe spot. Do not leave it where someone could trip over it.
- If the mesh is broken, handle it with gloves to avoid cuts.
- Dispose of the old mesh according to your workplace rules.
You should never operate the vibrating screen machine with sections of mesh missing. This can cause extra wear on the support frames and lead to bigger problems.
Inspect and Clean Screen Deck
Before you install the new screen mesh, you need to check and clean the screen deck. This step makes sure your new woven wire vibrating screen will sit flat and work well.
Check Frame, Rails, and Crown Bars
Look closely at the frame, rails, and crown bars. These parts support the woven wire vibrating screen and keep it tight.
- Inspect the frame for cracks, bends, or other damage.
- Check the rails and crown bars for wear. If you see worn spots, think about adding rubber or urethane liners for extra protection.
- Make sure all bolts and clamps are in good shape. Replace any that look worn or damaged.
You want the support frame to be strong and smooth. This helps your new mesh last longer and work better.
Clean Debris and Damage Points
Use a brush or vacuum to clean away all dust, dirt, and leftover material from the screen deck. Pay special attention to corners and edges where debris likes to hide.
- Wipe down the frame and rails. Make sure there are no sharp points or rough spots that could damage the new woven wire vibrating screen.
- Check for any signs of corrosion or imperfections. If you find any, fix them before you move on.
Pro Tip: A clean, smooth deck helps your vibrating screen mesh installation go faster and gives you better screening results.
You should always inspect for wear, especially if you use the vibrating screen machine for wet materials. Clean decks prevent blinding and buildup, which keeps your woven wire vibrating screen working at its best.
By following these steps, you set yourself up for a successful vibrating screen mesh installation. You protect your equipment, get better performance, and make your mesh last longer.
Check Installation Angle and Components
Before you put in the new mesh, you need to check the installation angle and all key components. This step helps you get the best performance from your vibrating screen.
Verify Screen Angle
The angle of your screen matters a lot. If you set the angle right, materials will flow smoothly across the mesh. This lets particles touch the screen surface and separate well. When you use the wrong angle, you might see problems like poor material flow, uneven wear, or even clogging.
- A proper angle helps materials move and spread out.
- If you notice slow movement or buildup, try adjusting the angle.
- A small change can make a big difference in how well your screen works.
Tip: Adjusting the screen angle can improve material flow and reduce uneven wear on your mesh.
Inspect Spring Axes and Motor Rotation
Next, look at the spring axes and the motor. Springs help absorb vibration and keep the screen steady. Motors make the screen shake and move materials.
- Check the springs for cracks or damage. Replace any broken springs right away.
- Make sure the motor turns in the correct direction. If it spins the wrong way, your screen will not work right.
- Look for grease on the motor. You should replace the grease after 2,000 hours of use.
Here’s a quick table to help you remember what to check:
| Key Component Check | Description |
|---|---|
| Damping Springs | Regularly check for cracks. |
| Motor Grease | Replace after 2,000 hours of running time. |
| Support Bolts | Make sure they are not loose. |
Inspect Side Seals and Gaskets
Side seals and gaskets keep material from leaking out of the screen. If these parts wear out or break, you might see leaks or even damage to the mesh.
- Look for cracks, tears, or missing pieces in the seals and gaskets.
- Replace any worn or damaged parts before you install the new mesh.
- Make sure all seals fit tightly against the frame.
Note: Good seals and gaskets help you avoid leaks and keep your screening area clean.
Install the New Screen Mesh
Now you are ready to put in the new mesh. Take your time with this step. Careful installation helps your mesh last longer and work better.
Confirm Mesh Size and Hook Type
First, double-check the mesh size and hook type. The mesh must match your machine’s specs. If you use the wrong size or hook, the mesh will not fit right.
- Lay the mesh flat and measure it.
- Check the hook style. Make sure it matches the frame.
- If you are not sure, look at your machine’s manual or ask your supplier.
Position and Align Mesh
Next, place the mesh on the screen deck. Make sure it sits flat and lines up with the frame.
- Center the mesh so it covers the whole deck.
- Smooth out any wrinkles or folds.
- Check that the hooks or edges line up with the clamps or fasteners.
If you see bulges or gaps, adjust the mesh before you move on.
Engage Hooks or Fasteners
Now, secure the mesh to the frame. Use the right hooks, clamps, or bolts for your machine.
- Start at one end and work your way across.
- Attach each hook or fastener tightly, but do not over-tighten.
- Check that the mesh stays flat and does not shift.
Pro Tip: Secure each modular panel using its specific locking mechanism for a tight fit.
After you finish, look over the mesh again. Make sure there are no loose spots or raised edges.
Tension the Mesh Evenly
Proper tension keeps your mesh working well. If you pull too tight or too loose, you can damage the mesh or get poor results.
Apply Gradual, Even Tension
Use the right tensioning equipment for your mesh. Apply force slowly and evenly across the whole surface.
- Start at the center and work toward the edges.
- Pull each section a little at a time.
- Check for even tension as you go. The mesh should feel firm, not floppy or overly tight.
Tip: Apply a consistent force across the screen to prevent uneven stress.
Avoid Over-Tensioning
Do not pull the mesh too tight. Over-tensioning can cause tears, warping, or early failure.
- Follow the manufacturer’s tensioning instructions.
- Stop if you see the mesh stretching or hear cracking sounds.
- Check the tension regularly, especially after the first few hours of use.
If you keep the tension even, you will avoid problems like reduced screening efficiency, clogging, or mesh detachment. You will also help your mesh last longer and keep your team safe.
Final Checks and Test Run
You’re almost done! Before you power up your vibrating screen, you need to make sure everything is tight, safe, and ready for action. These last steps help you catch small mistakes before they turn into big problems.
Secure Clamps and Bolts
Go around the entire screen and check every clamp, bolt, and fastener. Use your wrench or socket set to make sure each one is tight. Loose hardware can cause the mesh to shift or even come loose during operation. That can lead to abnormal vibrations or damage.
- Start at one corner and work your way around the frame.
- Tug gently on the mesh to check for movement.
- Tighten any bolts or clamps that feel loose.
- Double-check the hooks and locking mechanisms if your screen uses them.
Tip: If you hear rattling or see gaps, stop and fix them now. A secure mesh means safer, smoother screening.
Pre-Operation Inspection
Now it’s time for a full inspection. You want to catch any issues before you start the machine. Here’s a checklist you can follow:
- Make sure the screen sits on a sturdy, level foundation. This keeps vibrations steady and prevents the frame from shifting.
- Check that the screen is positioned correctly and the angle matches your setup.
- Confirm that the power supply is connected and grounded properly.
- Look for any chutes, hoppers, or supports that need to be installed or adjusted.
- Inspect the screen for any damage from shipping or installation.
- Verify that you installed the correct mesh size and type for your job.
- Test the vibration mechanism. Make sure the weights, stroke, and frequency settings are correct.
- Calibrate the speed and amplitude to match your material and screening needs.
- Remove any tools, debris, or leftover parts from the work area.
Note: Taking a few extra minutes for this inspection can save you hours of downtime later.
Test Start and Observe
You’re ready for the big moment. Start the machine and watch closely. Don’t load any material yet. Let the screen run empty for a few minutes.
- Listen for unusual noises like rattling or grinding.
- Watch for abnormal vibrations or shaking.
- Check that the mesh stays tight and flat.
Once you’re sure everything looks good, add a small amount of material and observe how it moves across the mesh. Keep an eye out for these common issues:
- Particles getting stuck in the mesh holes (blinding)
- Worn or damaged mesh that reduces screening efficiency
- Loose bolts or lack of lubrication causing odd vibrations
If you spot any of these problems, shut down the machine and fix them right away. Don’t ignore small issues—they can turn into bigger headaches fast.
Pro Tip: Always monitor the first few runs closely. Early adjustments help you get the best performance and extend the life of your mesh.
When you finish these final checks and test runs, you can feel confident that your vibrating screen mesh is installed correctly and ready for work.
Importance of Correct Tensioning
Effects on Mesh Life and Performance
Tensioning is not just about pulling the mesh tight. It also affects how long your woven wire vibrating screen lasts and how well it works. When you tension the mesh the right way, stress spreads out across the whole panel. This helps the mesh handle tough jobs and keeps it from wearing out too fast. Micro-vibrations shake loose trapped particles, so your screen stays clean and works well.
Here’s what happens when you get tensioning right:
- You keep more than 95% of the open area for up to 8,000–10,000 hours.
- The mesh stays strong, even in tough places.
- You avoid dead spots where material builds up and causes early wear.
If you want your woven wire vibrating screen to last, pay attention to tensioning. It is not just about making the mesh tight—it is about making it work better.
Preventing Movement and Breakage
Loose mesh can cause big problems. If your woven wire vibrating screen is not tensioned evenly, it can move during use. This movement leads to breakage, especially when fluid flow shakes things up. The mesh rubs against the partition plate, which causes cracks. You can stop this by making the mesh more rigid. Try adding reinforcing ribs, making it thicker, and arranging holes and bridges in a smart way. Making the mesh the right way also helps.
When you tension the mesh correctly, you keep it from sagging or shifting. That means you avoid early wear and keep your woven wire vibrating screen working longer. You also lower the risk of fretting fatigue, which can break the mesh and stop your work.
Tips for Even Tension
Getting even tension across your woven wire vibrating screen is not hard, but you need to follow some easy steps. Here are some tips to help you:
- Start tensioning from the center and move outward.
- Use slow, steady force—do not yank or pull too hard.
- Check the mesh for firmness, not stiffness.
- Follow the manufacturer’s instructions for your mesh type.
- Check the mesh after the first few hours and adjust if needed.
Let’s look at some performance improvements you’ll see with proper tensioning:
| Performance Improvement | Description |
|---|---|
| Reduced early wire breakage | You lower the chance of wire breakage during use. |
| Stabilized separation performance | You get steady and reliable separation of materials. |
| Decreased unplanned shutdowns | You have fewer surprise equipment failures. |
Tip: Proper tensioning stops sagging and early wear, so you avoid dead spots and keep your woven wire vibrating screen running smoothly.
If you follow these tips, you will get the best results from your woven wire vibrating screen. You will see longer mesh life, better performance, and fewer problems.
Screen Mesh Replacement Mistakes to Avoid
Wrong Mesh Size or Hook Type
You might think any mesh will do, but choosing the wrong size or hook type can cause big problems during screen mesh replacement. Here’s what can go wrong if you don’t match the mesh and hooks to your machine:
- A mesh that’s too fine slows down your process. It blocks material and reduces how much you can screen at once.
- A mesh that’s too coarse lets unwanted material slip through. You lose control over the quality of your final product.
- The wrong hook type can make the mesh slip or sag. This leads to poor screening and can even damage your equipment.
Always double-check the mesh size and hook style before you replace the screen mesh. This small step saves you time, money, and headaches later.
Tip: Keep your machine’s manual handy. It usually lists the right mesh sizes and hook types for your model.
Skipping Cleaning or Inspection
You might want to rush the job, but skipping cleaning or inspection can cost you more in the long run. Take a look at what happens when you skip these steps:
| Risk Description | Impact |
|---|---|
| Increased wear and damage | Skipping cleaning can lead to unnoticed cracks or dents, which can worsen over time. |
| Operational inefficiencies | Clogged mesh from debris can slow down work processes. |
| Higher maintenance costs | Neglecting inspections may result in more frequent repairs and replacements. |
If you don’t clean and inspect, you might miss small problems that turn into big ones. Dirt and debris can hide cracks or weak spots. These issues can cause breakdowns when you least expect them.
Note: A quick inspection and cleaning before installation helps your mesh last longer and keeps your operation running smoothly.
Uneven or Insufficient Tension
Tension matters more than you might think. If you don’t tension the mesh evenly, you set yourself up for trouble. Here’s what can happen:
| Consequence | Description |
|---|---|
| Excessive mesh movement and flexing | Leads to increased mechanical stress on wires |
| Premature wire fatigue and breakage | Results from excessive flexing |
| Reduced separation accuracy | Affects the performance of the vibratory screen |
| Increased risk of material bypass | Compromises the effectiveness of the screen |
| Shortened service life | Overall durability of the mesh is reduced |
When you rush or skip proper tensioning, the mesh can move too much or flex in the wrong places. This weakens the wires and causes them to break early. You also lose accuracy in your screening, and materials can slip past the mesh. Always take your time to tension the mesh evenly across the whole frame.
Reminder: Check the tension after the first few hours of use. Mesh can settle and loosen, so a quick adjustment keeps everything working right.
Ignoring Safety Steps
You might feel tempted to skip safety steps when you replace the screen mesh, especially if you’re in a hurry. But ignoring these steps can put you and your team at risk. Safety is not just a checklist—it’s what keeps everyone safe and your equipment running well.
Let’s look at what can go wrong if you ignore safety steps during screen mesh replacement:
- You might forget to disconnect the power before starting. This can lead to electric shock or the machine starting up while you work.
- If you skip inspecting the screen deck, springs, or frame, you could miss signs of damage or wear. These problems can cause the machine to fail or even break apart during use.
- Leaving debris or dust in the area can make you slip or trip. A messy workspace also hides hazards and makes it hard to spot problems.
- If you don’t check that the foundation is level and strong, the machine might shake too much or even tip over. Removing transport supports is also important so the structure doesn’t get damaged.
- Springs need to be lined up right, and bolts must be tight. If you skip this, parts can come loose or break, leading to equipment failure.
Always follow every safety step, even if you think you know the process. One missed step can lead to injury or expensive repairs.
A safe installation protects you, your coworkers, and your equipment. Take a few extra minutes to double-check everything. You’ll save time and trouble in the long run.
Not Rechecking After Start-Up
You might think your job is done once you finish installing the mesh and start the machine. But if you don’t recheck after start-up, you could miss early signs of trouble. Machines can shift, bolts can loosen, and mesh can settle after the first few runs.
Here’s why you should always recheck after start-up:
- The mesh might loosen as it settles into place. If you don’t catch this, it can start to sag or even tear.
- Bolts and clamps can vibrate loose. A quick check helps you spot and tighten them before they cause bigger problems.
- You might notice odd noises, shaking, or leaks that weren’t there before. These are signs something needs fixing right away.
Make it a habit to watch the machine closely during the first few hours after you replace the screen mesh. Listen for anything unusual. Look for movement or material leaking out. If you spot a problem, stop the machine and fix it before it gets worse.
A careful recheck after start-up helps you catch small issues before they turn into big repairs. It also keeps your screening process smooth and safe.
By paying attention to these steps, you make sure your screen mesh replacement goes smoothly and your equipment stays in top shape.
Post-Installation Checks and Monitoring
Inspect Mesh and Fasteners
After you replace the screen mesh, you need to check everything again. Start by looking at the mesh and all fasteners. Make sure the woven wire vibrating screen sits flat and tight on the deck. Run your hand along the edges. You should not feel any loose spots or raised corners.
Check every clamp, bolt, and hook. Tighten anything that feels loose. If you see a worn or damaged fastener, swap it out right away. A missing or weak fastener can cause the mesh to shift or tear during operation.
Here’s a quick table to help you remember what to check and why:
| Maintenance Task | Importance |
|---|---|
| Periodic checks on wear and tear | Helps identify issues before they lead to failure. |
| Greasing moving parts | Reduces friction and heat buildup, prolonging equipment life. |
| Clearing accumulated material | Prevents blockages that can affect performance. |
| Immediate replacement of damaged parts | Ensures optimal performance and prevents further deterioration. |
You want your vibrating screen machine to run smoothly. Regular checks help you catch problems early and keep your equipment in top shape.
Safe Start-Up Procedures
Now you are ready to start the vibrating screen machine. Safety comes first. Stand clear of moving parts. Make sure everyone else is clear too. Turn on the power and let the machine run empty for a few minutes.
Listen for strange noises. Watch for shaking or rattling. If you notice anything odd, stop the machine and check the mesh and fasteners again. You want to fix small issues before they turn into big problems.
Here’s a simple checklist for a safe start-up:
- Confirm all guards and covers are in place.
- Make sure the mesh is tensioned and secure.
- Check that all bolts and clamps are tight.
- Remove any tools or debris from the area.
- Start the machine and observe for a few minutes.
Tip: Never load material until you know the woven wire vibrating screen is working right.
Monitor for Leaks and Vibration
Once your machine is running, keep an eye on it. Look for leaks around the edges. If you see material escaping, check the side seals and mesh alignment. Small leaks can lead to big messes and lost product.
Pay attention to vibration. The vibrating screen machine should run steady. If you feel extra shaking or hear new noises, something might be wrong. Check for loose bolts, worn springs, or mesh movement.
You can use these steps to monitor your machine:
- Track screening efficiency to see how well the mesh separates material.
- Watch for changes in vibration or noise.
- Review product quality for signs that you need to adjust or replace the mesh.
- Try new setups if you notice blockages or poor flow.
Regular maintenance keeps your woven wire vibrating screen working longer. Weekly checks help you spot wear early. If you stay alert, you can avoid unplanned downtime and keep your screening process smooth.
Schedule Routine Checks
You want your vibrating screen mesh to last as long as possible, right? Setting up a routine check schedule helps you catch problems early and keeps your equipment running smoothly. Don’t wait for something to break before you look at your screen. Make these checks a regular part of your workweek.
Here’s how you can build a simple routine:
- Pick a day each week for your main inspection. Stick to the same day so you don’t forget.
- Write down what you need to check. Use a checklist and keep it near your machine.
- Train your team to spot early signs of trouble. Everyone should know what to look for.
What should you check during your routine? Here are some smart practices:
- Watch for changes in vibration. If your screen starts to shake differently, it could mean the mesh is wearing out or something is loose.
- Listen for new noises. Squeaks, rattles, or grinding sounds can warn you about problems.
- Use vibration monitoring tools if you have them. These tools help you spot changes in gear mesh conditions before they get serious.
- Check the oil if your machine uses it. Look for dirty oil or metal particles. Oil condition monitoring can tell you if parts are wearing down inside.
- Try using accelerometers. These small devices measure how much your machine shakes. They can help you find problems with gear loading or spot failures early.
Tip: Keep a logbook for your checks. Write down what you find each time. This helps you see patterns and plan repairs before things get worse.
You should also look at the mesh for holes, tears, or sagging. Check all fasteners and clamps to make sure they stay tight. Clean away any material that builds up on the mesh or around the frame. Good maintenance keeps your screen working better and helps you avoid costly downtime.
If you make routine checks a habit, you’ll catch small issues before they turn into big repairs. Your vibrating screen mesh will last longer, and your whole operation will run smoother.
Conclusion
You now know the main steps for installing vibrating screen mesh. Always turn off and lock the equipment before you begin. Use the correct tools for the job. Check each part carefully before starting. Here are some important things to remember:
- Always follow safety rules.
- Make sure the mesh is tight everywhere.
- Look over your work when you finish.
- Keep up with regular maintenance.
For the best results, follow the instructions from your manufacturer and watch how your screen works. If you need help or want good mesh, contact us—we make vibrating screen mesh.
FAQ
How often should I check the tension of my vibrating screen mesh?
You should check the tension after the first few hours of use. After that, check it weekly. Regular checks help you spot problems early and keep your mesh working well.
What tools do I need for mesh installation?
You need basic hand tools like wrenches, screwdrivers, and pliers. You may also need a tensioning tool, gloves, and safety glasses. Always keep your tools close for a smooth job.
Can I reuse old mesh clamps or fasteners?
You can reuse them if they look strong and undamaged. If you see rust, cracks, or wear, replace them. Good fasteners keep your mesh secure and safe.
Why does my mesh keep coming loose?
Loose mesh often means uneven tension or worn fasteners. Check the tension and tighten all bolts. Replace any weak parts. A tight mesh works better and lasts longer.
How do I know if I picked the right mesh size?
Check your machine’s manual or ask your supplier. The right mesh size matches your material and screening needs. If you see too much material passing through, try a finer mesh.
What should I do if the mesh clogs quickly?
Try cleaning the mesh more often. You can also use a larger mesh size or add anti-blinding devices. Keeping the mesh clean helps your screen work better.
Where can I get quality vibrating screen mesh?
You can contact us! We make and supply vibrating screen mesh. We help you choose the right type and size for your job. Just reach out for advice or a quote.